Video walkthrough coming soon
The written steps below cover everything in the meantime.
About 5 min to follow along
When you’re done
- A signup popup on your website
- A clean list of people who confirmed they want your news
- A CSV file ready for Mailchimp or any email tool
- 1
Open Subscribers
In the left menu, click “Subscribers” (1) — the envelope-with-plus icon under Communication.
The four boxes at the top count your list: “Subscribed” (confirmed by email), “Awaiting confirmation” (haven’t clicked the link yet), “Text opt-ins” (agreed to marketing texts) and “New in 30 days”.
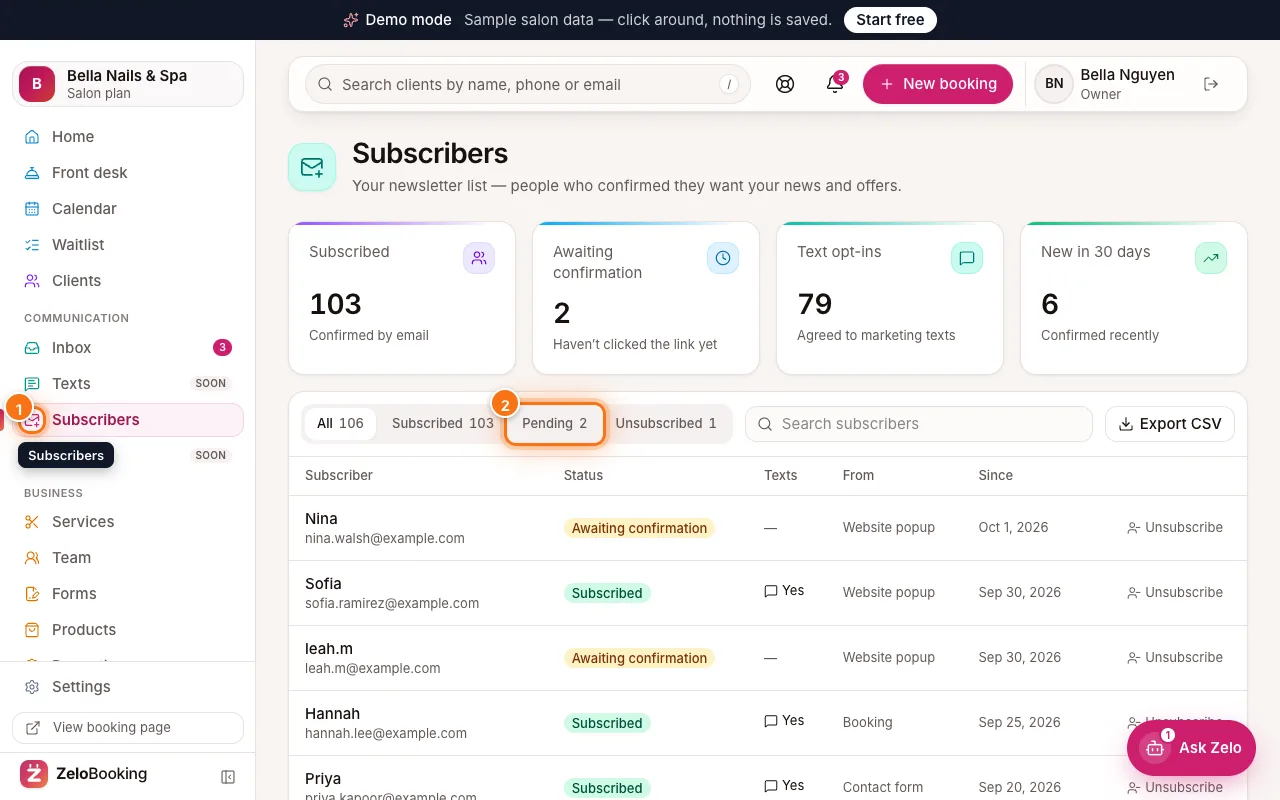
Subscribers with the Subscribers icon in the left menu (1) and the Pending filter (2) highlighted - 2
Understand double opt-in
When someone signs up, we email them a confirmation link. Until they click it, they show as “Awaiting confirmation” — click the “Pending” filter (2) to see them. Once they click, they become “Subscribed”.
Only subscribed people count as your newsletter list. This keeps fake or mistyped addresses out and is what spam laws expect.
The “From” column shows where each person signed up: Website popup, Website signup form, Contact form, Booking, Added by you or Import.
Tip: The confirmation link works for 7 days. If someone signs up again later, they get a fresh link.
- 3
Export your list
Click “Export CSV” (1) at the top right of the list (owners and admins). For your security you may be asked to confirm it’s you first — with your sign-in code or password. A spreadsheet file downloads with everyone who is subscribed: email, first name, phone, whether they agreed to texts, where they signed up and when they confirmed.
Keep it safe — it’s a list of people’s contact details. To email your subscribers, use the “Newsletters” tab: it sends from ZeloBooking with your address and an unsubscribe link in every email.
Tip: People awaiting confirmation or unsubscribed are never in the export — so you only ever email people who said yes.
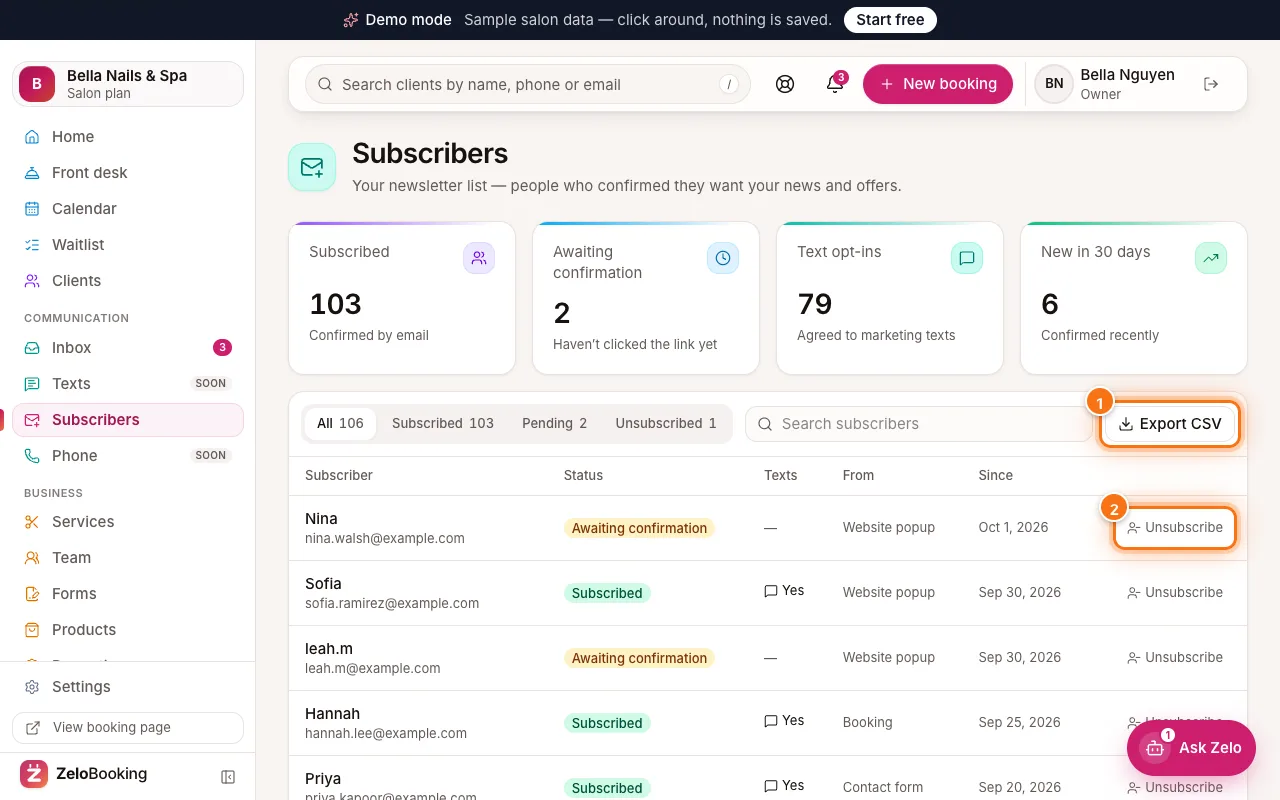
Subscribers list with the Export CSV button (1) and a row’s Unsubscribe button (2) highlighted - 4
Unsubscribe someone
Every email they get from you has an unsubscribe link, and it works straight away. If someone asks you directly, click “Unsubscribe” (2) on their row, then “Unsubscribe” again to confirm (or “Cancel”). They move to the “Unsubscribed” filter and drop out of your exports.
- 5
Turn on the signup popup
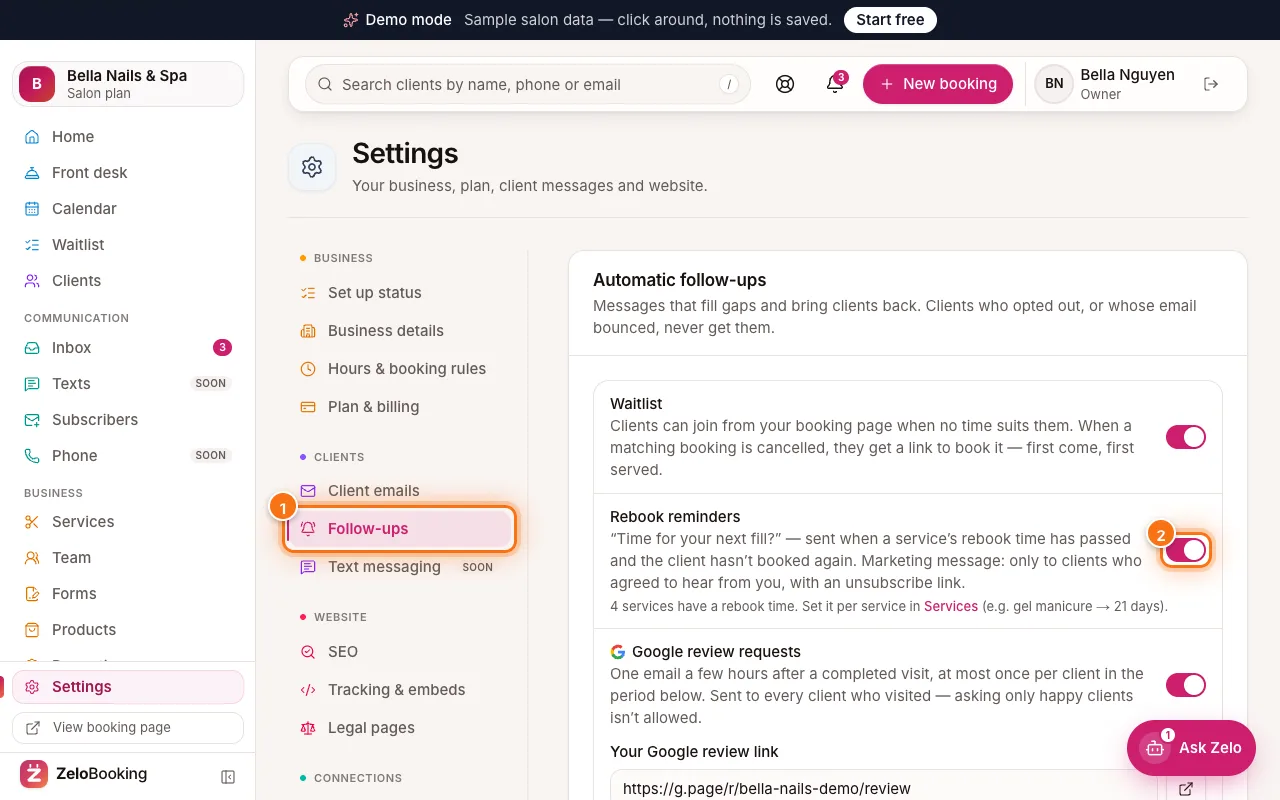
Scroll down to “Signup popup” (owners and admins). Switch on “Show the popup on my website” (1), then edit the “Heading”, “Text”, an optional “Offer badge” (e.g. 10% off your first visit) and the “Button text”. Switch on “Ask for a first name” if you want it (“Offer text messages too” shows “Coming soon” until texting clients is switched on).
Under “Show it” (2) choose when it appears: “After a delay”, “When they scroll” or “When leaving (desktop)”. Under “After “No thanks”” choose how long it stays hidden for that visitor. The preview on the right updates as you type.
Click “Save popup” (3). It appears on your site after you publish your website.
Tip: The popup waits for the cookie banner and never shows on booking pages, so it won’t get in the way of a booking.
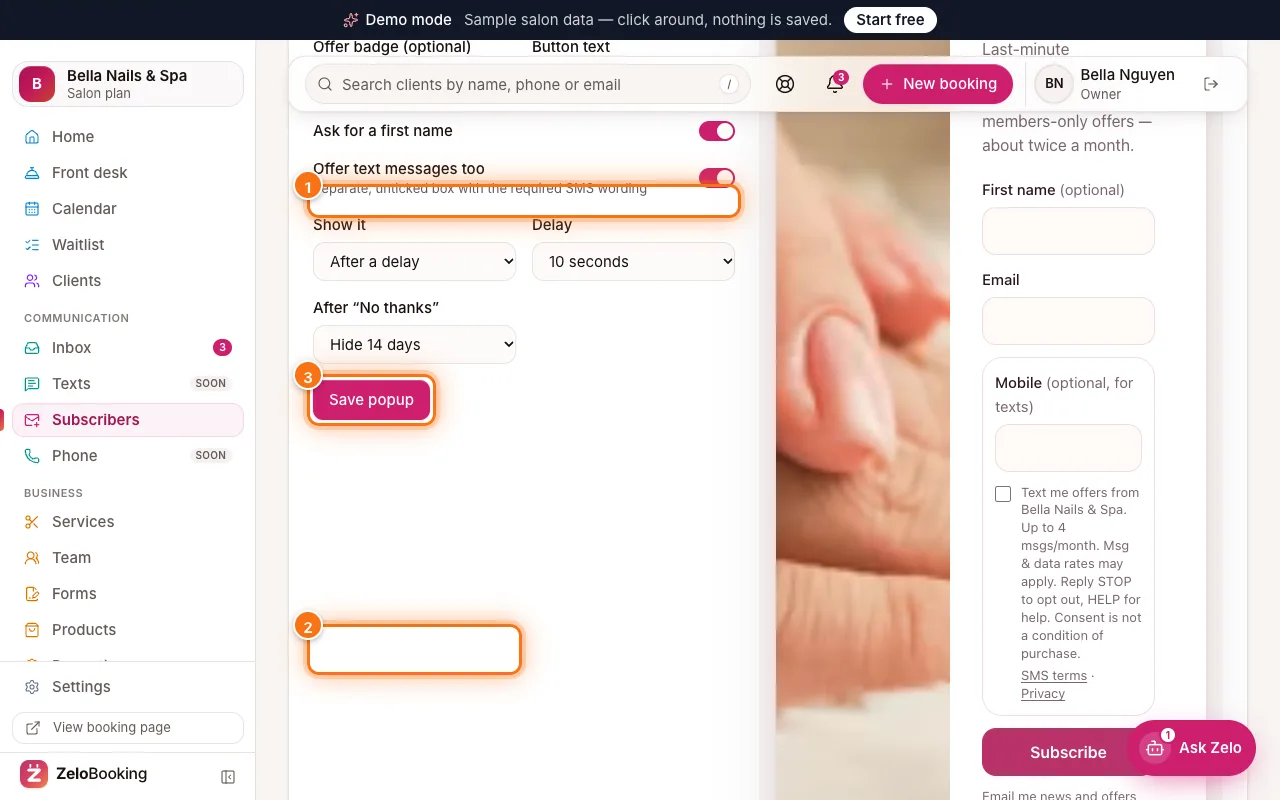
Signup popup settings: the Show the popup on my website switch (1), Show it (2) and Save popup (3) highlighted