Video walkthrough coming soon
The written steps below cover everything in the meantime.
About 6 min to follow along
When you’re done
- You know where every tool in the editor is
- You can move between pages and add a new one
- You know when changes are saved and when they go live
- 1
Open the editor
Go to the left menu → Website. This page shows your live site, your pages and your booking link. Click “Edit website” (1) at the top right.
Tip: The editor works best on a computer or tablet. On a phone it has a bottom bar with the same tools.
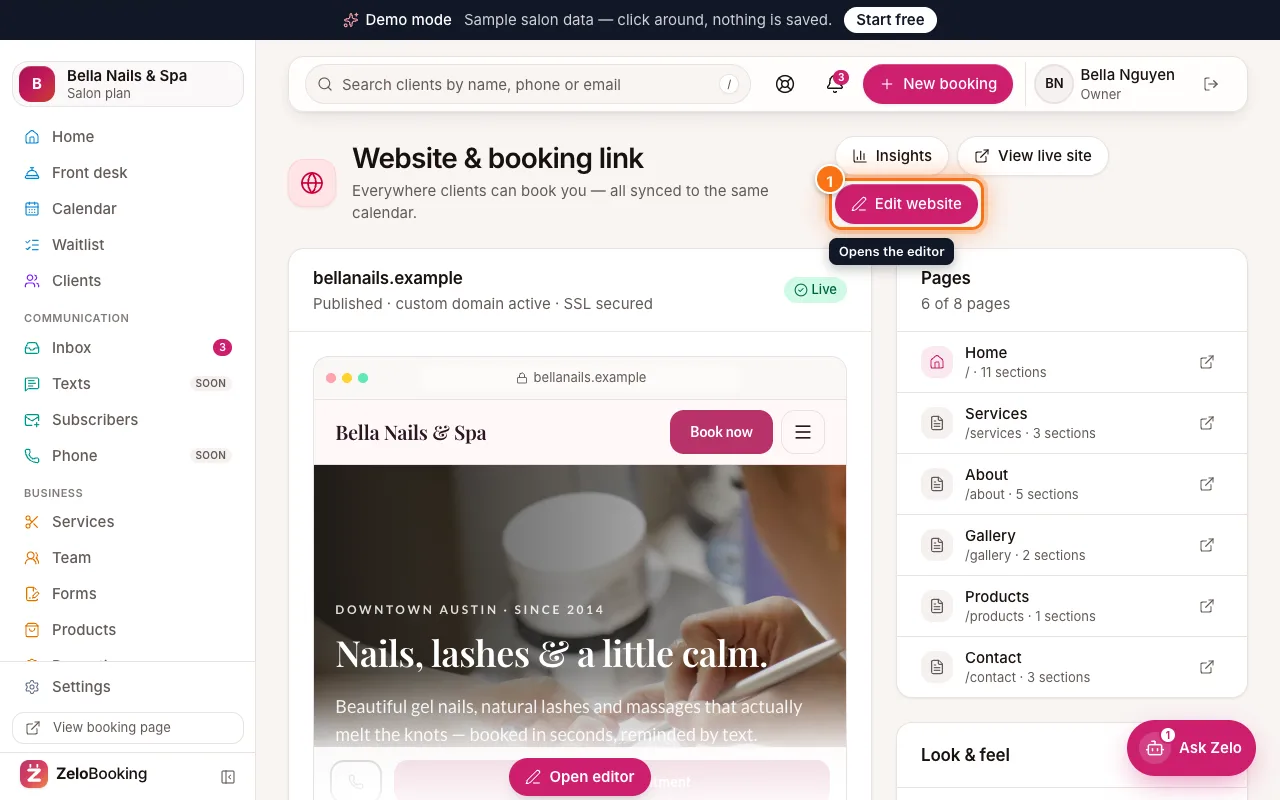
Website page with the Edit website button highlighted (1) - 2
Learn the three areas
The editor has three parts:
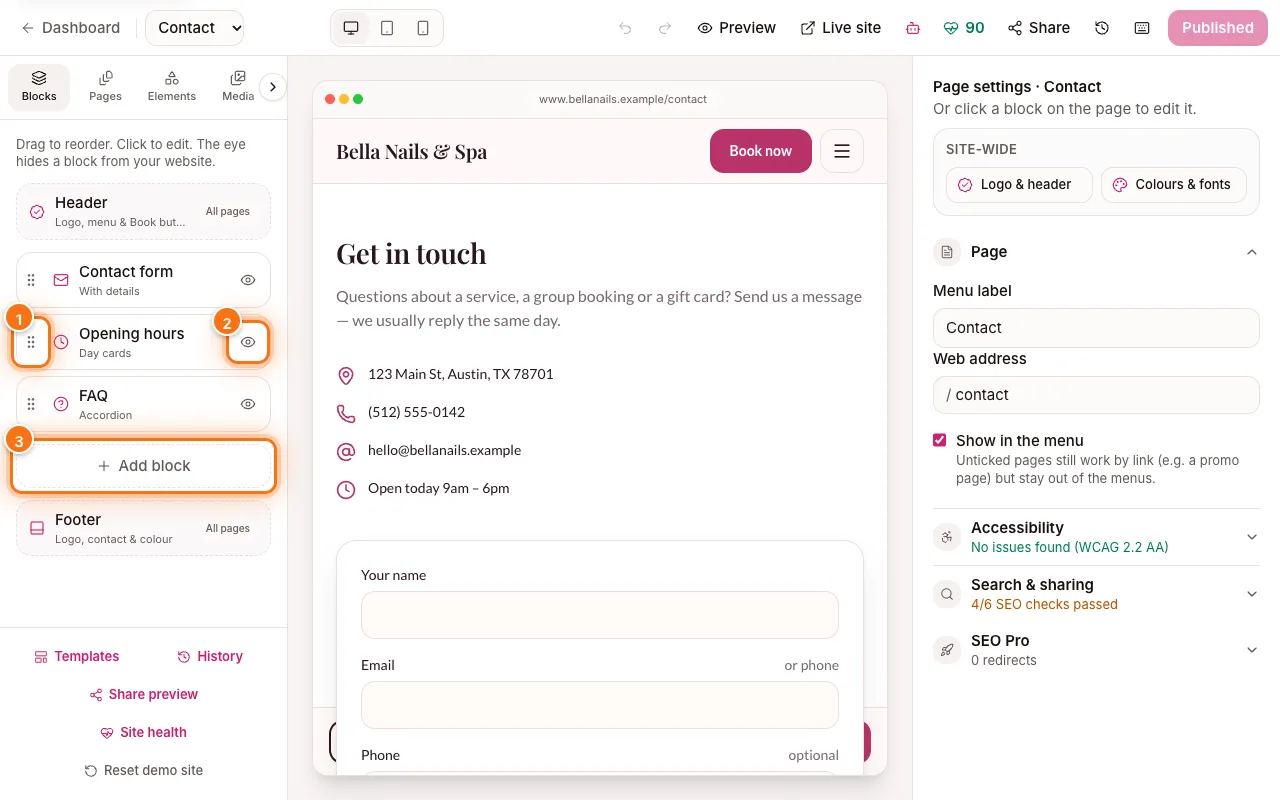
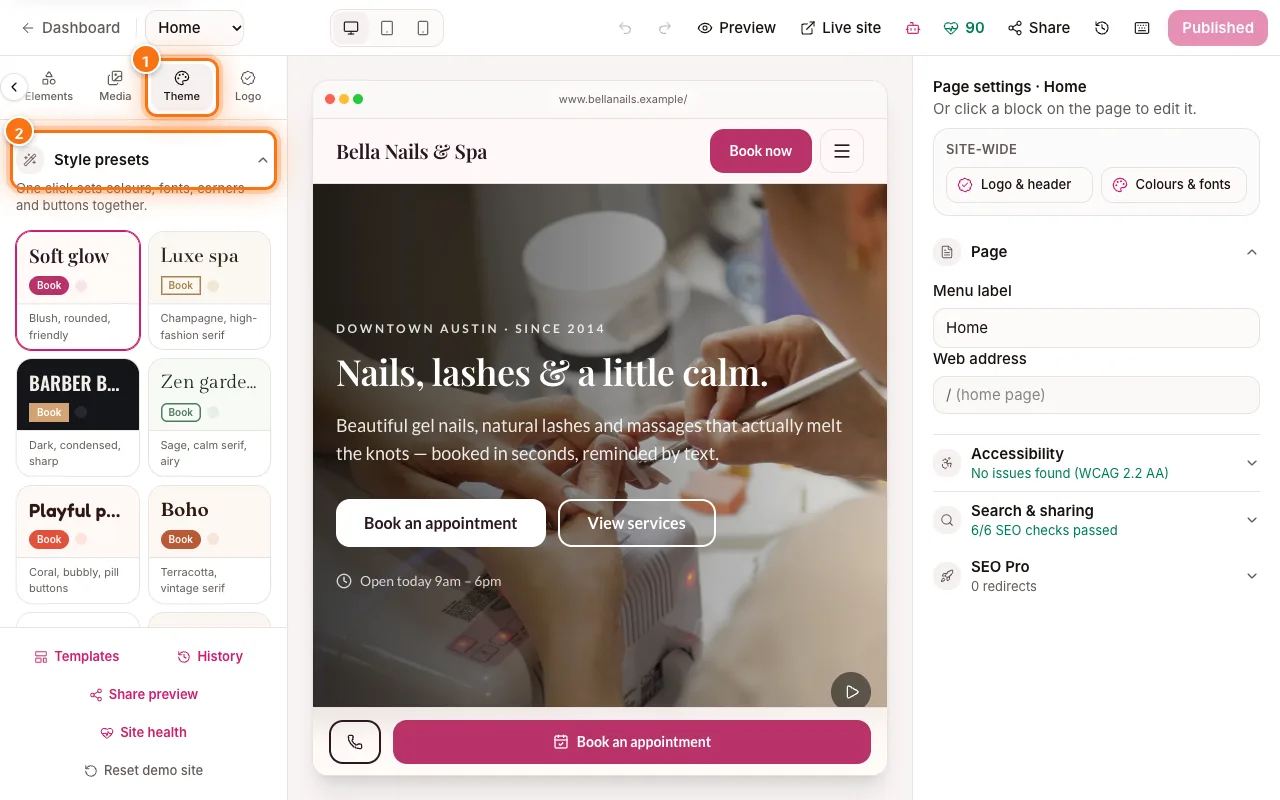
- Left panel (1): tabs for Blocks (the sections of this page), Pages, Elements, Media, Theme and Logo. If you can’t see Theme or Logo, click the small arrow at the end of the tabs.
- Middle (2): your page, exactly as visitors will see it. Click anything on it to edit it.
- Right panel (3): settings for what you clicked. With nothing selected it shows “Page settings” for the page you’re on.
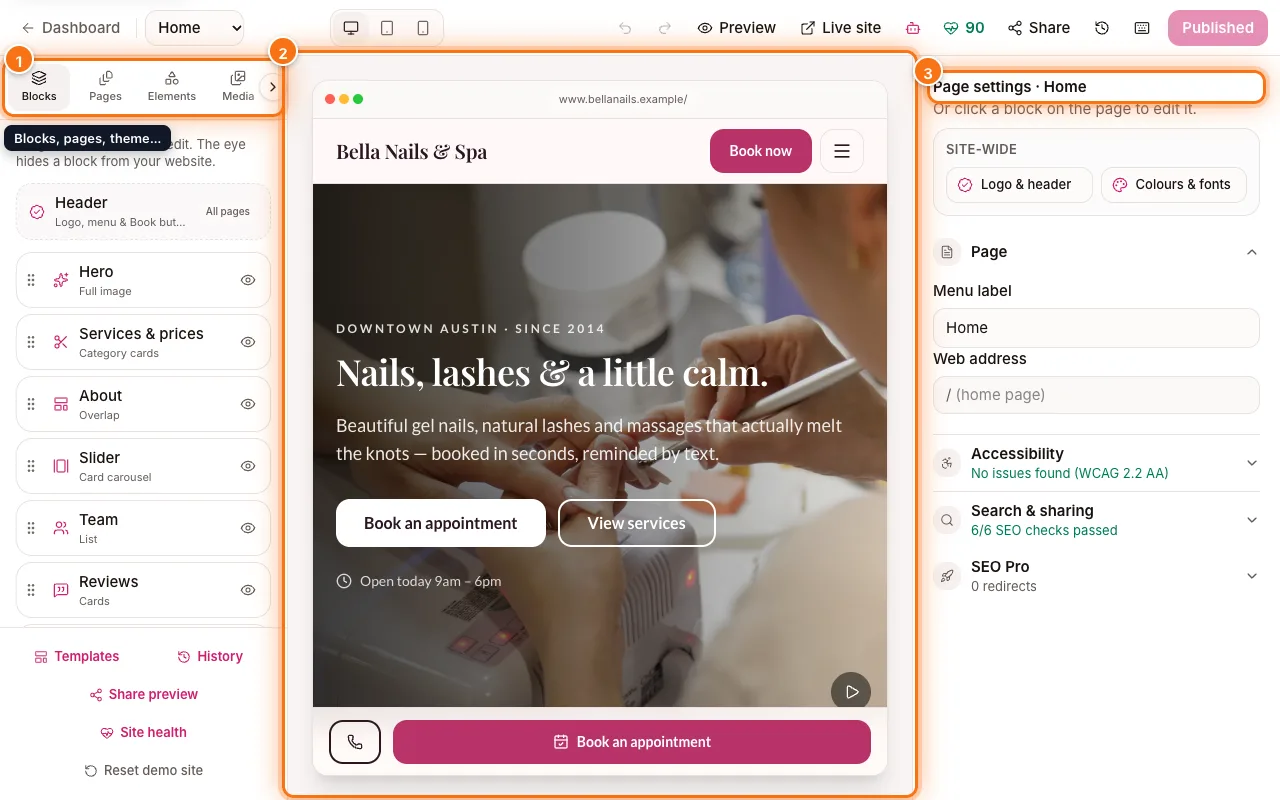
The website editor: panel tabs (1), the page in the middle (2) and Page settings on the right (3) highlighted - 3
Switch pages or add one
Use the page menu at the top left (1) to jump to another page. To manage pages, click the “Pages” tab (2): move a page up or down in the menu, hide it from the menu, duplicate it or delete it.
To add a page, type a name under “New page” (3) — for example “Gift cards” — and click “Add”.
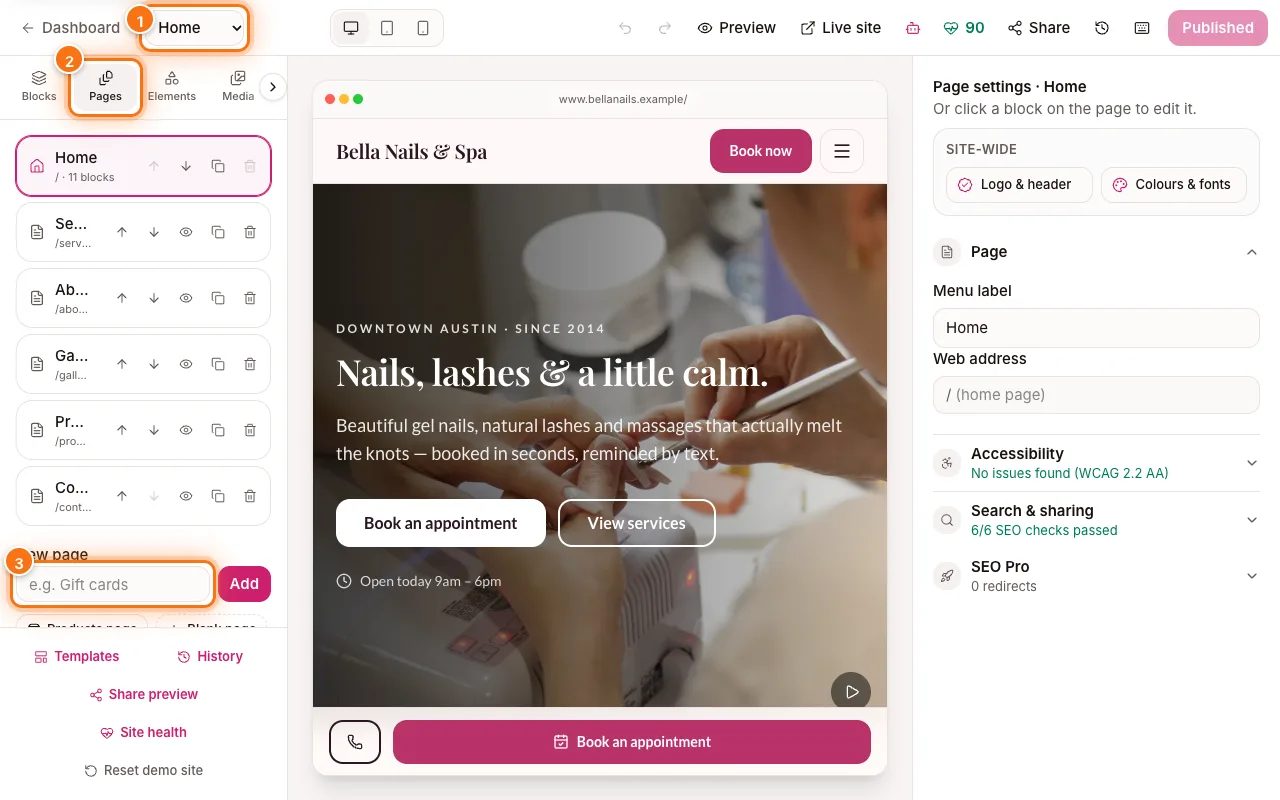
Editor Pages tab with the page menu (1), the Pages tab (2) and the New page name box (3) highlighted - 4
Edit text and photos
Double-click any text on the page and type. Press Enter to keep it, or Esc to cancel. Click a photo to change it from your uploads or free stock photos.
Your services, prices, team and opening hours come from your dashboard. Change them there (Services, Team, Settings) and the website updates by itself.
- 5
Undo, preview and publish
Everything you do saves as a draft by itself. At the top right:
- Undo (1) and redo — go back a step any time.
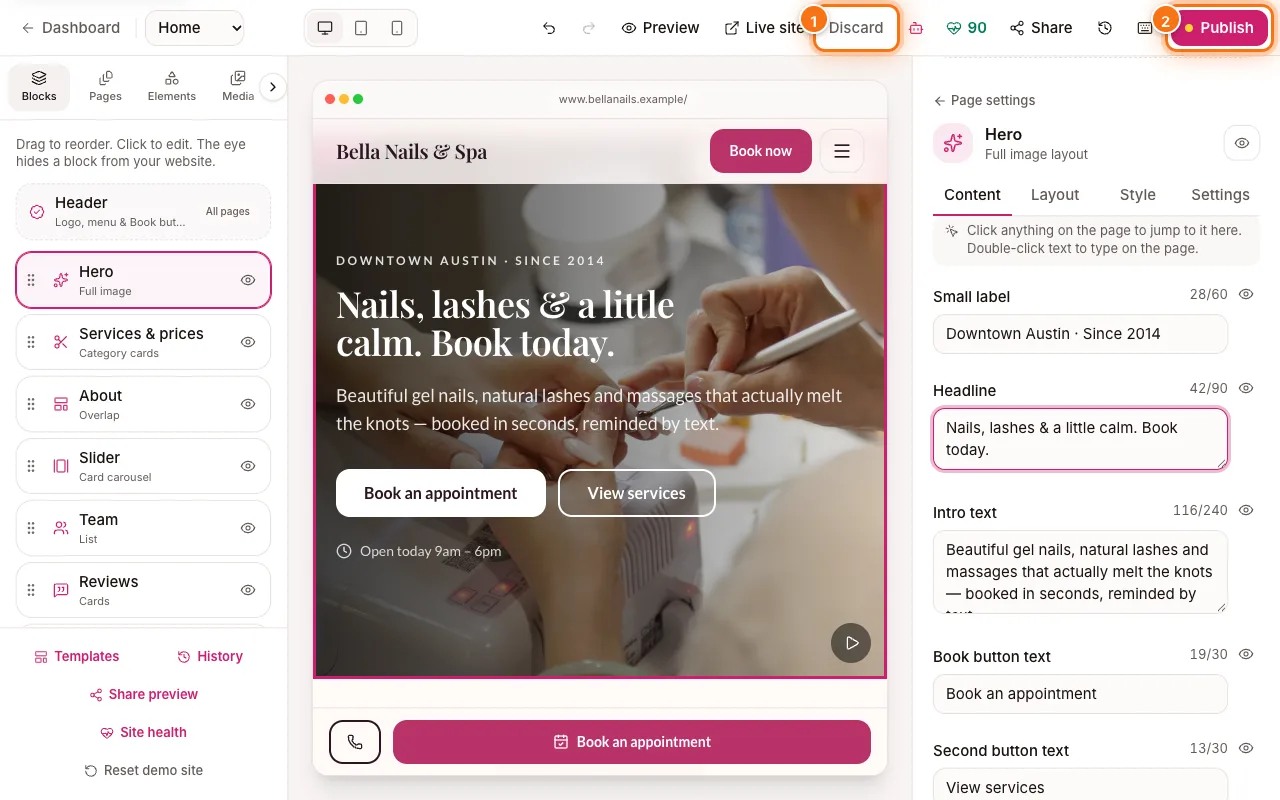
- “Preview” (2) — hides the editing tools so you see the page as a visitor would.
- “Publish” (3) — puts your changes live. It shows “Published” when there’s nothing new to publish, and turns on as soon as you change something.
Tip: Next: learn to work with sections in “Add and arrange sections”, and your colours and logo in “Theme, fonts and logo”.
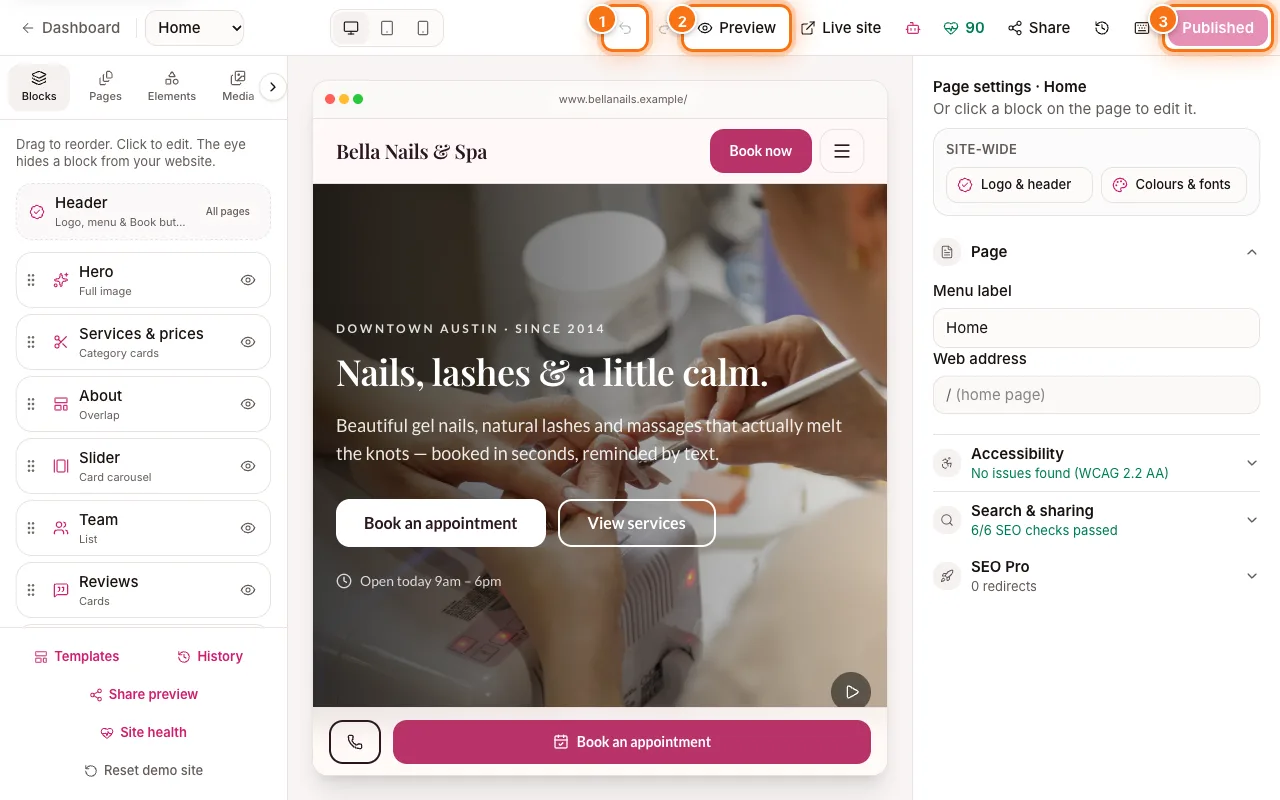
Editor top bar with Undo (1), Preview (2) and Publish (3) highlighted