Video walkthrough coming soon
The written steps below cover everything in the meantime.
About 8 min to follow along
When you’re done
- Each person with their own calendar column and colour
- Working hours that online booking respects
- Team members signed in with the right access
- 1
Open Team
In the left menu, click “Team” under Business. Each card shows a person’s title, email, phone, weekly working hours and services. “Has a login” means they can sign in. The line at the top shows how many staff calendars your plan includes (for example “4 of 10 staff calendars used on the Salon plan”).
Click “Add staff member” (1) to add someone, or “Edit” (2) on a card to change them. “Preview staff view” (3) shows the staff app exactly as your team sees it.
Tip: Free includes 1 staff calendar, Starter 2, Salon 10 and Pro unlimited.
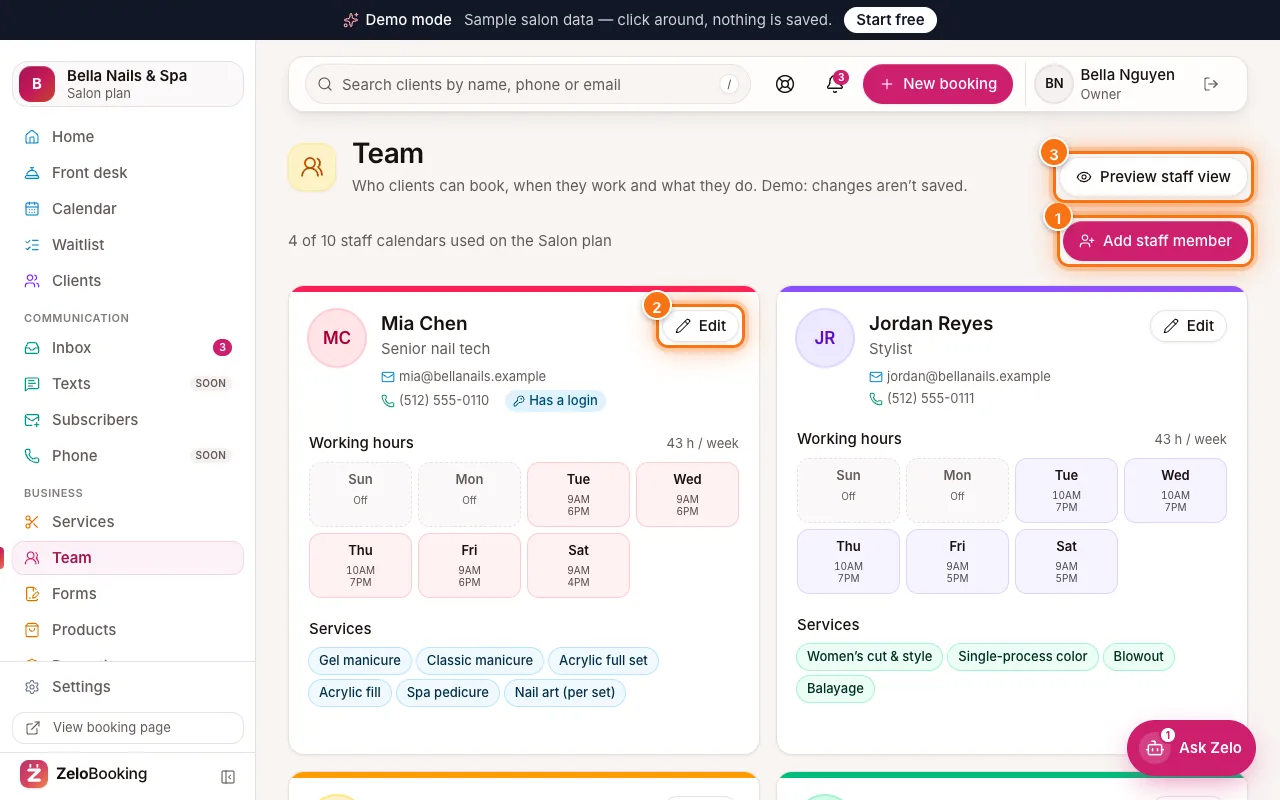
Team page with Add staff member (1), Edit on a card (2) and Preview staff view (3) highlighted - 2
Add their photo and details
In the panel, click the round + button on the picture (1) and choose “Upload from device” or “Choose from your photos”. Fill in “Name”, “Title” (2) (for example “Senior stylist”), “Email” and “Phone”.
Leave “Takes bookings” (3) on if clients can book them. Turn it off to keep someone on the team without taking bookings — for example during leave.
Tip: Clients see this photo on your booking page and website. Fill in “Photo description (for Google and screen readers)” too.
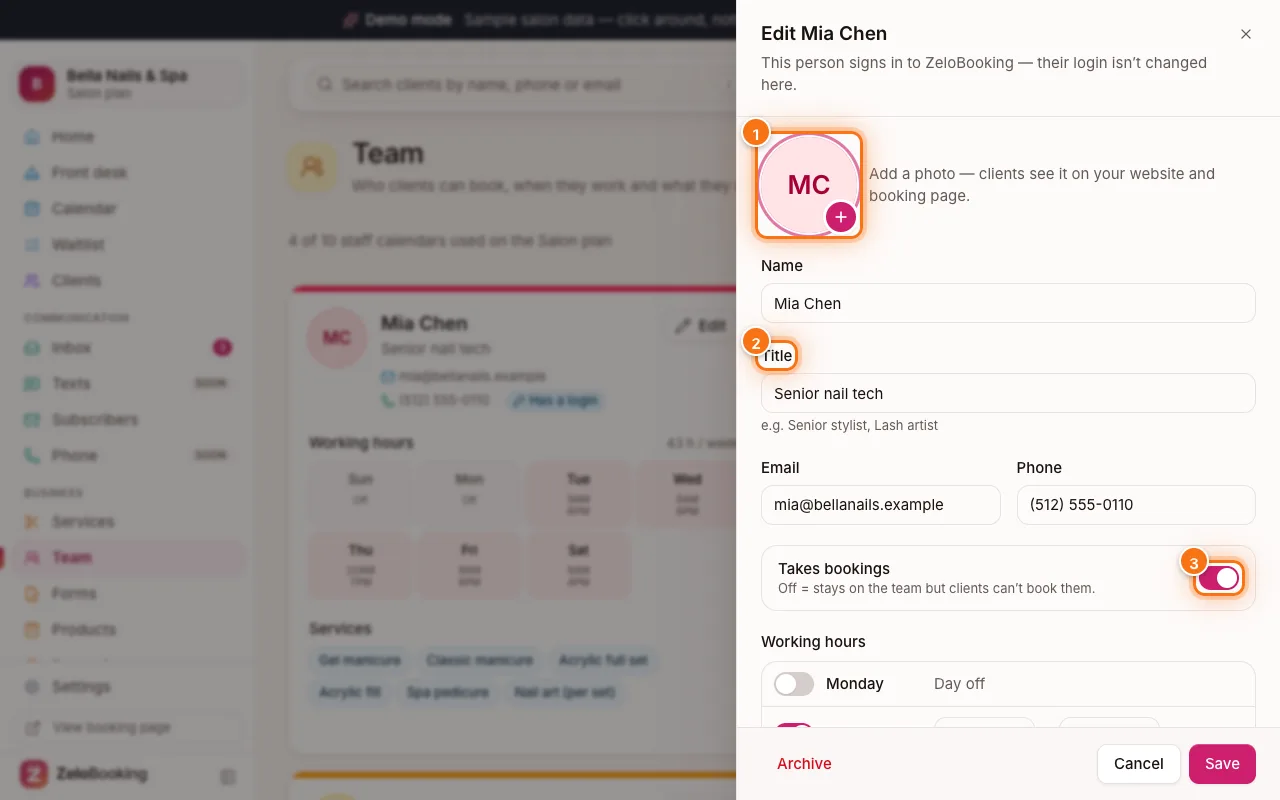
Edit team member panel with the photo button (1), Title (2) and Takes bookings (3) highlighted - 3
Set working hours
Under “Working hours”, use the switch on each day — off (1) means “Day off”, on (2) means they work. Pick the start (3) and end time for each working day (15-minute steps, one time range per day).
Online booking only offers times when the business is open and this person is working.
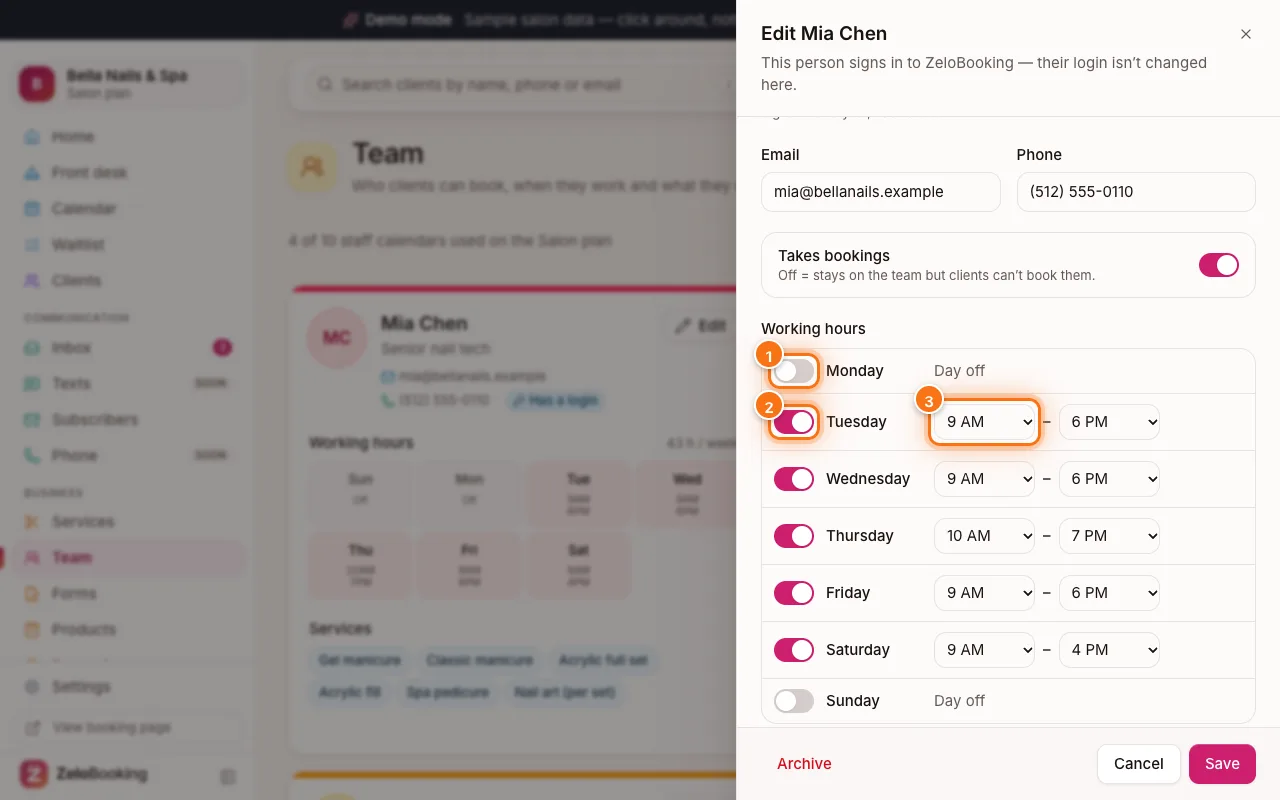
Working hours in the team member panel: a day off (1), a working day (2) and its start time (3) - 4
Tick their services and save
Under “Services they do”, tick each service this person performs (1). This keeps “Anyone available” and booking with a specific person accurate.
Click “Save” (2) at the bottom right.
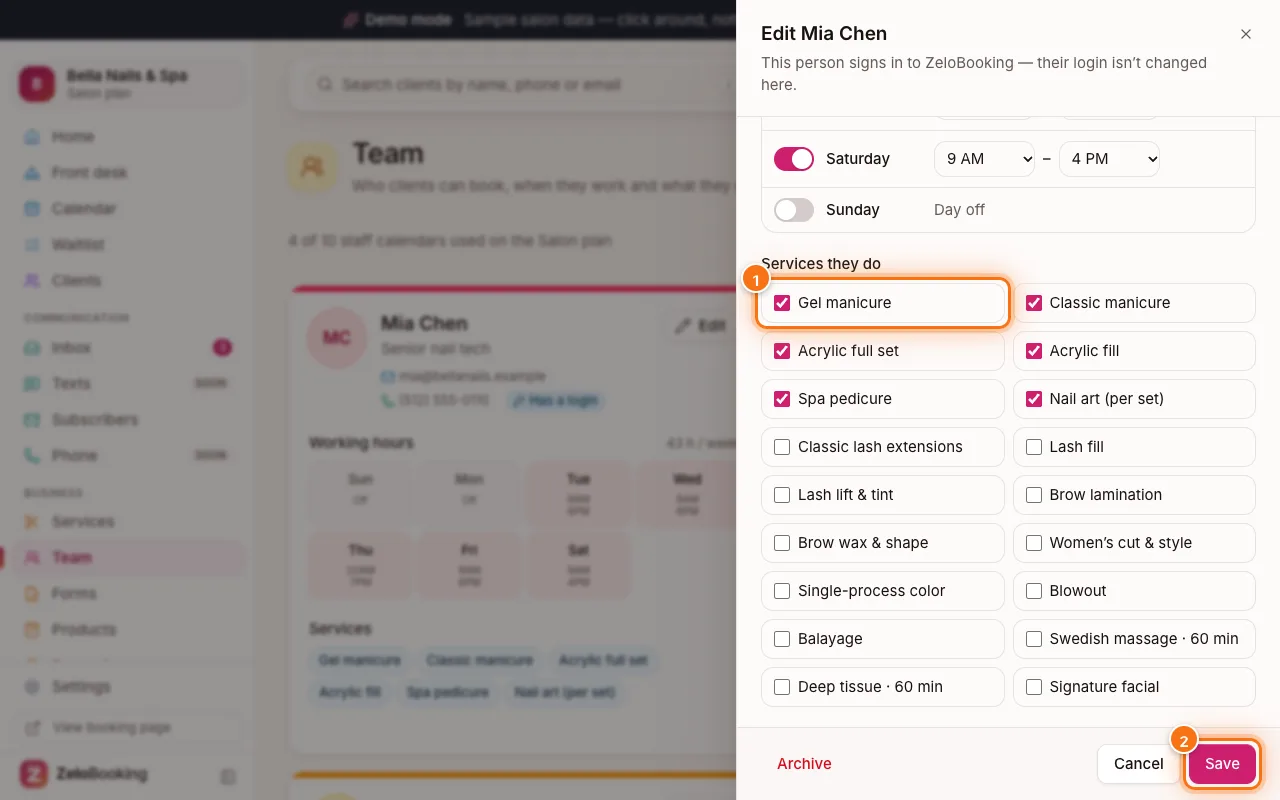
Services they do with a ticked service (1) and Save (2) highlighted - 5
Invite them to sign in
In your own dashboard, scroll below the team cards to “Team access”. Type their email in “Invite by email” and choose a “Role”:
- “Staff — own schedule” — sees only their own bookings and clients
- “Front desk — all bookings” — runs the front desk, calendar, walk-ins and clients
- “Admin — everything except plan & ownership” — only the owner can invite an admin
Choose their “Staff profile” so their appointments show in their dashboard (a profile with the same email is picked for you), then click “Send invite”. The link works once and expires in 7 days — the date shows on their row. If the email can’t be sent, click “Copy link” and send it yourself.
Tip: To change someone’s role or which staff profile is theirs, click “Edit access” on their row (“Create a new profile…” makes one for them). To take away someone’s login, click “Remove” (only the owner can remove an admin). Invite lost or “Expired”? Click “Send again” for a new link. To stop a pending invite, click “Cancel invite”.
- 6
Preview what staff see
Click “Preview staff view” at the top of Team. You’ll see the staff app as your team does: Today, My schedule, My clients, Hours & time off and Profile.
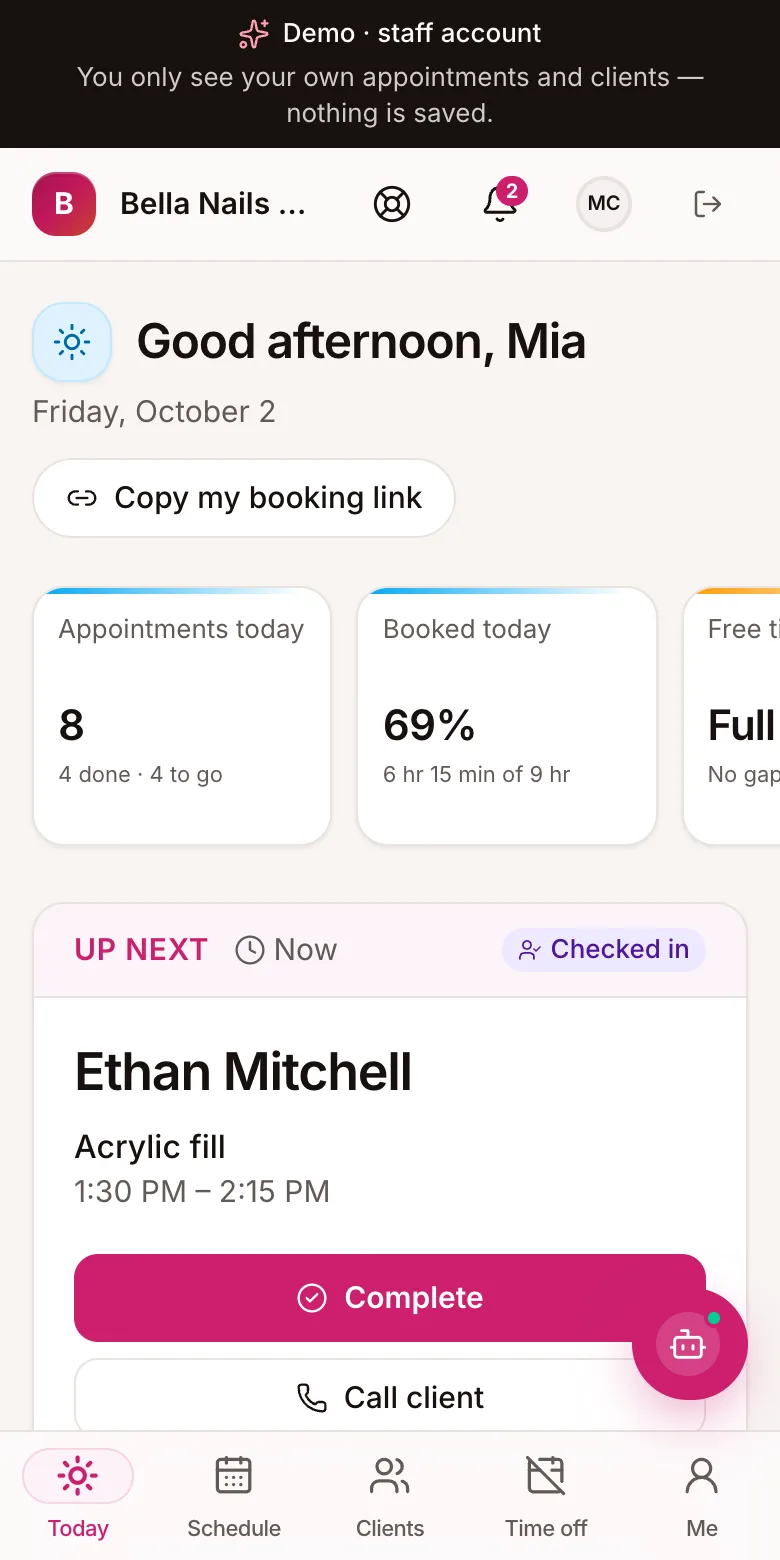
The staff app on a phone: today, up next, check in and needs attention