Video walkthrough coming soon
The written steps below cover everything in the meantime.
About 7 min to follow along
When you’re done
- One service with several options, each with its own price and time
- Add-ons like nail art or a gloss that clients can tick while booking
- Processing time that lets the same person take another client in the gap
- 1
Spot services with options and add-ons
Open Services. Small badges under a service name show what it has:
- “2 options” (1) — the client picks one, such as Short or Long
- “1 add-on” (2) — extras the client can add
- “50 min processing” — a gap in the middle of the service
Services with options show a “from” price — the lowest option.
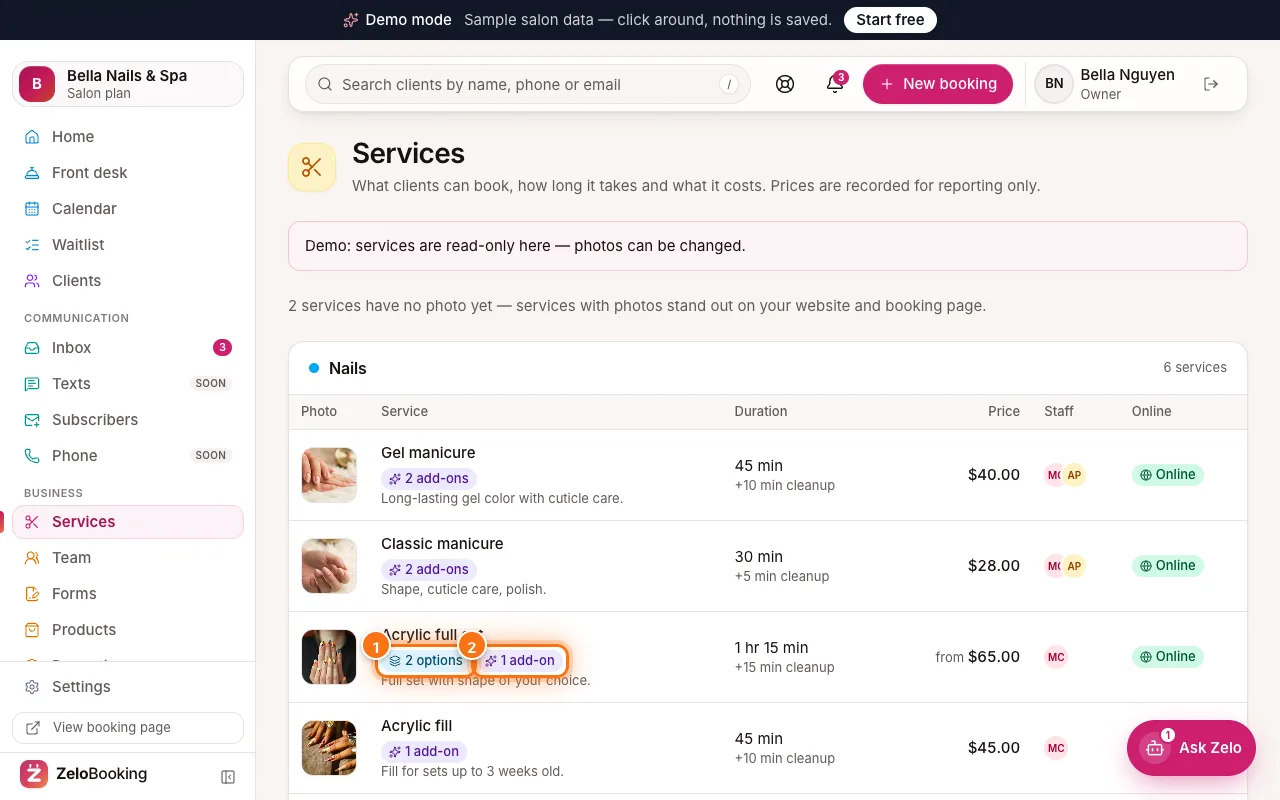
Acrylic full set with its 2 options (1) and 1 add-on (2) badges highlighted - 2
Add options with their own price and time
Click “Edit” on a service (or “Add service”). Find “Options & prices” and click “Add options”. Two rows appear. For each one, fill in “Option 1 name” (for example “Short hair”), “Price ($)” and “Minutes”. Click “Add option” for more (up to 12), or the bin icon to remove one.
Once a service has options, its own “Duration” and “Price” boxes are greyed out (“Set by each option below”). Click “Save”.
Tip: Clients must choose one option while booking. Your menu and website show “from” the cheapest price.
- 3
Add processing time
In the same panel, switch on “Processing time”. Fill in:
- “Active first (minutes)” — the hands-on part before the gap (for example 25 minutes applying colour)
- “Processing — person free (minutes)” — how long it develops while the stylist is free
The line below adds it up, for example “25 min active → 50 min free → 15 min finishing = 1 hr 30 min”. Click “Save”. The service now shows a processing badge (1).
Tip: Online booking can fit short services (like a blow-dry) into that free gap — the calendar shows it hatched as “Processing · free”.
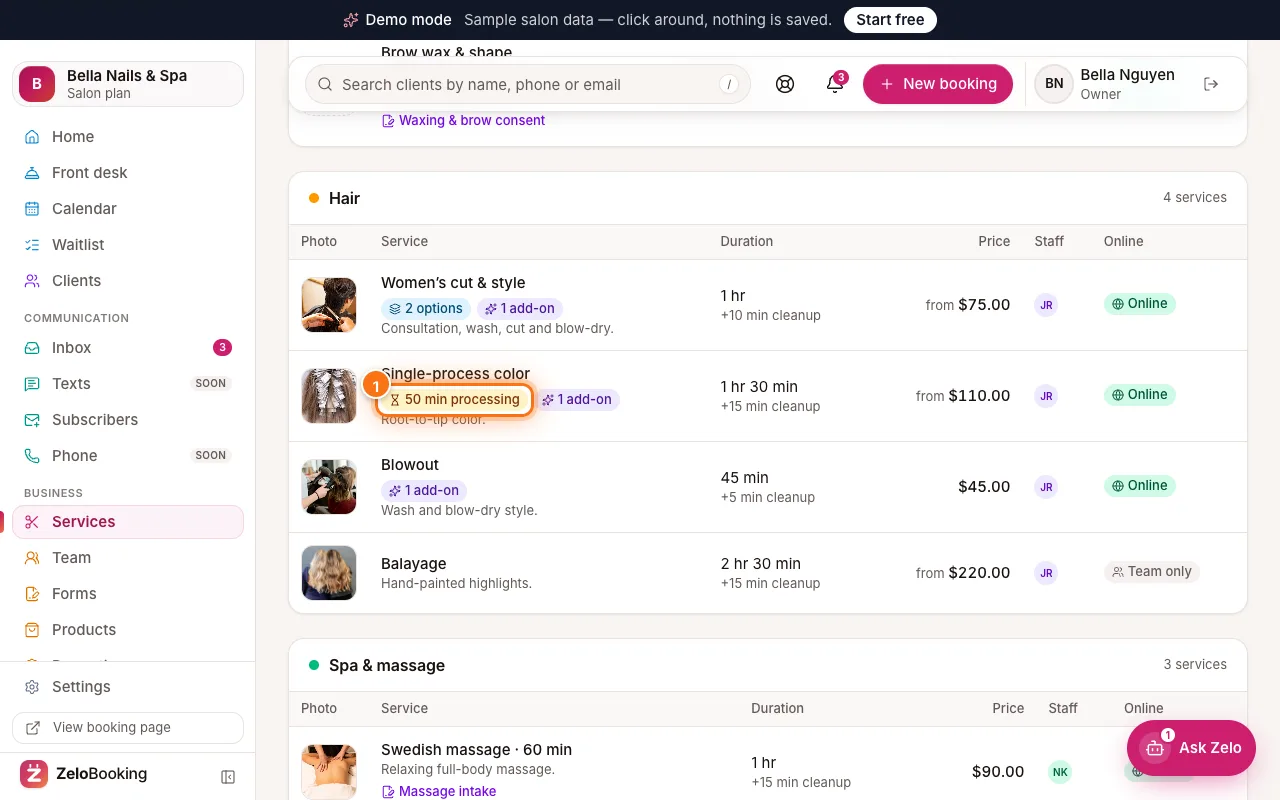
Single-process color with its 50 min processing badge (1) highlighted - 4
Create an add-on
Scroll to the “Add-ons” panel at the bottom of Services. It lists every extra with its price, extra time, “Online” or “Team only”, and the services it goes with. Click “Add add-on” (1), or “Edit” (2) to change one.
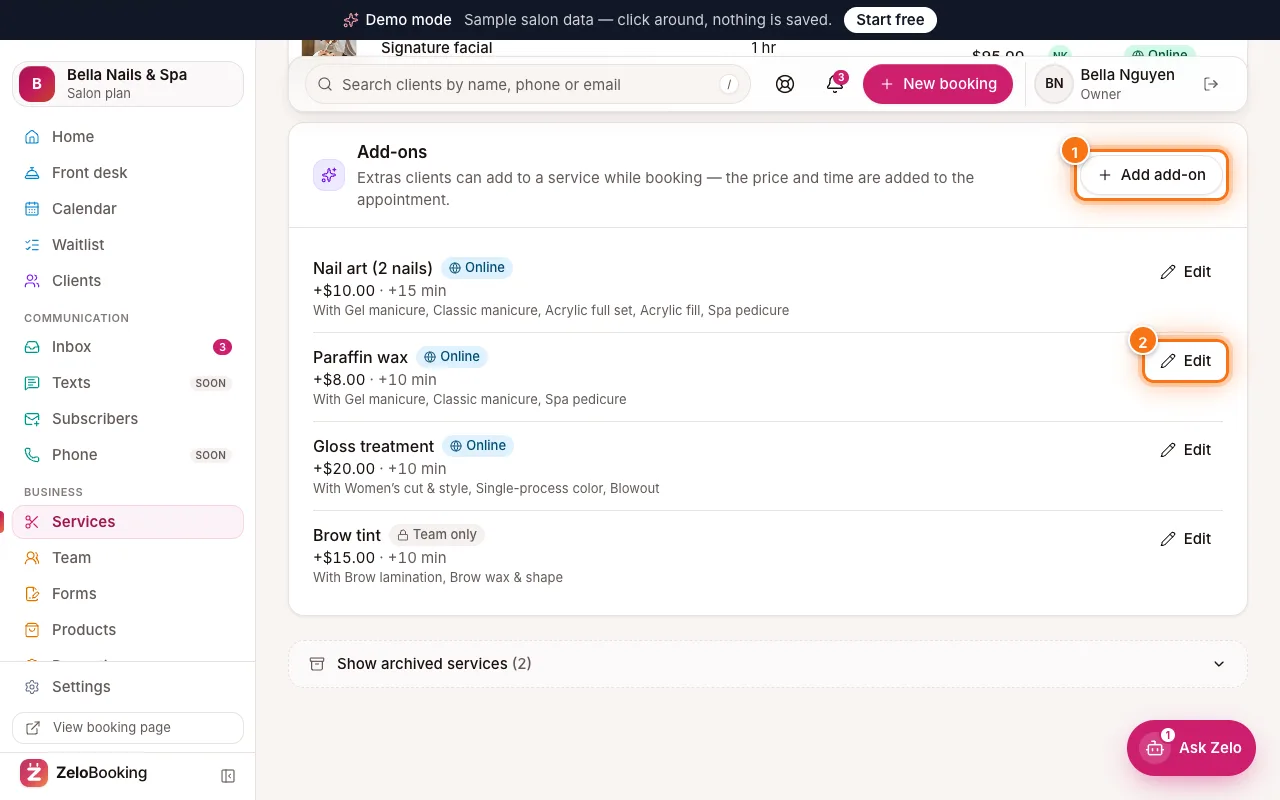
Add-ons panel with Add add-on (1) and an Edit button (2) highlighted - 5
Fill in the add-on
In “Add an add-on”, type a “Name” (1) such as “Nail art”, an optional “Description”, the “Price ($)” (2) and the “Extra minutes” (3) it adds to the appointment (0–240).
Leave “Bookable online” on so clients can tick it; turn it off for extras only your team should add. Under “Offer it with”, tick the services it belongs to. Click “Save”.
Tip: To stop offering an add-on, open it and click “Archive add-on”. Past bookings keep it.
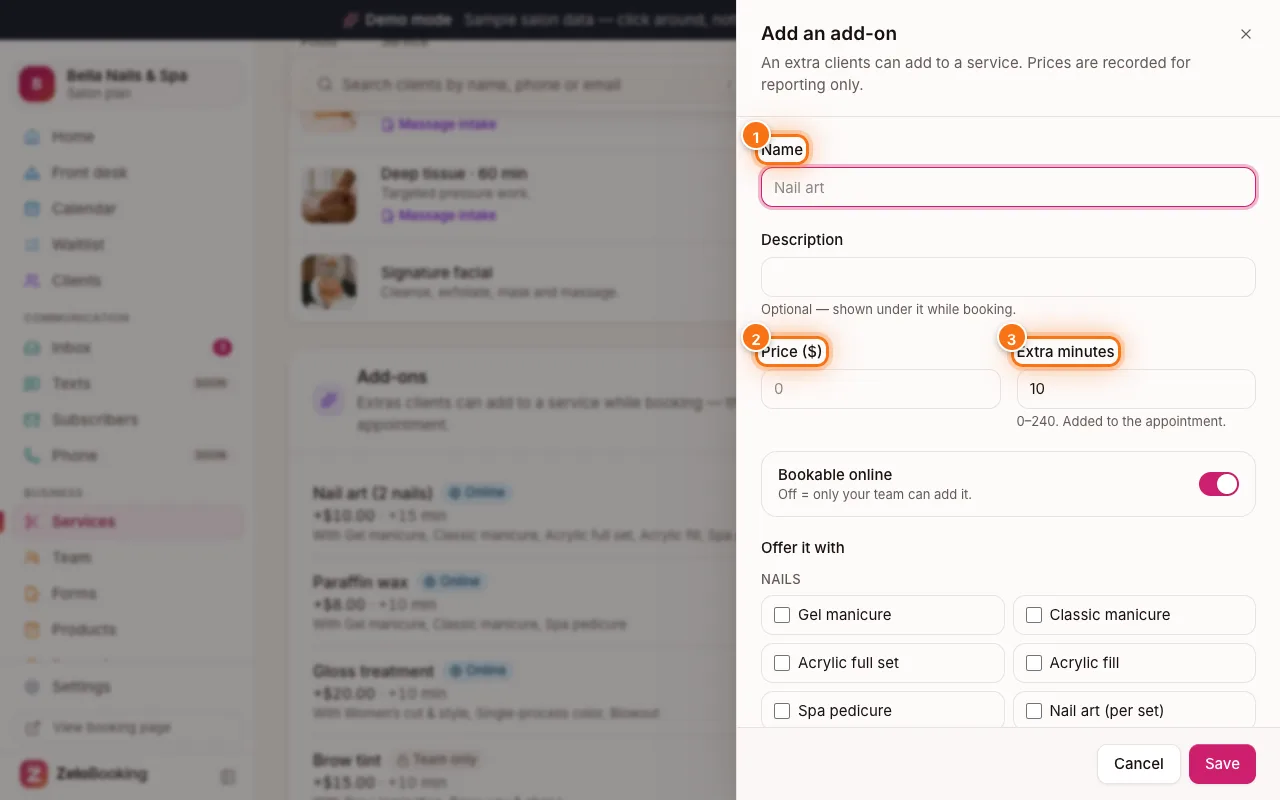
Add an add-on panel with Name (1), Price (2) and Extra minutes (3) highlighted - 6
What clients see when booking
On your booking page, a service with options opens “Choose an option for … (required)”. The client picks one, for example “Short nails” (1) or “Long or coffin” (2). Under “Add extras (optional)” they can tick add-ons (3).
The total time and price update straight away, and the booking, confirmation email and calendar all show the option and add-ons.
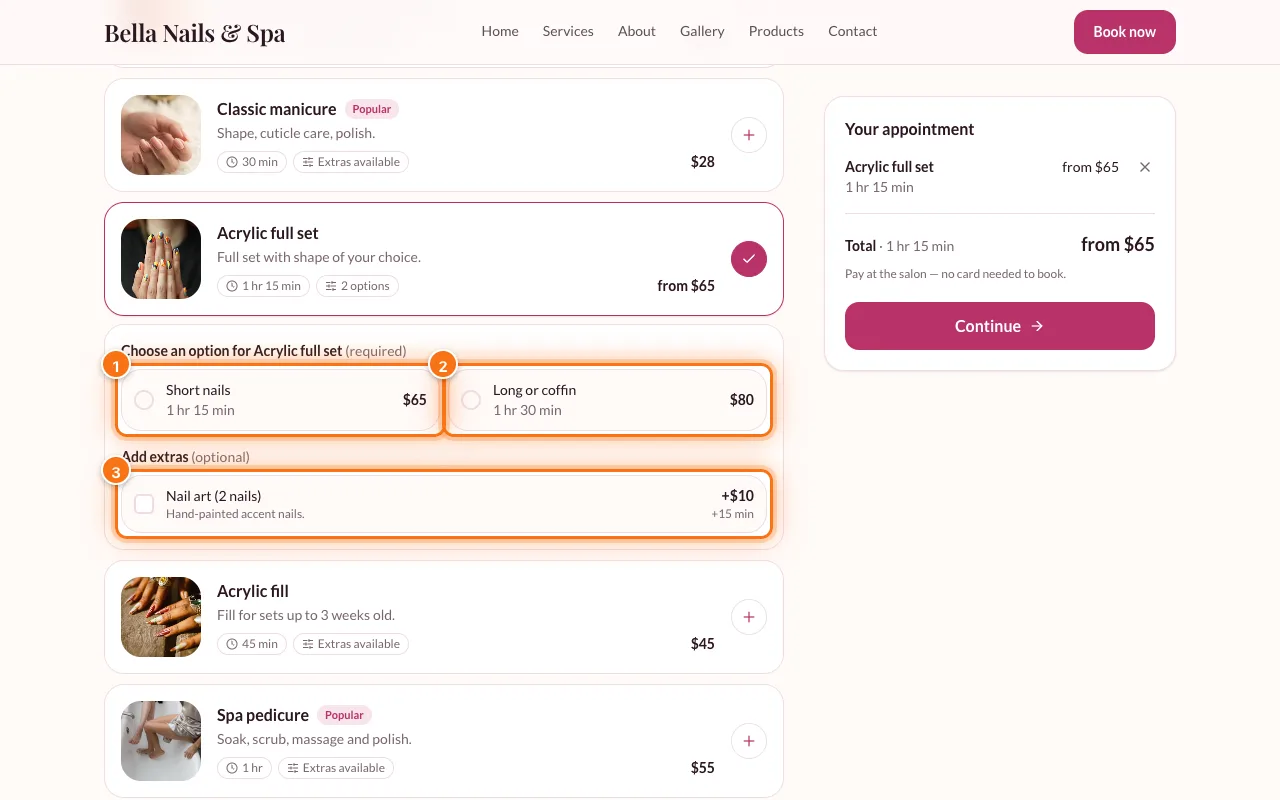
Booking page options for Acrylic full set: Short nails (1), Long or coffin (2) and the Nail art extra (3)