Video walkthrough coming soon
The written steps below cover everything in the meantime.
About 4 min to follow along
When you’re done
- Personal appointments automatically block online booking
- ZeloBooking appointments shown in your own calendar (optional)
- Each team member connected to their own calendar
- 1
Open Integrations and connect
Go to Settings → “Integrations” (1). Under “Calendars” you’ll see Google Calendar and Outlook / Microsoft 365.
Click “Connect Google” or “Connect Outlook” (2) and sign in to approve. We only read when you’re busy — never your event titles or details.
Work or school Outlook account? Some organisations let only their IT admin approve new apps. If Microsoft asks for an admin’s approval, ask your IT admin to approve “ZeloBooking Calendar Sync”, then connect again.
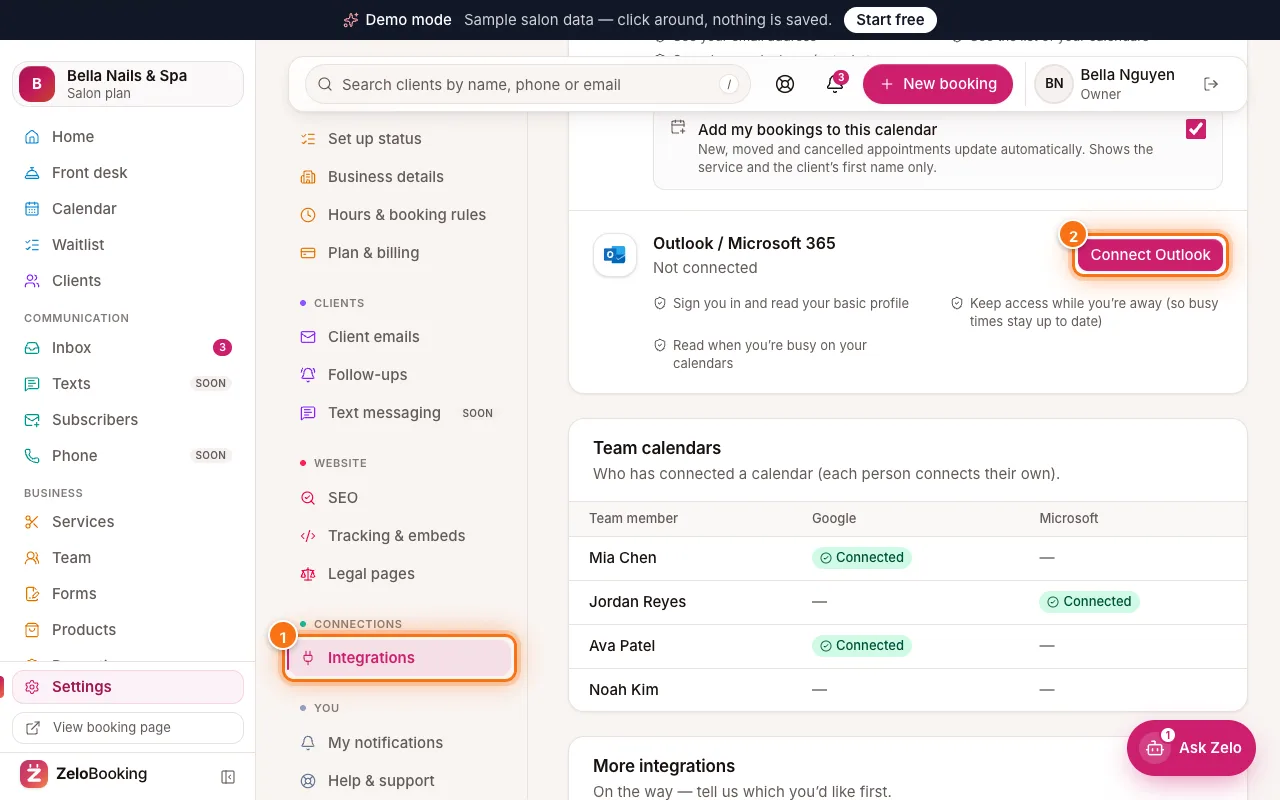
Settings → Integrations (1) with Connect Outlook (2) highlighted - 2
Choose what syncs
Once it says “Connected”:
- “Add my bookings to this calendar” (1) — puts your new, moved and cancelled appointments in Google or Outlook, showing only the service and the client’s first name
- “Choose calendars” — tick the calendars under “Check these calendars for conflicts” (busy time on any of them blocks online booking) and pick where “Add my appointments to” puts them, then click “Save calendars”
- “Sync now” (2) — refresh busy times straight away (it also finds calendars you added)
- “Disconnect” (3) — stop syncing (you’ll be asked to confirm). The upcoming appointments we added are removed, and for Google, ZeloBooking’s access to that account is removed too
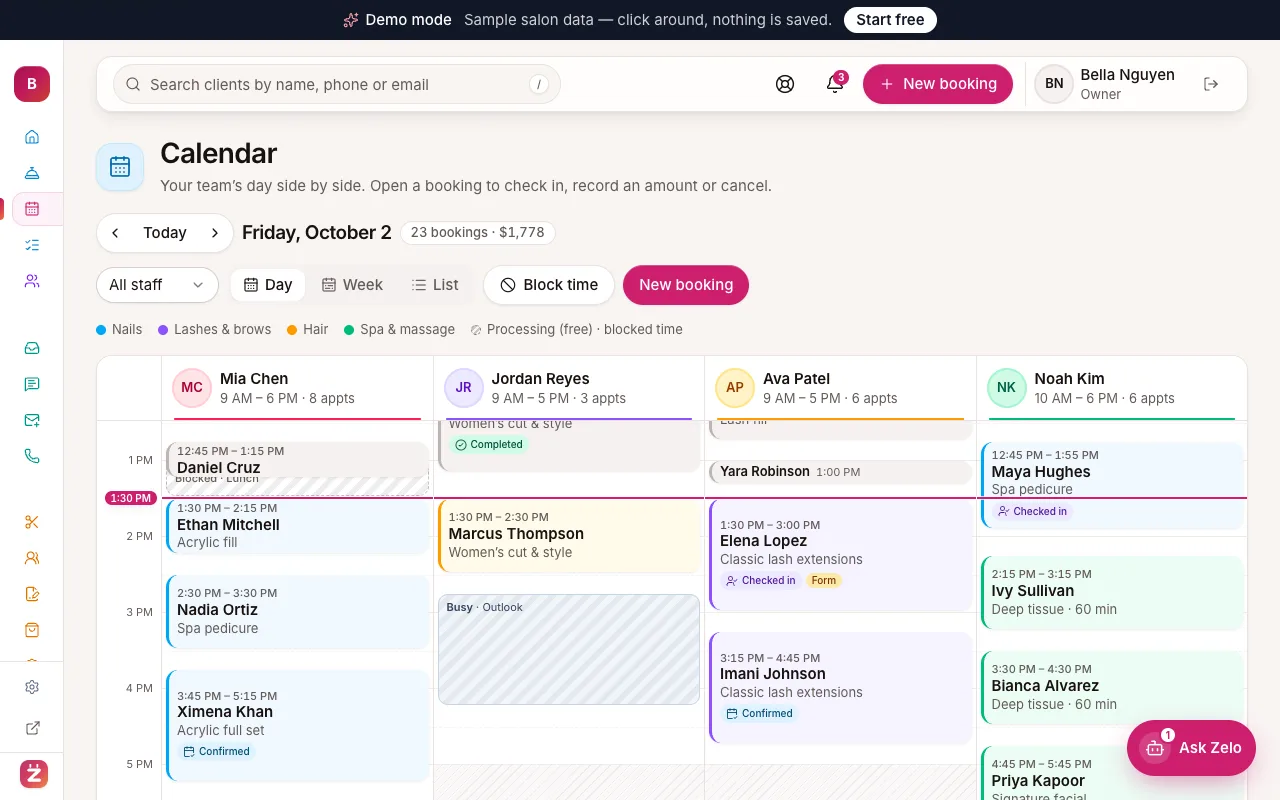
Tip: Busy times show on your ZeloBooking calendar as striped “Busy” blocks, so you know why a time isn’t offered.
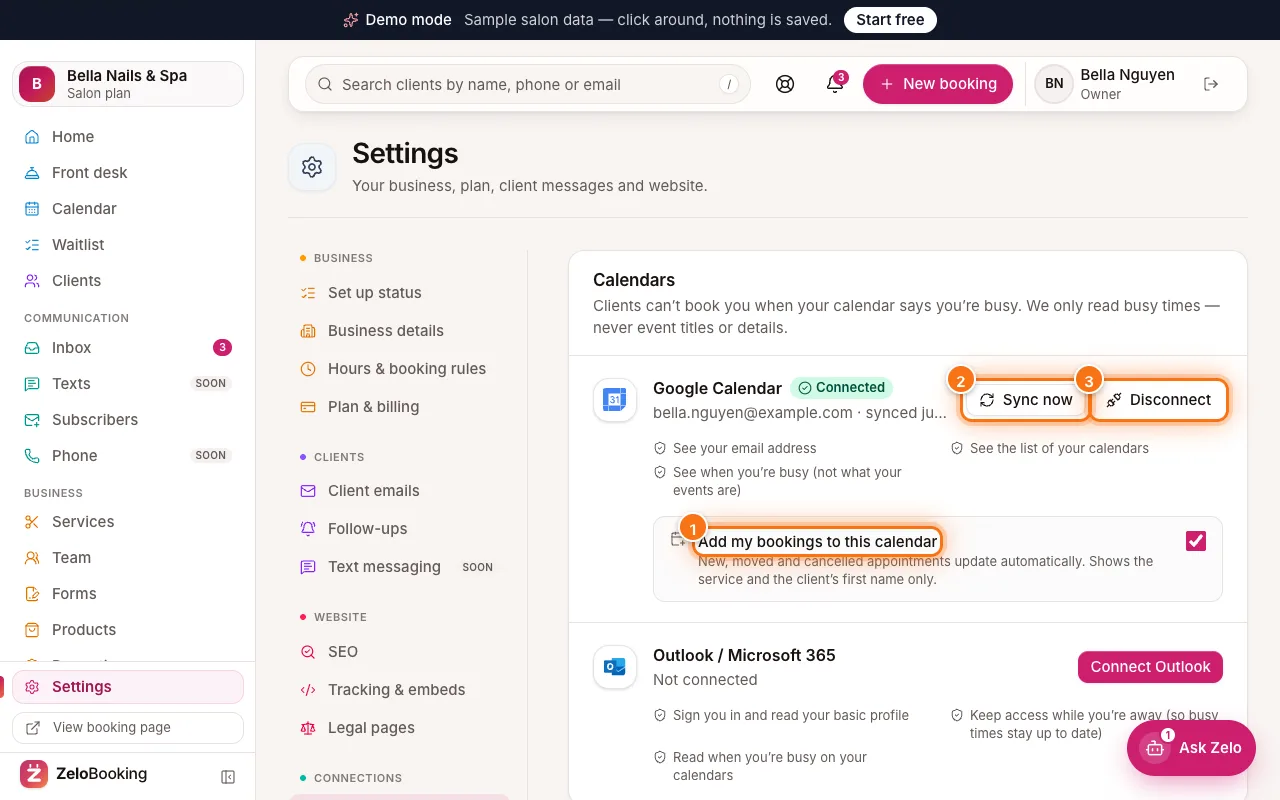
Connected Google Calendar with Add my bookings to this calendar (1), Sync now (2) and Disconnect (3) - 3
See who has connected
Owners and admins see “Team calendars” (1) below. It shows who has connected Google or Microsoft. Each person connects their own calendar, so nobody needs to share passwords.
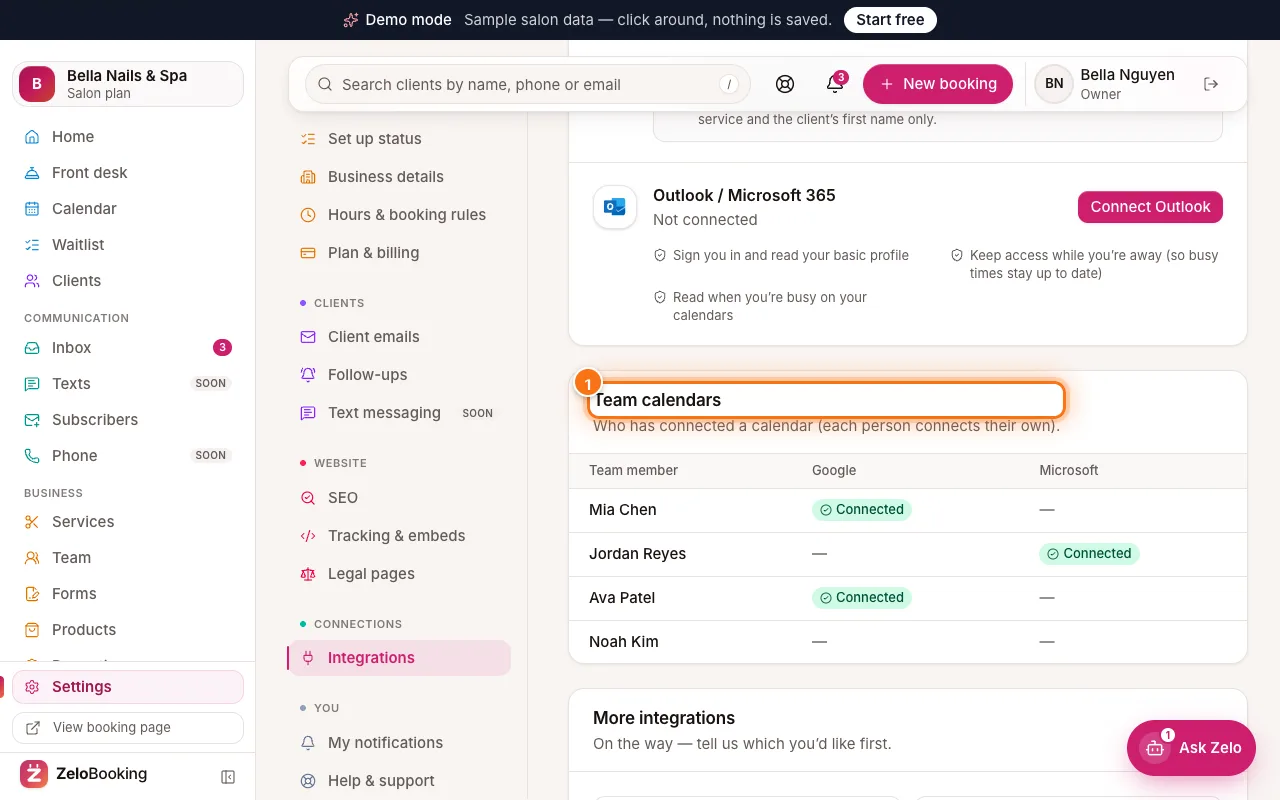
Team calendars table showing who has connected (1) - 4
Team members connect their own
Staff open “Settings” at the bottom of their own menu, then “Integrations” (1), and click “Connect Google” or “Connect Outlook” (2) the same way.
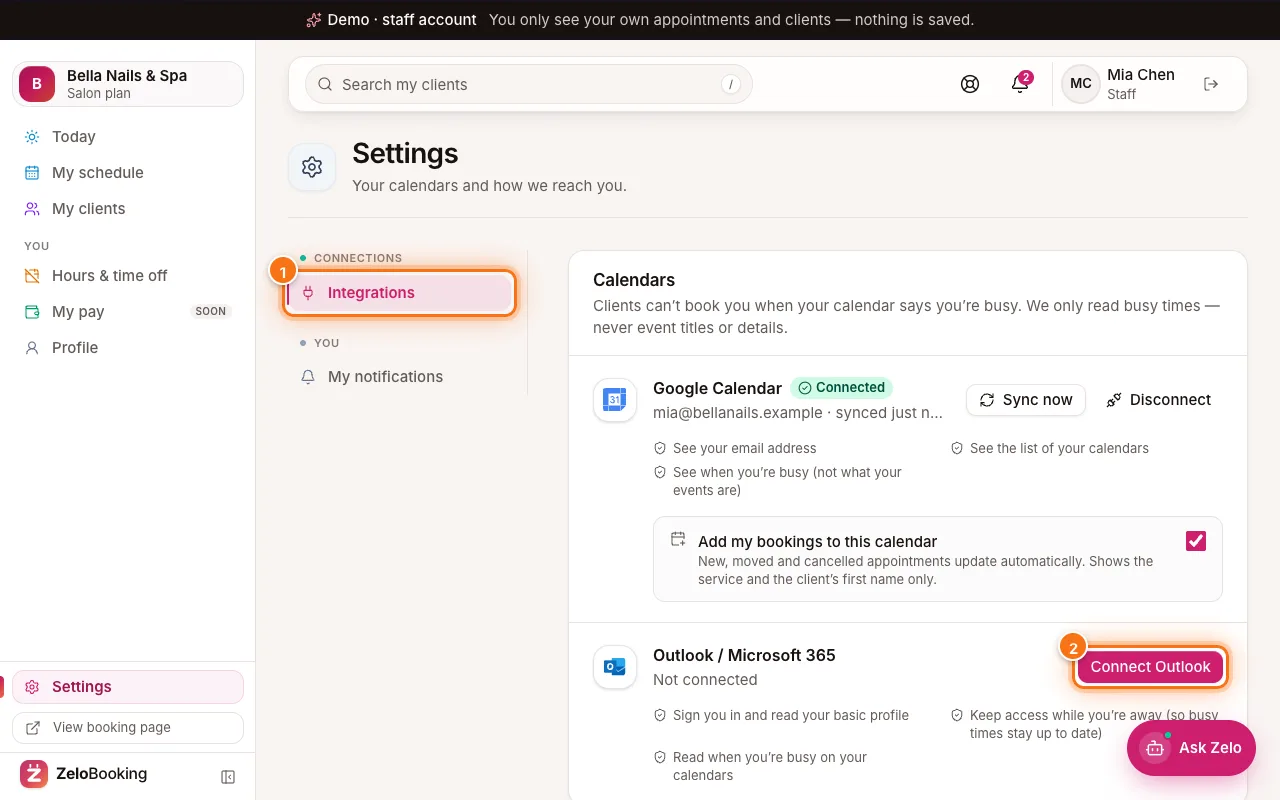
Staff app Settings → Integrations (1) with Connect Outlook (2) highlighted