Video walkthrough coming soon
The written steps below cover everything in the meantime.
About 8 min to follow along
When you’re done
- Book any client — new or returning — in under a minute
- Check clients in, mark no-shows and cancel from one panel
- Move bookings and tell the client in one click
- Breaks and meetings blocked so nobody books over them
- 1
Find your way around the day
In the left menu, click “Calendar”. You see your team side by side: one column per person, with the time down the left. A line marks the current time.
At the top:
- “Today” (1) jumps back to today; the arrows either side go to the day before or after.
- “All staff” (2) is a menu — pick one person to see only their column.
- “Day”, “Week” and “List” (3) switch how the calendar is shown (more in the last step).
Next to the date you see how many bookings the day has and what they add up to.
Tip: The coloured dots under the toolbar explain the card colours: one colour per service category. Each card also starts with its category’s letter, and the legend shows that letter next to the dot — so you don’t need to tell colours apart. Striped areas are blocked time or the free “processing” part of a service.
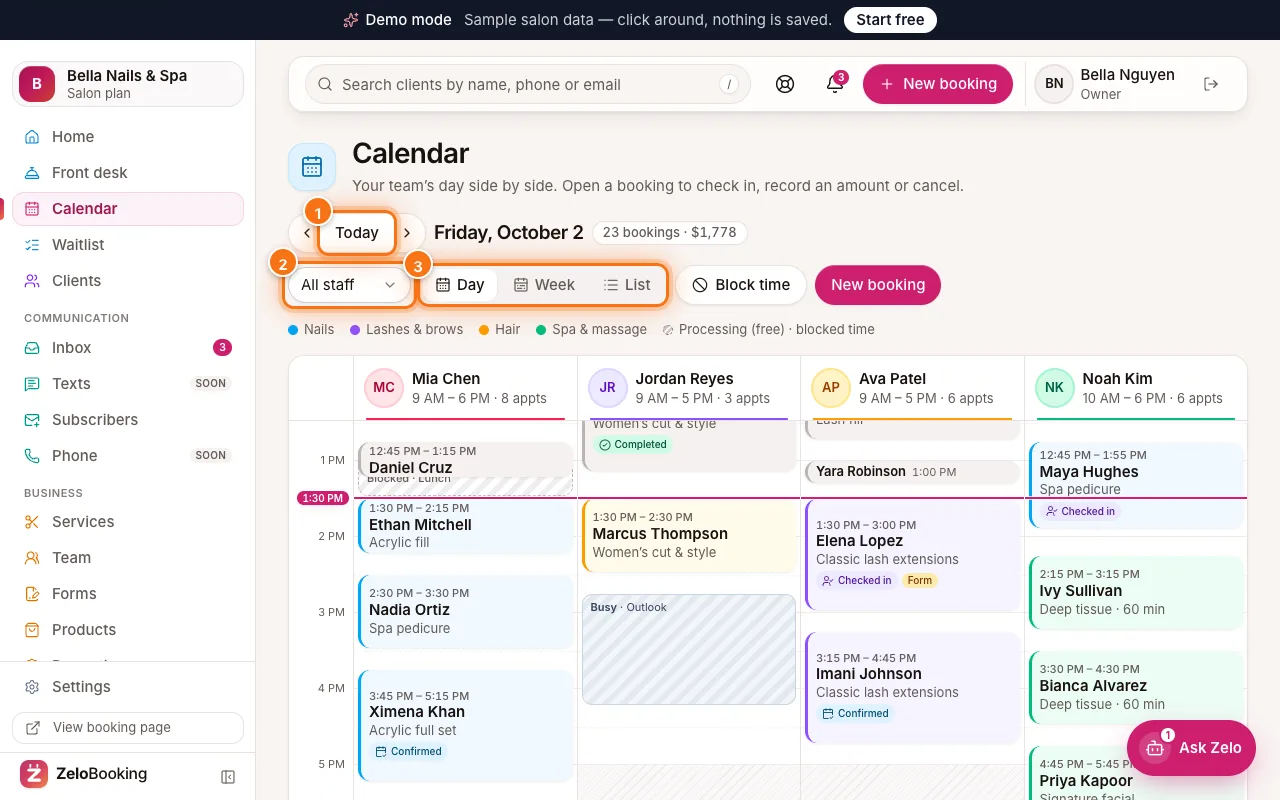
Calendar toolbar with Today (1), the All staff menu (2) and the Day, Week and List tabs (3) highlighted - 2
Open the booking form
Click “New appointment” (1) at the right of the toolbar.
Shortcut: click an empty spot in someone’s column. The form opens with that person and that time already filled in.
Tip: There’s also a “New appointment” button in the top bar of every dashboard page — it brings you straight here.
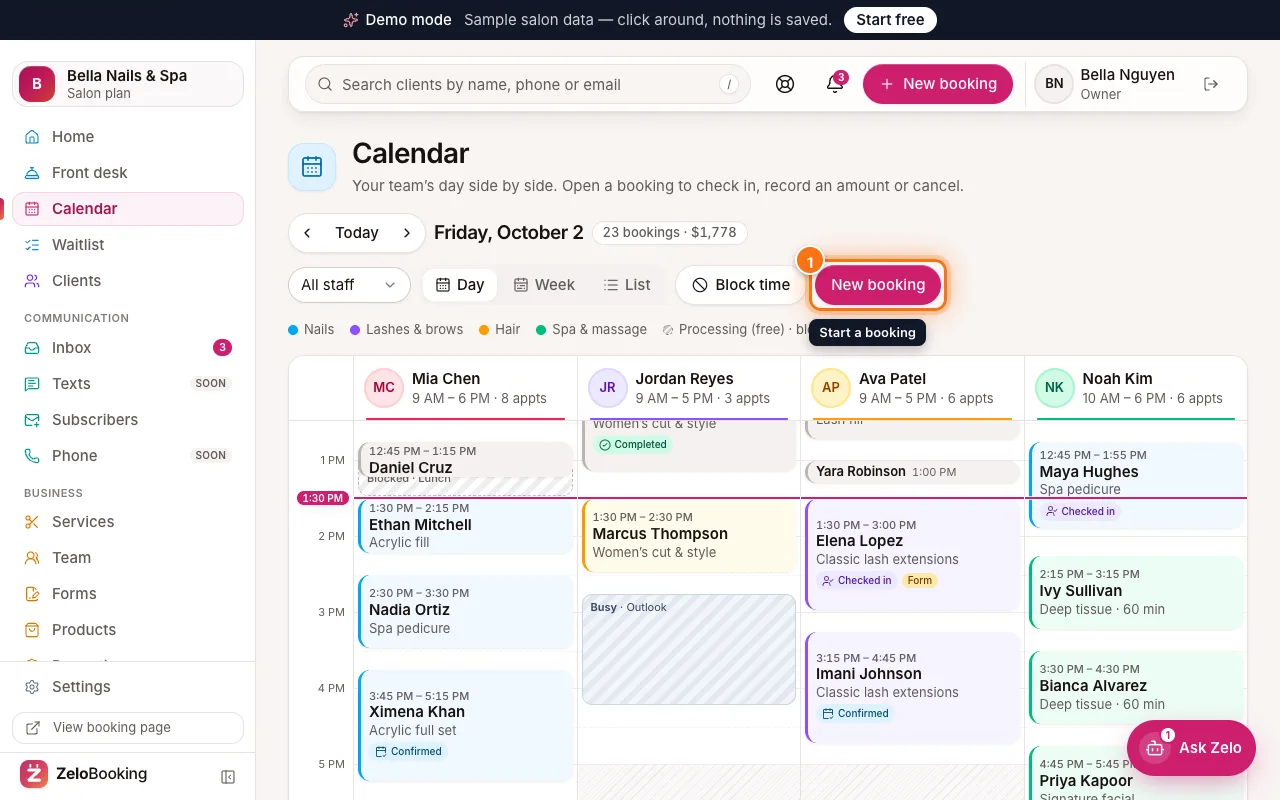
Calendar in Day view with the New appointment button highlighted (1) - 3
Choose the client
In “Client” (1), type part of a name, email or phone number, then click the right person in the list below.
Someone new? Click “+ New client” (2) and fill in First name, Last name, Mobile and Email. Changed your mind? Click “Pick an existing client instead”.
Once a client is picked, you’ll see their name with a “Change” button in case you chose the wrong one.
Tip: Add a mobile number or an email for new clients — that’s how they get their confirmation and reminders.
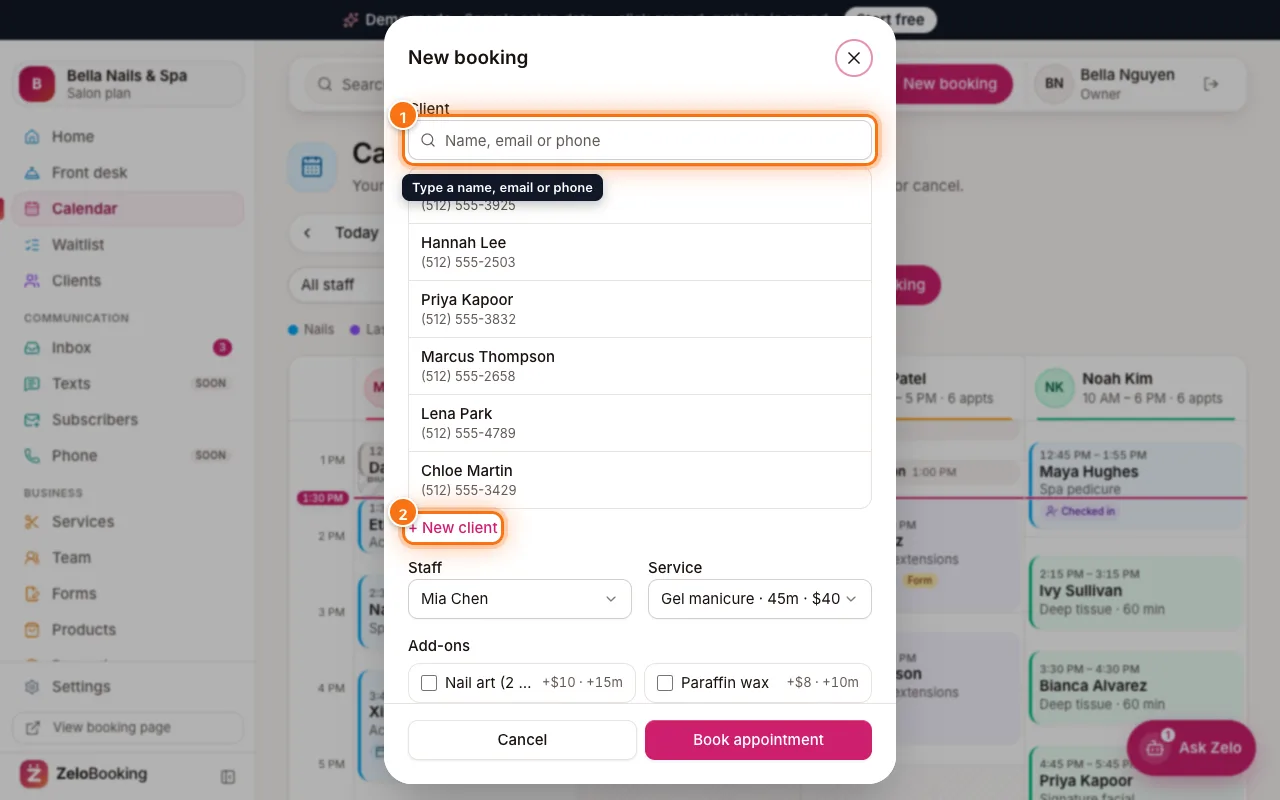
The New appointment form with the Client search box (1) and “+ New client” (2) highlighted - 4
Choose who, what and when
- “Staff” (1): the team member doing the service — or “Anyone available”, and we book the first person free who does it (the least busy one first).
- “Service” (2): what they’re booking. If the service has options (for example short or long hair), pick one under “Option”, and tick any “Add-ons”. Booking more than one thing? Click “+ Add another service” — up to 4 services, one after another with the same person.
- “Date”, then “Time” (3): the times listed are when that person works. The front desk, admins and owners can also choose “Other time…” and type any time.
- “Team note (optional)”: anything your team should know. The client never sees it.
- “Repeat”: leave “Doesn’t repeat”, or choose “Every week”, “Every 2 weeks” and so on, then how many “Appointments” in total (up to 12).
The grey line at the bottom shows the length, end time and price — and says so if a consent form will be sent. If the time is blocked, busy in their own calendar, in someone’s clean-up time or outside their hours, a “Heads up” box says so — you can still book it. Check it, then click “Book appointment”.
Tip: For repeating appointments, dates that clash with another appointment — or fall on the person’s time off, blocked or busy time, or outside their hours — are skipped, and the message after saving tells you which ones and why. With “Anyone available” the message says who it was booked with.
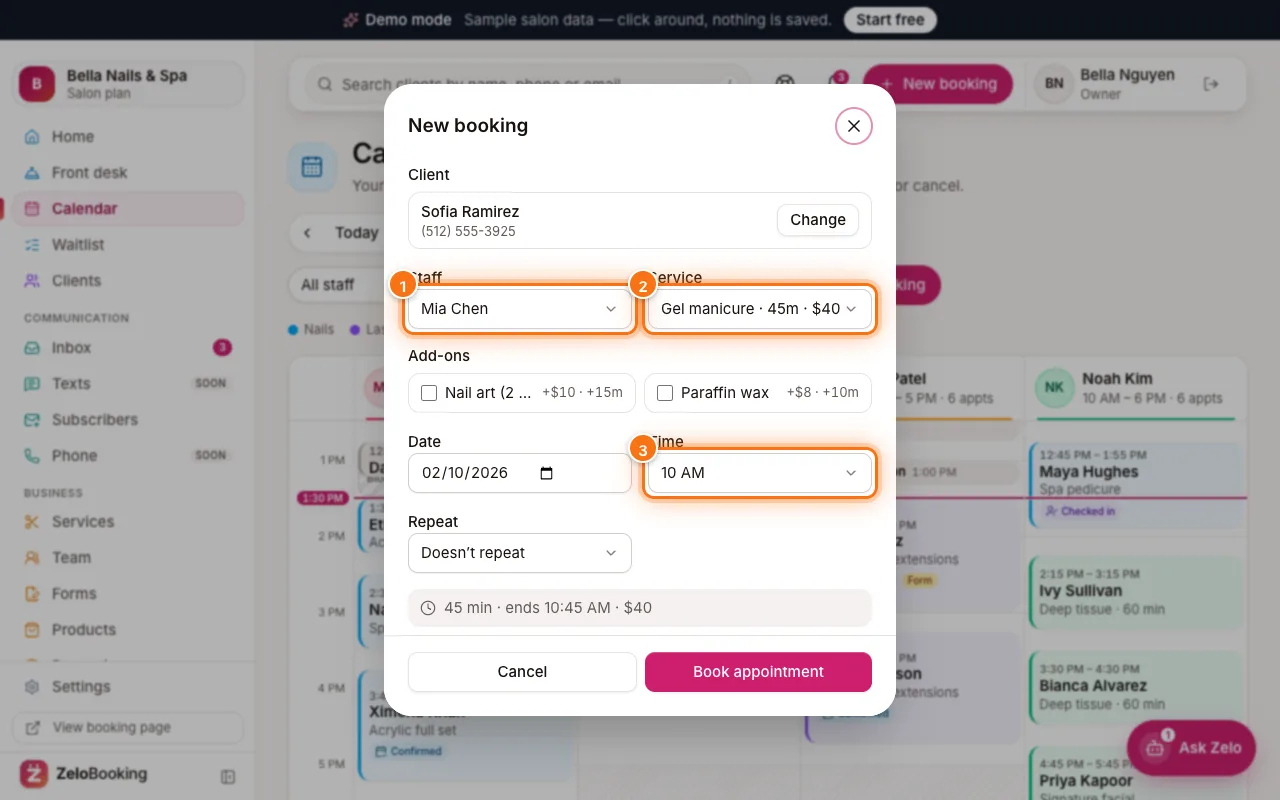
The New appointment form with a client picked and the Staff (1), Service (2) and Time (3) menus highlighted - 5
Open a booking
Click any booking in the calendar. A panel opens on the right with the client (visits, lifetime spend, phone, email, notes), who it’s with, how long it is, the price and how it was booked.
The buttons at the bottom:
- “Check in” (1) when the client arrives — on the day of the appointment (before that it says “Check in opens on the day”). Unconfirmed appointments show “Confirm” here instead. Checked in by mistake? “Undo check-in”.
- “Checkout” to finish the visit and record what they paid (see “Record payment at checkout”) — from the appointment’s day on, never ahead of it.
- “Move” (2) to change the time or person.
- “No-show” if they never came — it appears once the appointment time has come. Came after all? Open it and click “Undo no-show”.
- “Cancel appointment” (3) — you’ll be asked “Cancel this appointment?” Add a “Reason (optional)” (only your team sees it). “Let the client know” is ticked, so they get a cancellation email (or a text, where your business texts) — untick it to cancel quietly. Click “Yes, cancel” or “Keep appointment”.
Tip: Click the client’s name in the panel to open their full profile. “Add a note” (or “Edit note”) keeps a team note on the booking, and “History” shows what happened to it — booked, moved, checked in, paid — and who did it. “Change length” next to the duration makes it longer or shorter. A repeating appointment shows “Repeating appointment” with every date; “Cancel appointment” then asks “Only this one” or “This and the following”.
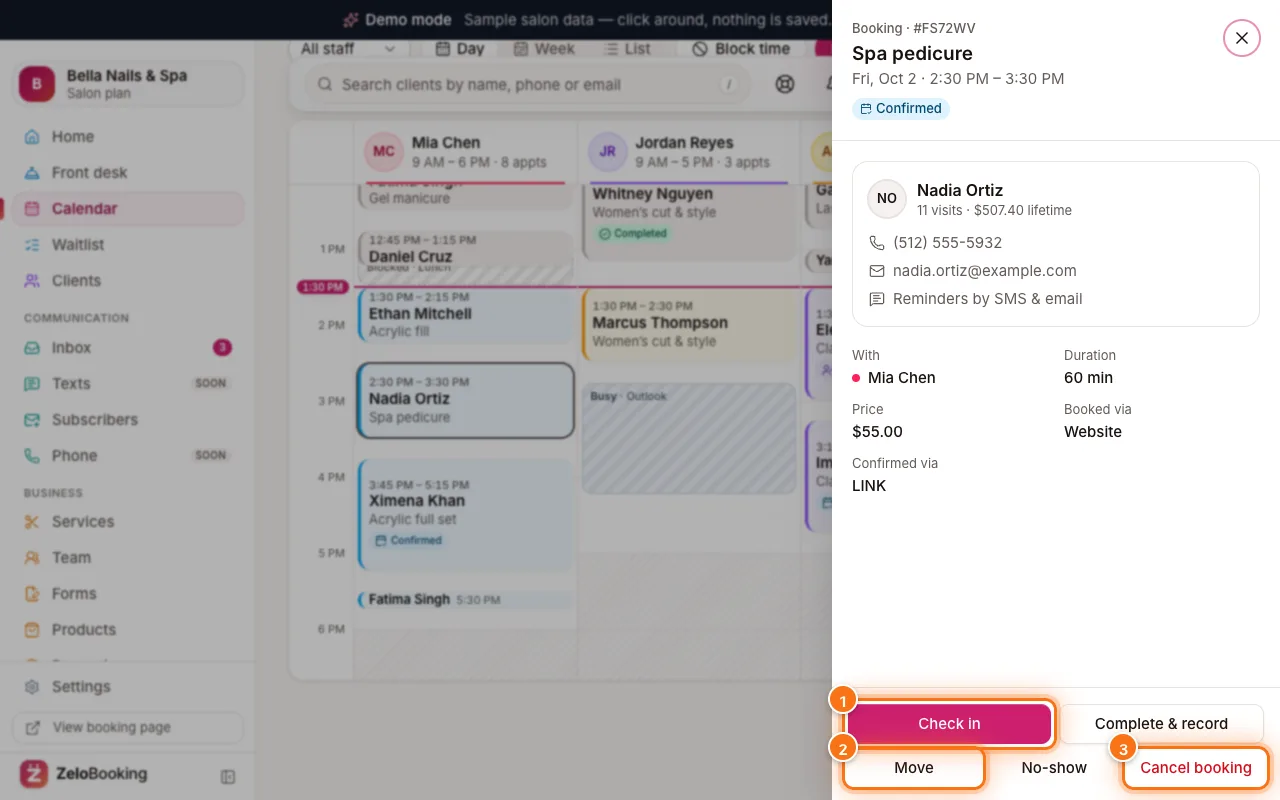
An appointment’s details panel with Check in (1), Move (2) and Cancel appointment (3) highlighted - 6
Move a booking
With a mouse, drag the booking to a new time — or into another person’s column (Day) or another day (Week) — and let go. Or open the booking and click “Move”.
Either way, the “Move appointment” window opens (“Move visit” when the client booked several services — they all move together). Check or change “Date” (1), “Time” (2) — any time of day — and “With” — it lists only people who do the service. The line underneath shows the new time, and a “Heads up” box says if it’s outside their hours, blocked or busy in their own calendar (you can still move it). For a repeating appointment, choose “Only this one” or “This and the following”. “Let the client know” is ticked, so they get the new time by email (or text) — untick it to move it quietly; the button then just says “Move”. Click “Move & tell the client” (3).
Tip: If the new time overlaps another booking, you’ll see “That overlaps another appointment” and the button stays off — the same for a time that has already passed. To make an appointment longer or shorter, drag its bottom edge (or use “Change length” in the appointment) — time freed by a shorter one is offered to your waitlist. On a phone or tablet, use the buttons — swiping scrolls the calendar.
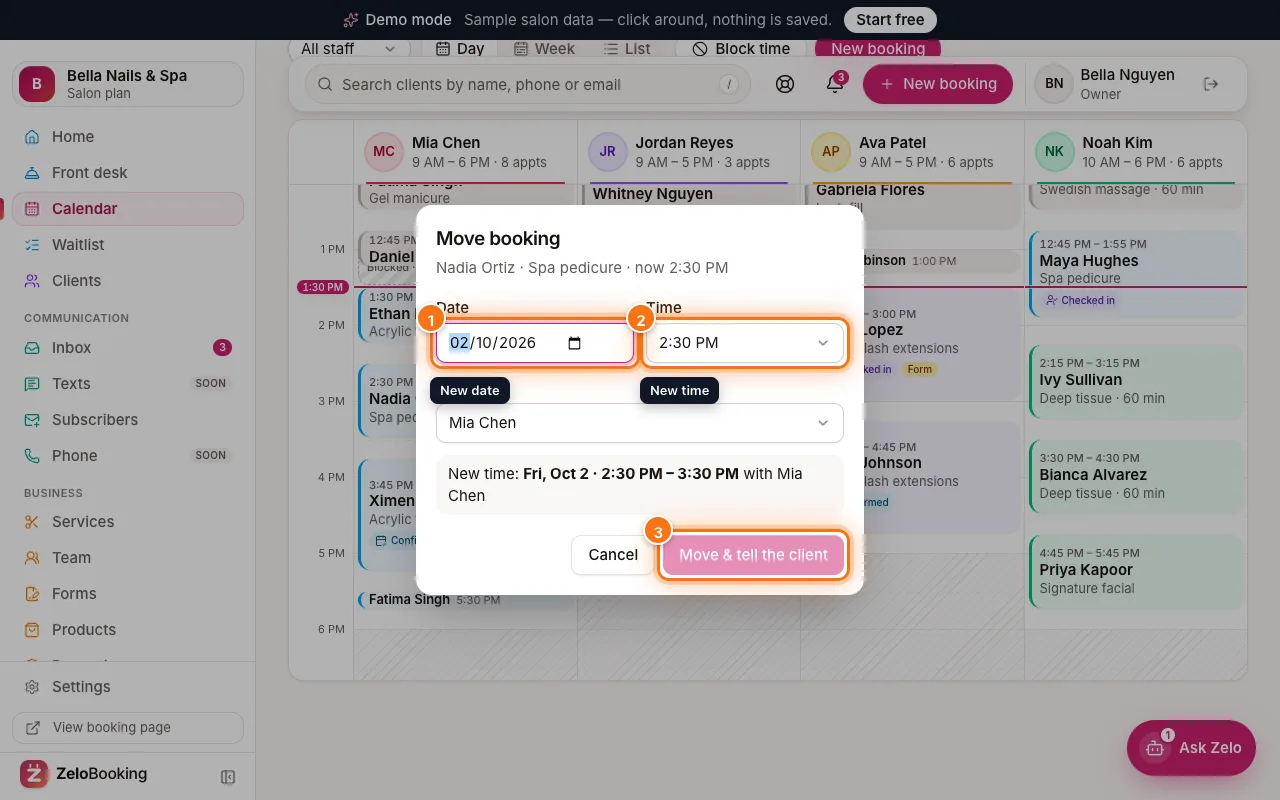
The Move appointment window with Date (1), Time (2) and “Move & tell the client” (3) highlighted - 7
Block time for breaks and meetings
Click “Block time” in the toolbar.
- “Who” (1): the team member.
- “Date”, or tick “All day” for a day off.
- “From” (2) and “To”: the start and end.
- “End date”: the last day, when it runs over several days (a holiday).
- “Repeat”: for a break that comes back — “Every day”, “Every weekday (Mon–Fri)”, “Every week” or “Every 2 weeks” — then “Until” the last date.
- “Reason (optional)”: for example Lunch or Training.
Click “Block time” (3). The time shows as a striped block, and online booking won’t offer it. Bookings already in that time stay as they are.
Tip: To remove a block, click the striped block in the calendar: “Remove this blocked time?” asks first — for a repeating block choose “Only this one” or “This one and every later one”.
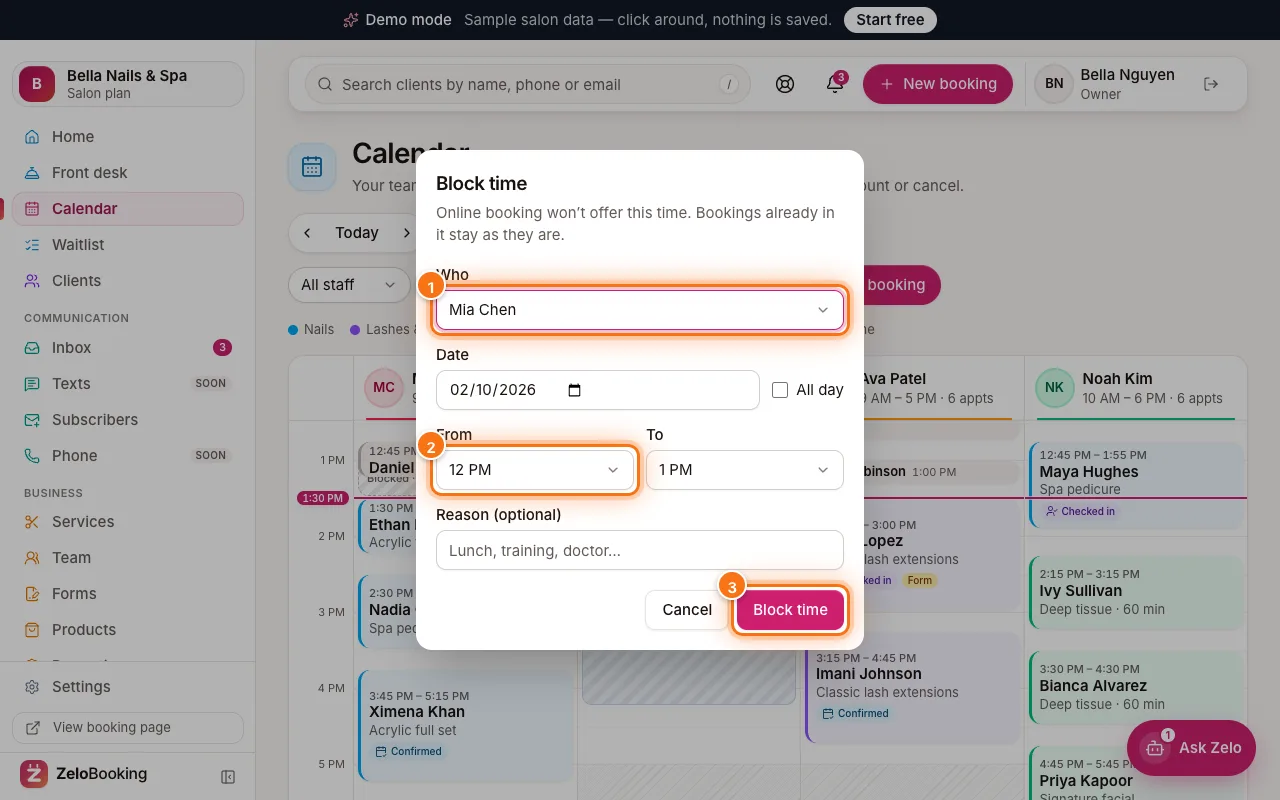
The Block time window with Who (1), From (2) and the Block time button (3) highlighted - 8
Switch between Day, Week and List
- “Day” shows everyone side by side — best for the front desk.
- “Week” shows seven days at once; the arrows then move a week at a time. Click a day’s heading to open that day.
- “List” shows the day’s bookings as a simple list you can scroll — handy on a phone.
In every view, click a booking to open it.
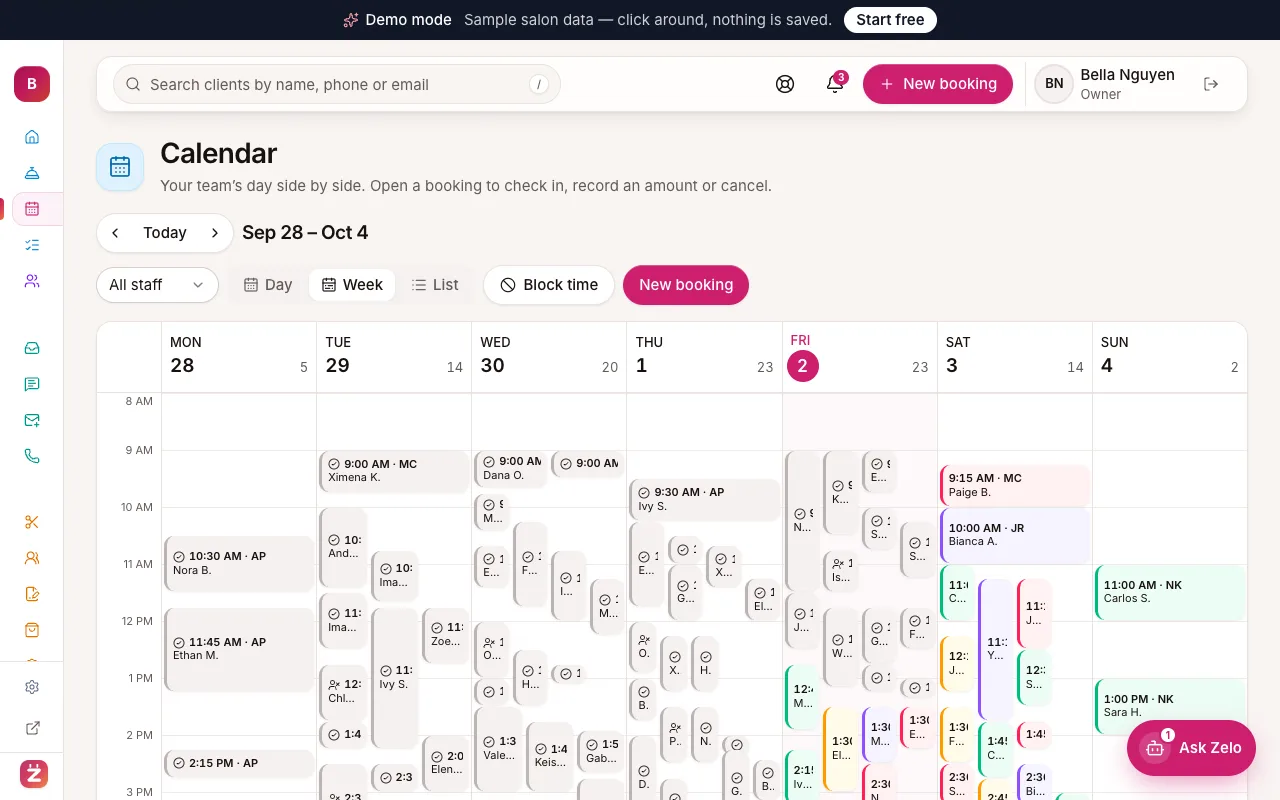
Calendar in Week view with each team member's bookings