Video walkthrough coming soon
The written steps below cover everything in the meantime.
About 7 min to follow along
When you’re done
- A month of posts planned in one sitting
- Captions in your tone, with your real services and prices
- A reminder with everything ready when it’s time to post
- 1
Find your way around
Go to the left menu → Social. Along the top: “Calendar” (1) shows planned posts by day, “Queue” lists what’s coming up, “Autopilot” writes posts for you, “Ideas” (2) has suggestions and “Link in bio” is a simple page for your Instagram bio.
To write your own post, click “New post” (3).
Tip: On the calendar, drag a post to another day to move it.
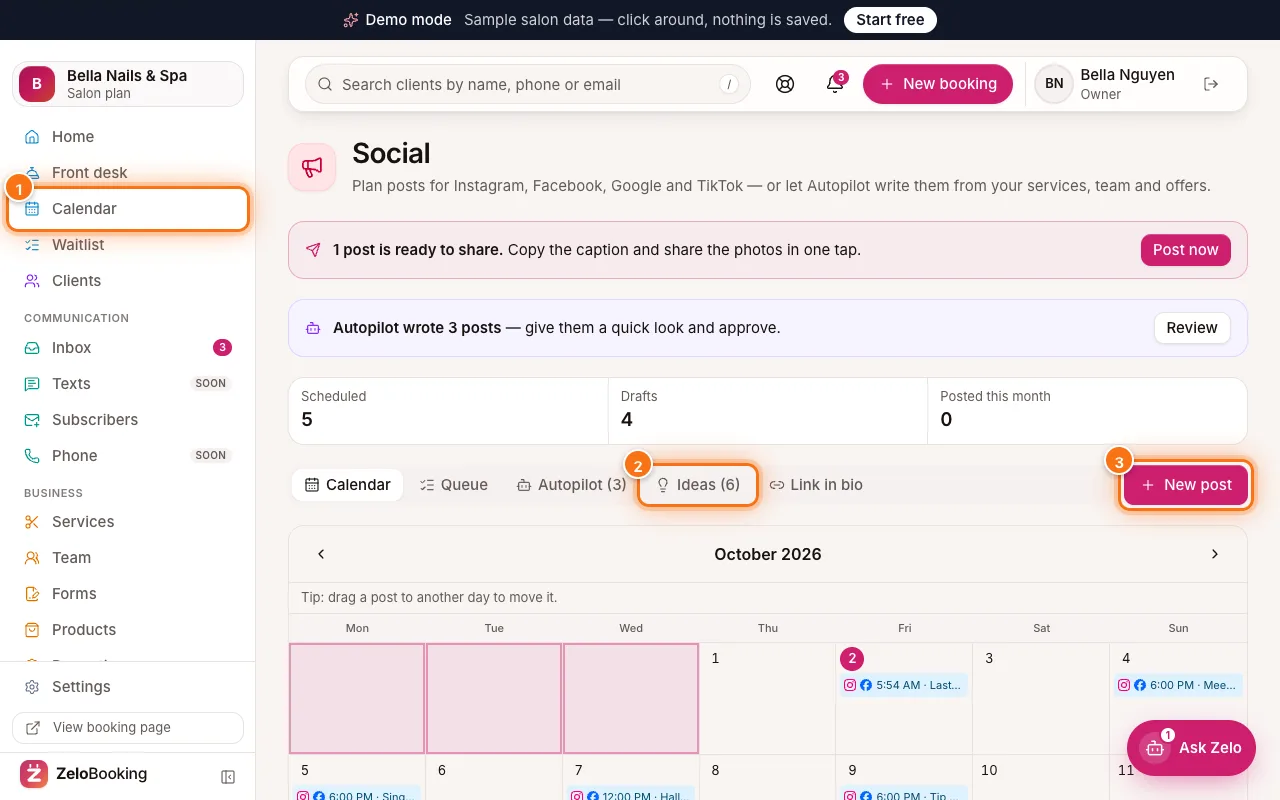
Social with Calendar (1), Ideas (2) and New post (3) highlighted - 2
Start from an idea
Click “Ideas”. Each idea comes from your real business — open times today, a new service, a service spotlight, a team member. Click “Use this idea” (1) to open it as a post with the caption already written.
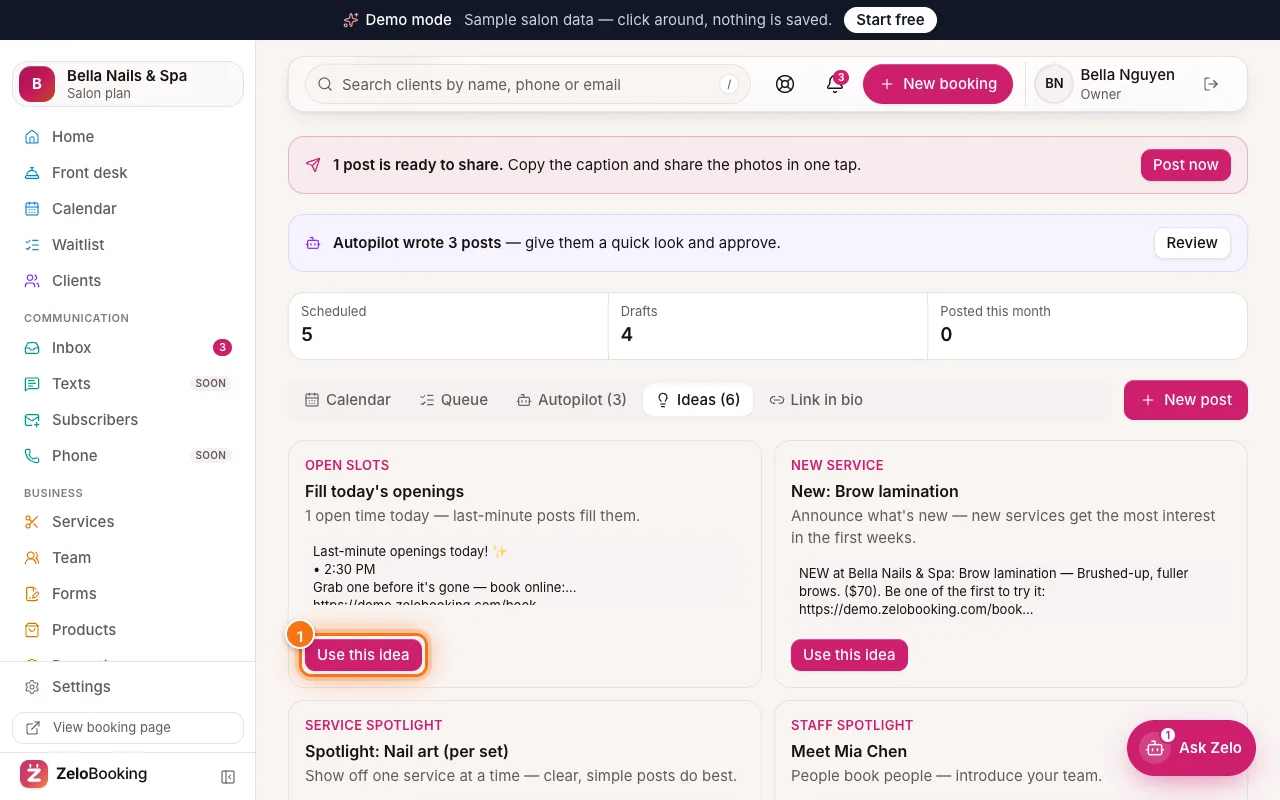
Social ideas with Use this idea highlighted (1) - 3
Write and schedule a post
In the post window:
- “Post to” (1) — tick Instagram, Facebook, Google Business and/or TikTok.
- “Photos & video” — “Library” to pick from Media, or “Graphic” to make one in your brand.
- “Caption” — type it, or choose a tone and click “Rewrite with AI” (2). Tap hashtags to add them.
- “Date” and “Time” — when to post.
Click “Schedule” (3), or “Save draft” to finish later.
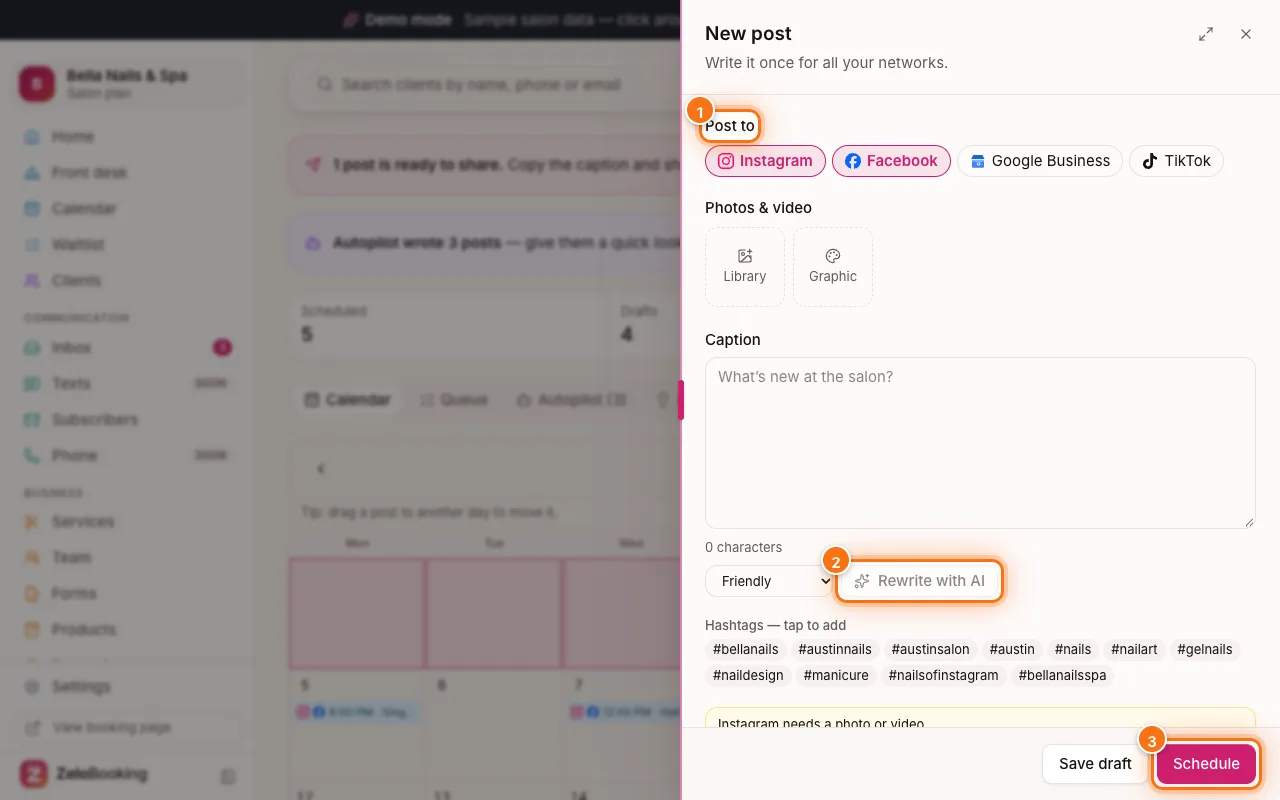
New post window with Post to (1), Rewrite with AI (2) and Schedule (3) highlighted - 4
Share it when it’s time
At the time you chose, you get a reminder (bell + email) and a “Post now” bar on this page. Click it to open “Ready to post”:
- “Share photos & caption” (1) — on a phone this opens Instagram or Facebook with your photos; paste the caption.
- “Copy caption” (2) — copies the text.
After posting, click “Mark as posted” (3). Not now? “Remind me in 1 hour” or “Skip this one”.
Tip: Posting automatically without a tap is coming soon, once Meta, Google and TikTok approve it.
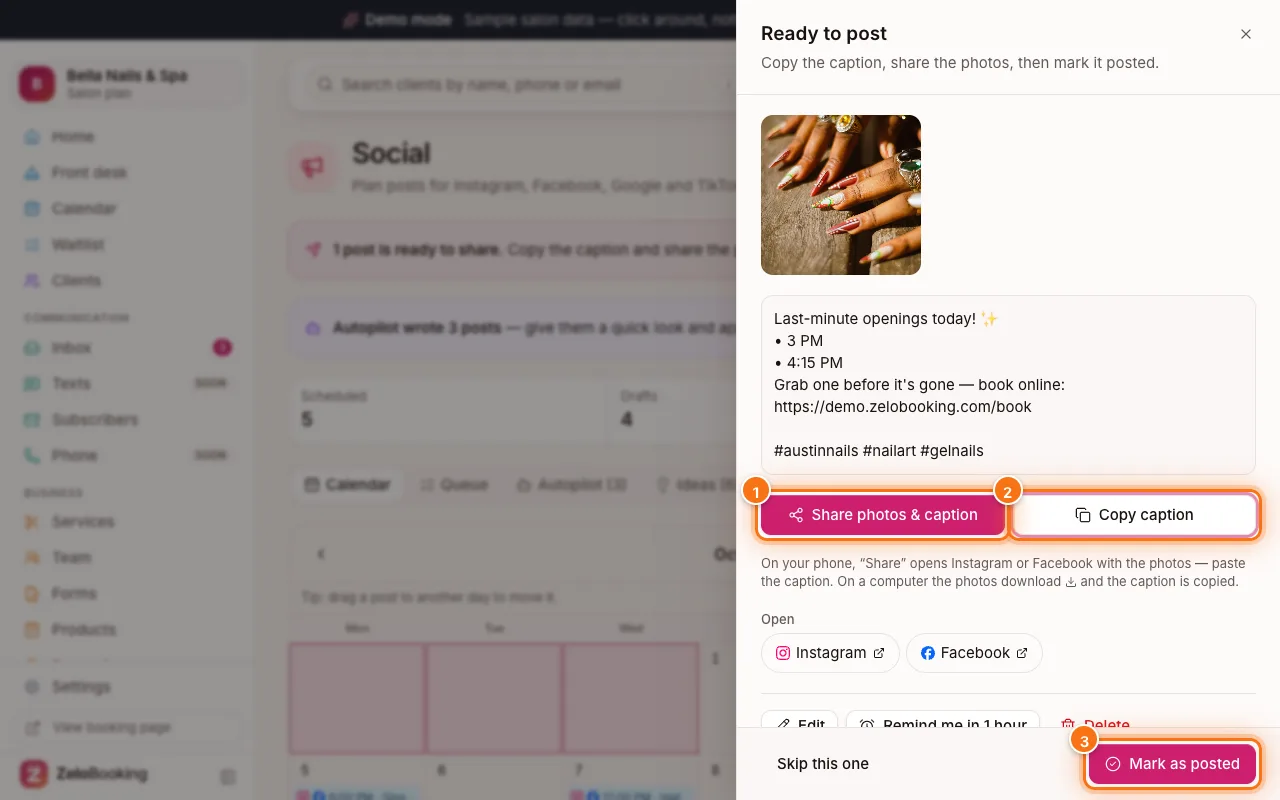
Ready to post with Share photos & caption (1), Copy caption (2) and Mark as posted (3) highlighted - 5
Let Autopilot plan for you
Click “Autopilot” and switch it on. Choose “Posts a week” (1), the “Days” (2) and time, where to “Post to” (3), what to post about (services & prices, offers, care tips, before & after, reviews, holidays, meet the team) and your tone of voice.
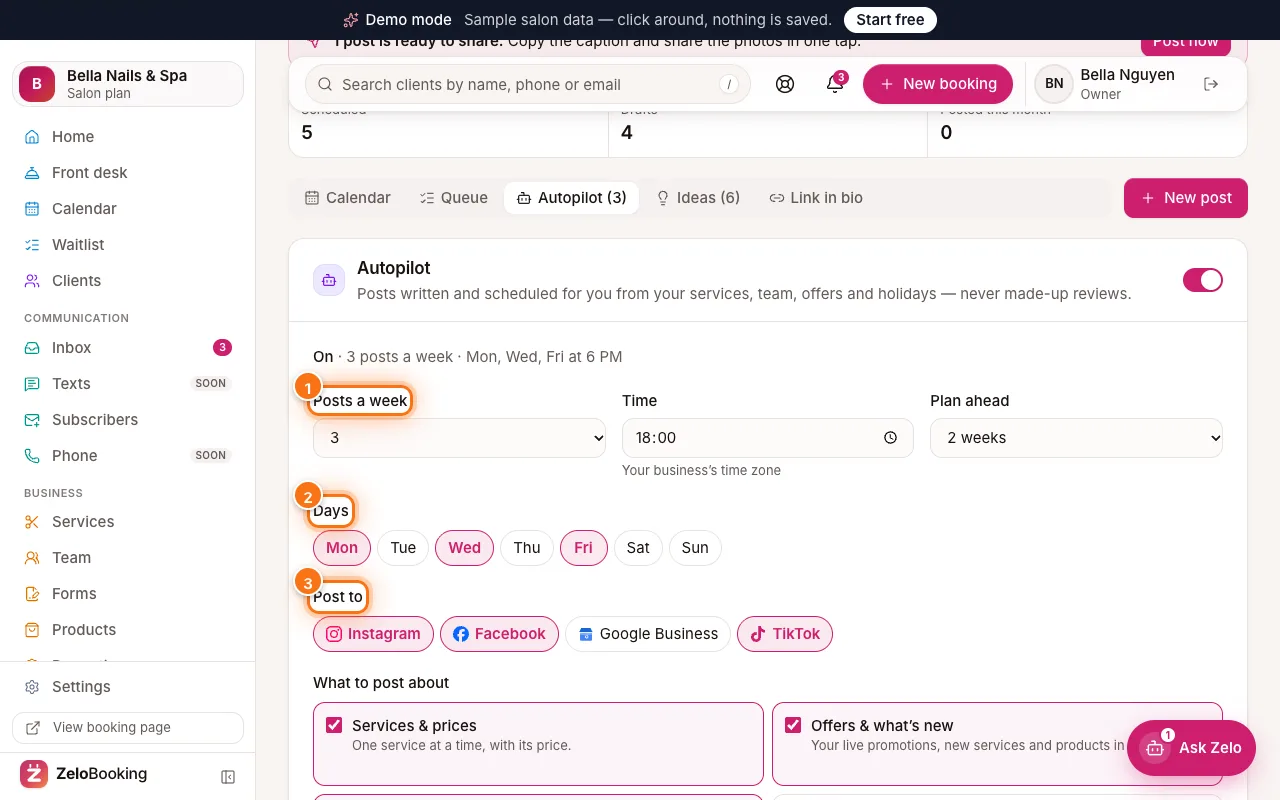
Autopilot settings with Posts a week (1), Days (2) and Post to (3) highlighted - 6
Approve Autopilot’s posts
Under “Before posts are scheduled” choose “Review first” (drafts wait for your OK) or “Auto-approve”. Click “Plan posts now” (1) to fill your calendar.
Drafts wait under “Waiting for your OK”: click “Edit” or “Approve” on each, or “Approve all” (2).
Autopilot only uses your real services, prices, team, offers and holidays — never made-up reviews — and before & after posts always wait for your own photos.
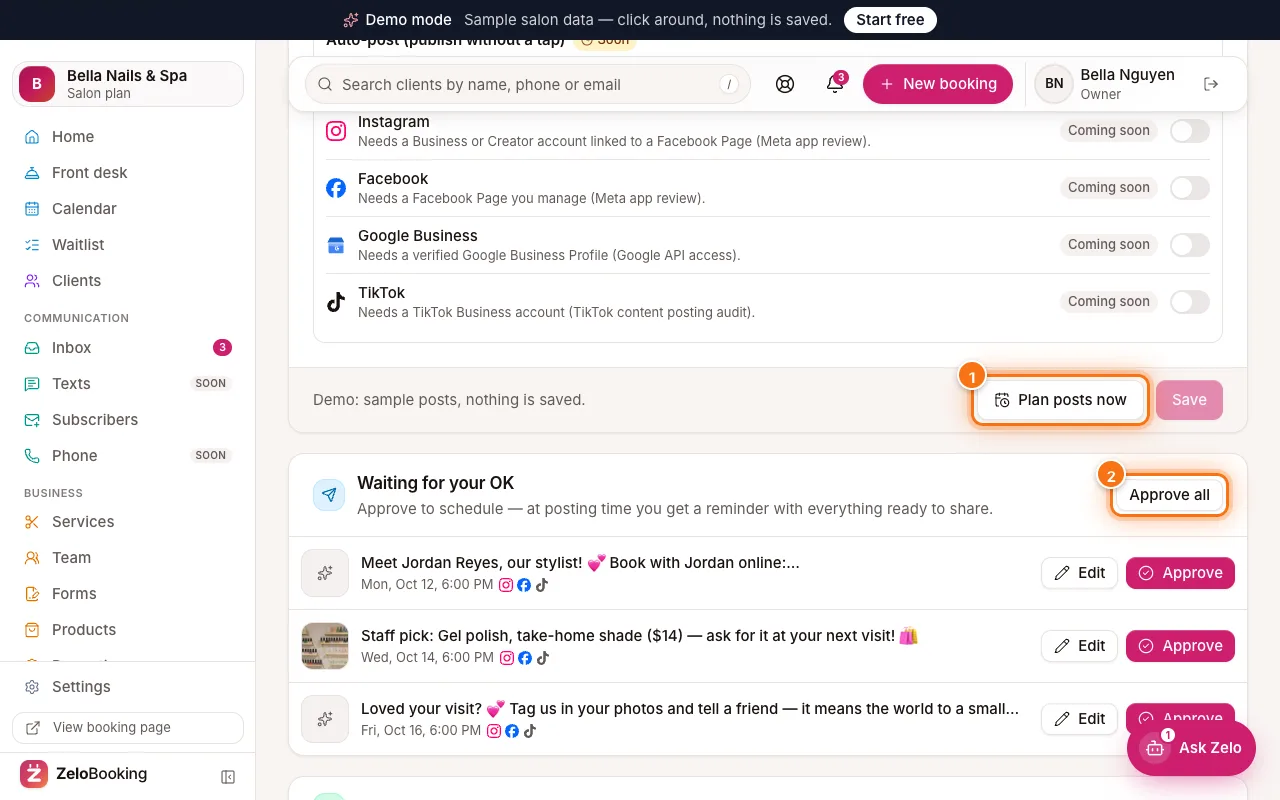
Autopilot with Plan posts now (1) and Approve all (2) highlighted