Video walkthrough coming soon
The written steps below cover everything in the meantime.
About 5 min to follow along
When you’re done
- Promo codes with the discount, dates and limits you want
- Welcome offers just for first visits
- Usage tracked for every code
- 1
Start a new promotion
Go to the left menu → Promotions and scroll to “Promotions”. Click “New promotion” (1).
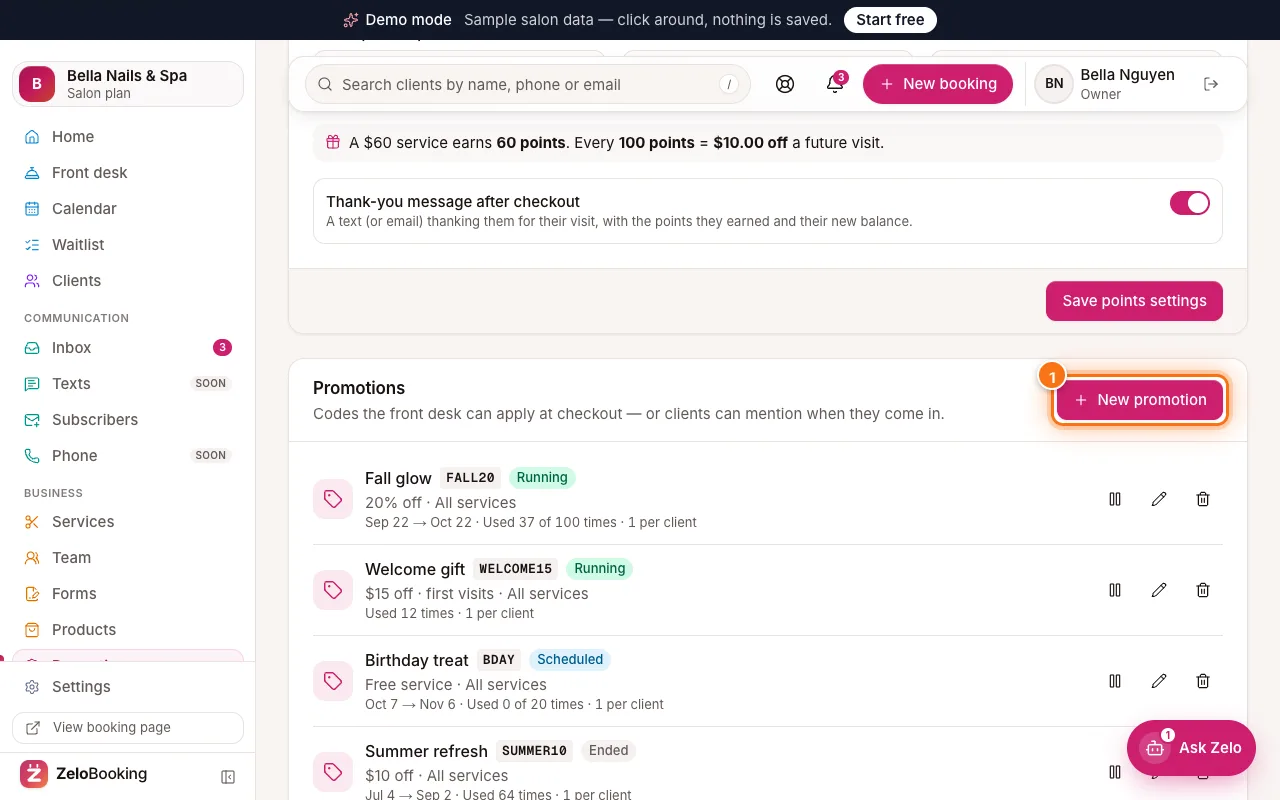
Promotions with the New promotion button highlighted (1) - 2
Name it, pick a code and a discount
- “Name” (1) — what your team sees, for example “Fall glow”.
- “Code” (2) — what clients say or type, for example FALL20 (letters, numbers and dashes).
- “Discount” (3) — “% off”, “$ off” or “Free service”, then the amount.
Under “Services”, tick the services it’s for. Leave all unticked to apply it to every service.
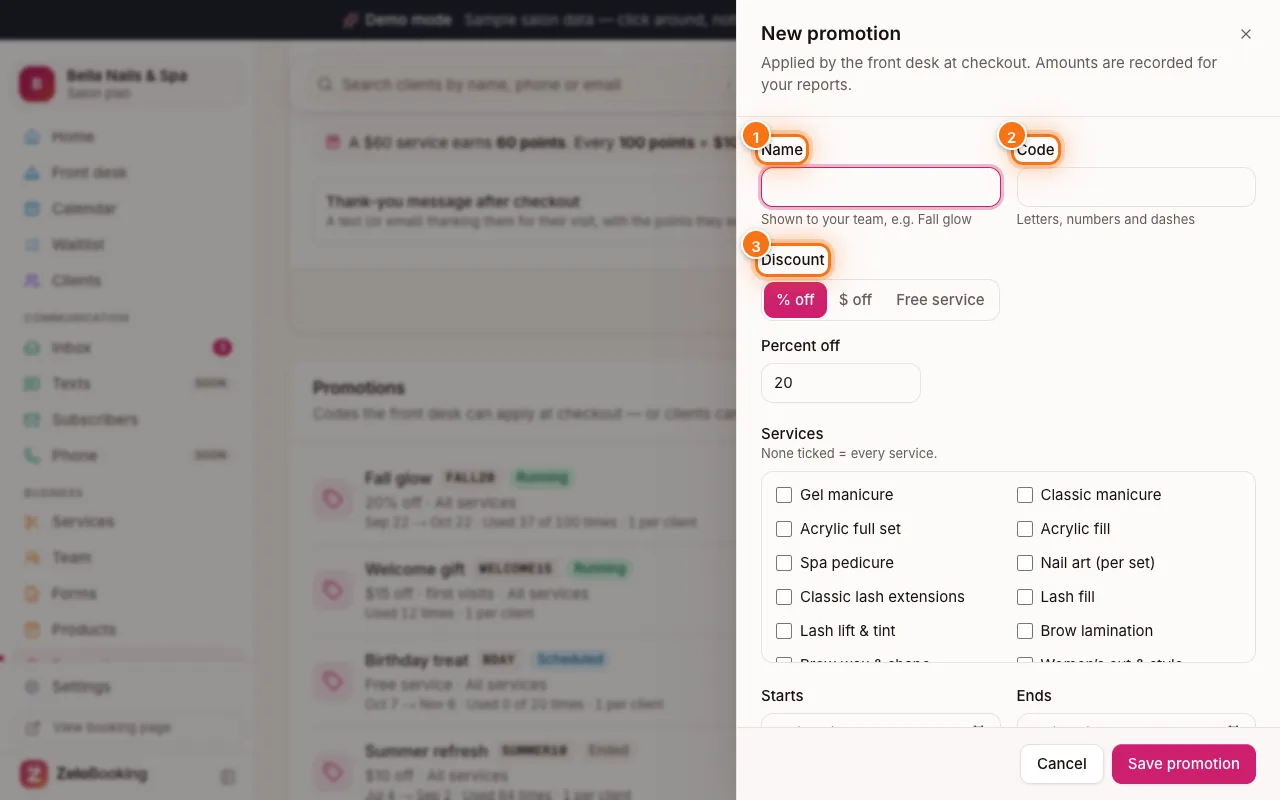
New promotion form with Name (1), Code (2) and Discount (3) highlighted - 3
Set dates and limits
- “Starts” (1) and “Ends” — leave empty to start now / never end.
- “Total uses” (2) and “Uses per client” — leave empty for unlimited.
- “First visits only” — for a welcome offer for new clients.
Click “Save promotion” (3).
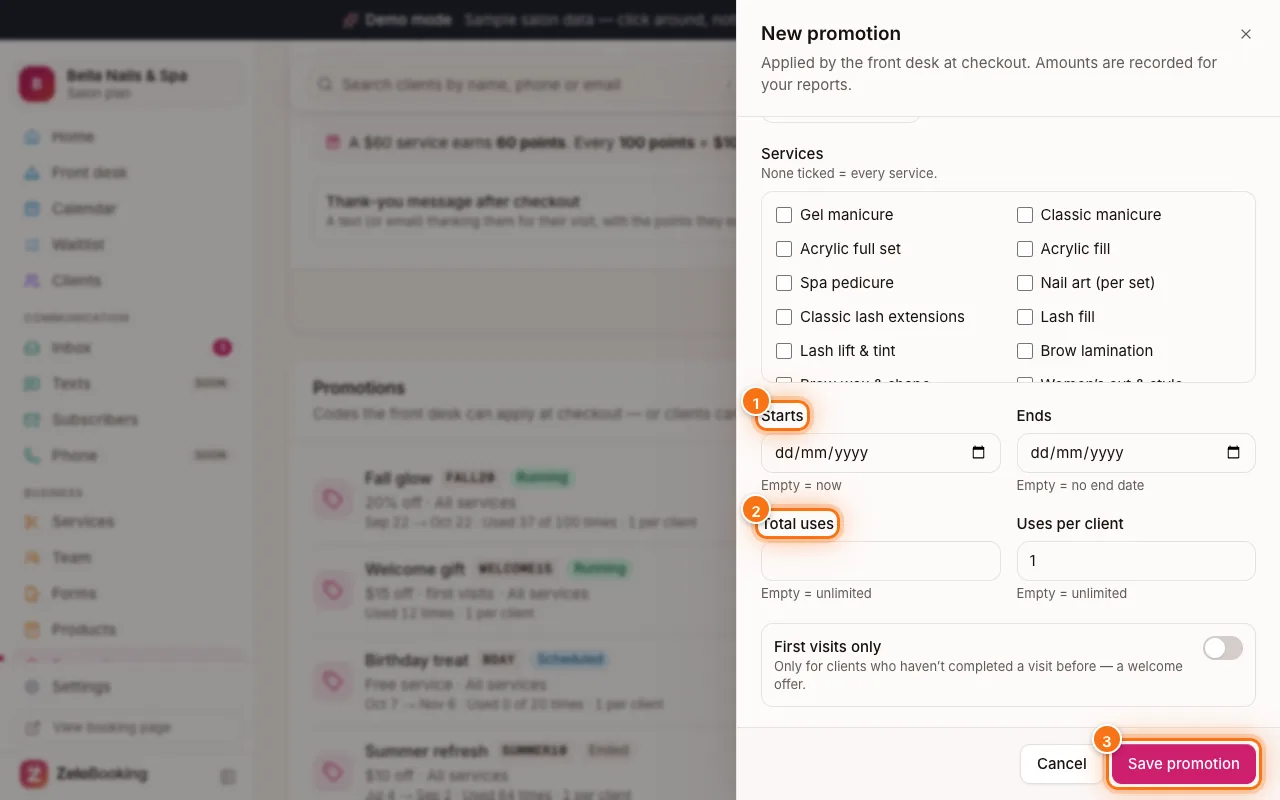
New promotion form with Starts (1), Total uses (2) and Save promotion (3) highlighted - 4
Manage your codes
Each promotion shows its status (Running, Scheduled or Ended), dates and how many times it’s been used. Use the buttons on the right to pause (1), edit (2) or remove (3) it.
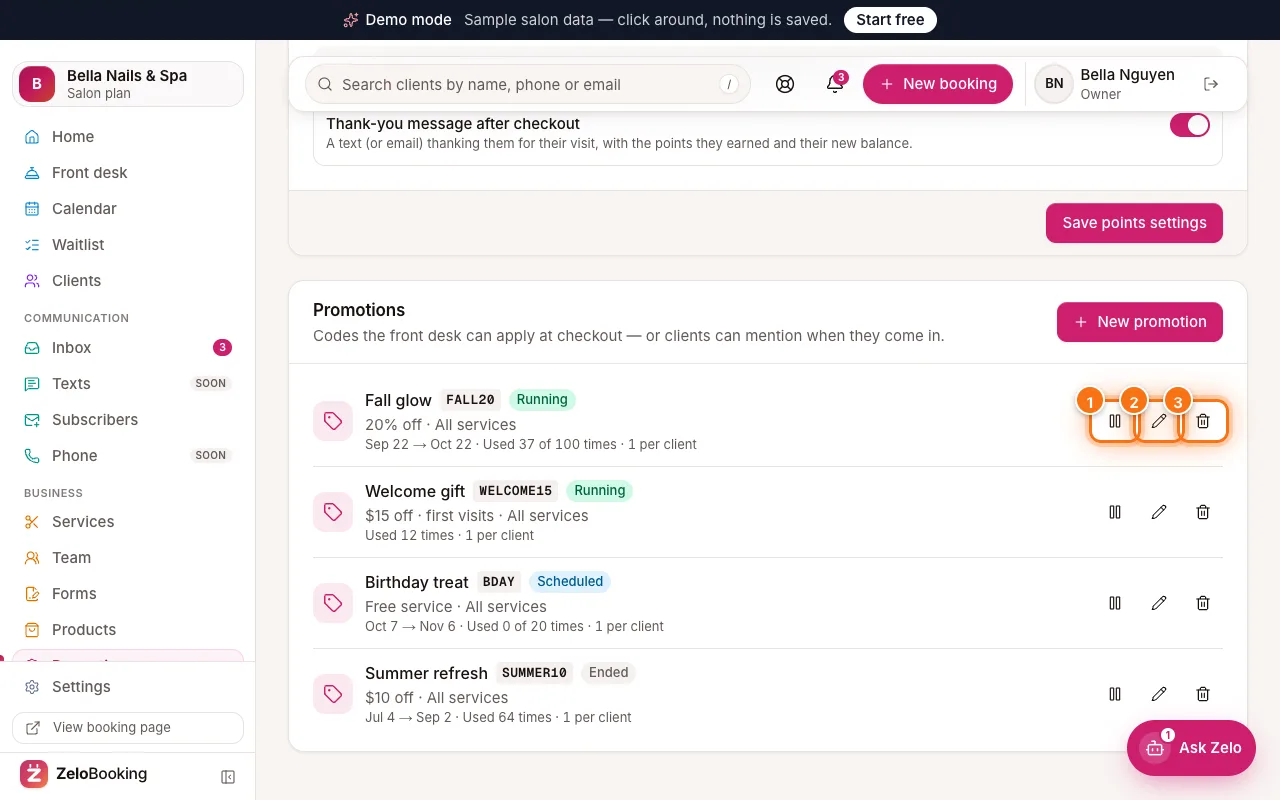
A promotion with its pause (1), edit (2) and remove (3) buttons highlighted - 5
Apply a code at checkout
On the Front desk board, click “Checkout” on the visit. In “Promotion”, click the running promotion (1), or type the client’s code in “Or a code” (2). The discount shows in the total before you click “Complete visit”.
Tip: Clients see your running offers and codes in their client app under “Offers for you”.
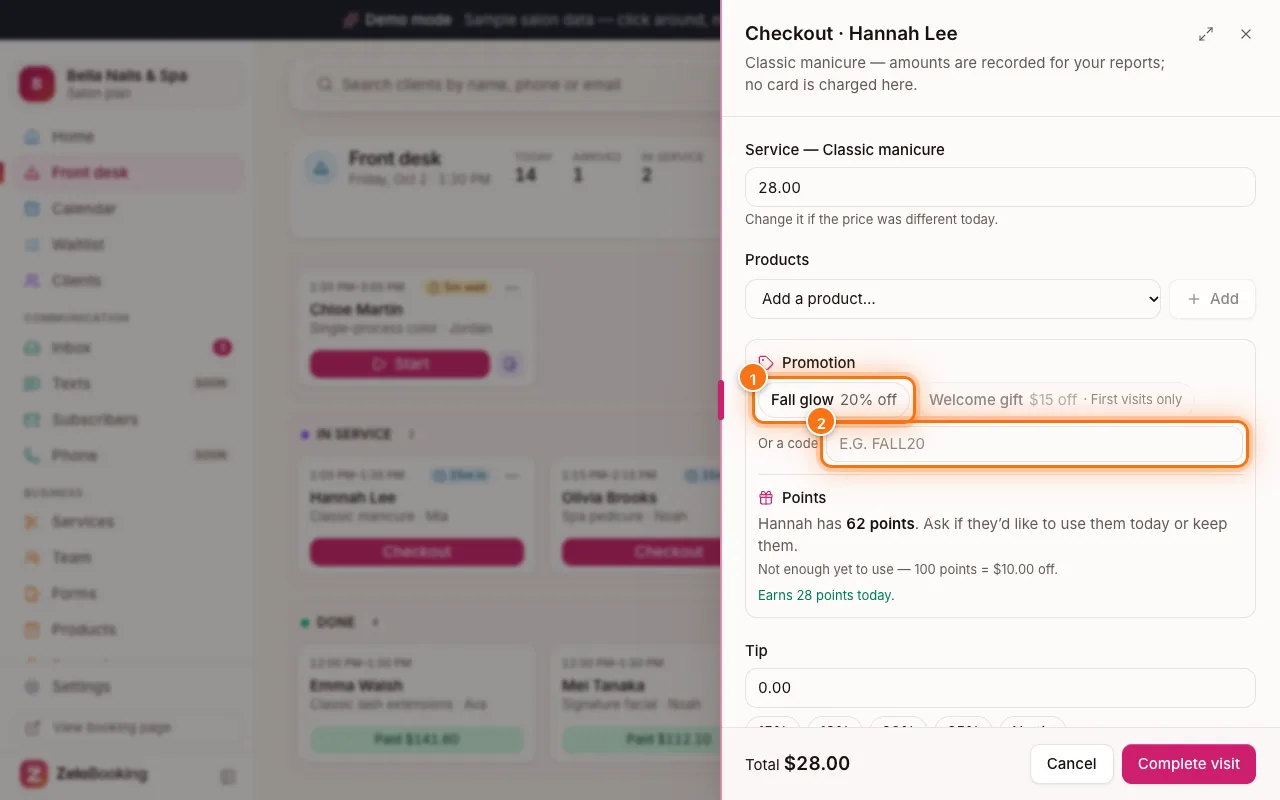
Checkout Promotion box with a running promotion (1) and the code box (2) highlighted