Video walkthrough coming soon
The written steps below cover everything in the meantime.
About 8 min to follow along
When you’re done
- Every supply counted, with days left before it runs out
- Supplies that go down by themselves as services are done
- Orders and deliveries in one place, plus quick stock takes
- 1
Add your supplies
Go to the left menu → Inventory and click “Add item” (1). Have a barcode on the package? Click “Scan” (2) and point your camera at it — if it’s new, you can add the item straight away. “Stock take” (3) is for counting everything later.
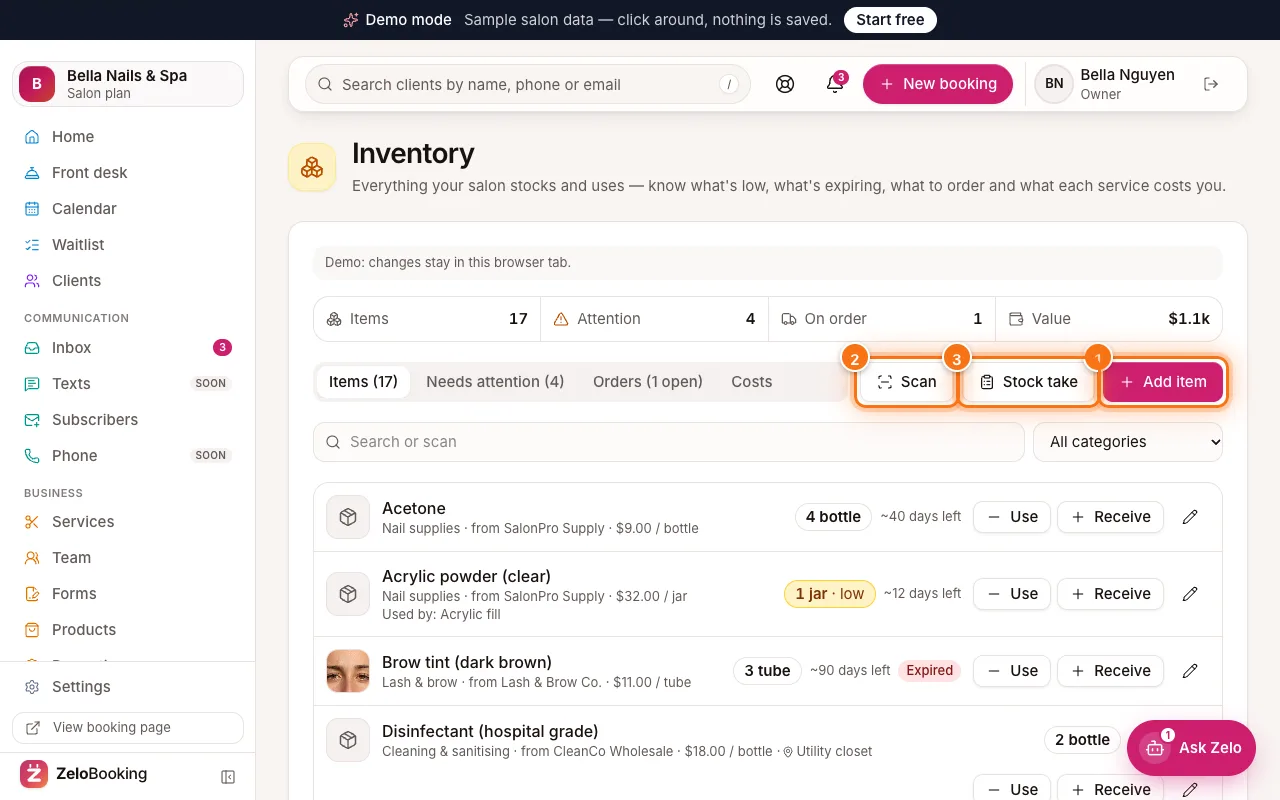
Inventory with Add item (1), Scan (2) and Stock take (3) highlighted - 2
Fill in the item
- “Name” (1) — e.g. “Gel top coat”.
- “Counted in” (2) — bottle, box, pack, ml…
- “On hand now” — how many you have today.
- “Reorder at” (3) — you’re alerted at or below this number. “Stock up to” is your target after ordering.
- “Cost per piece”, “Stored at”, “Supplier” and “Supplier contact” — optional, but they make ordering easy.
- “Barcode” and “Expires on” — optional.
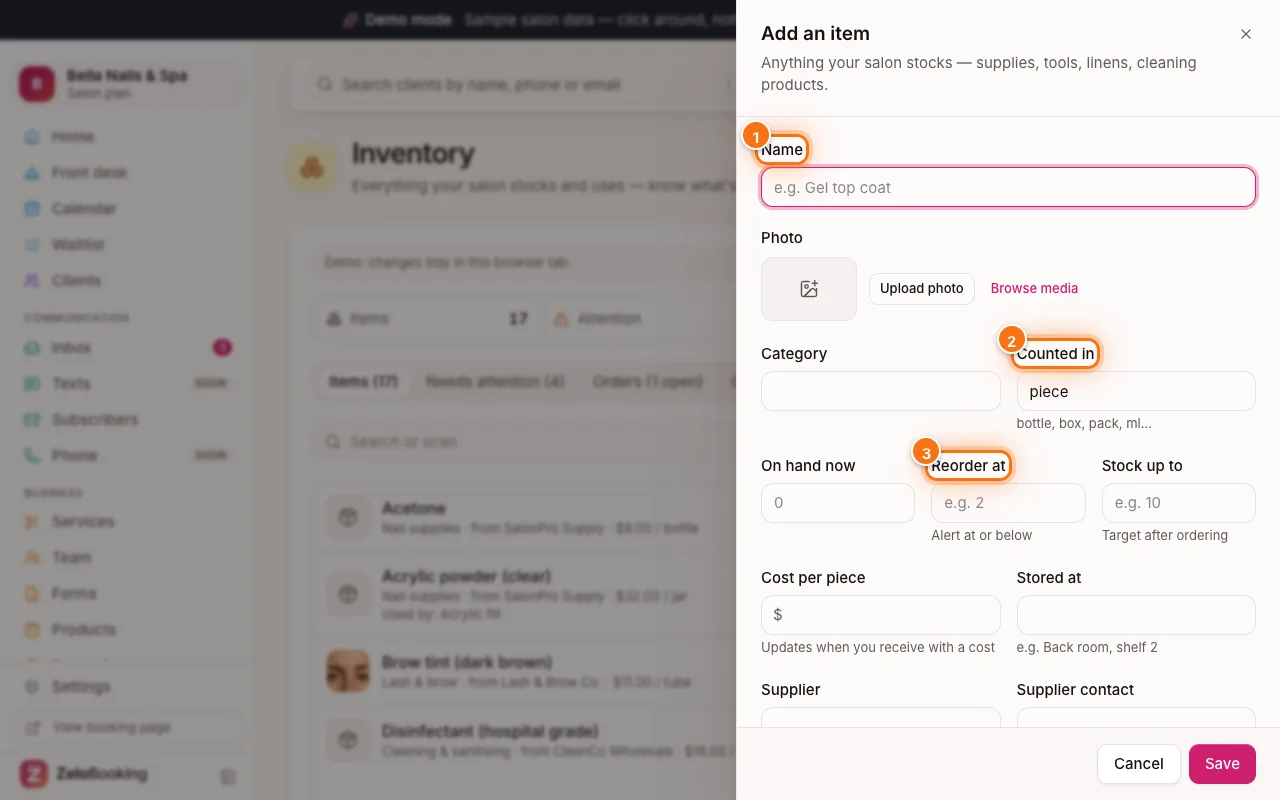
Add an item form with Name (1), Counted in (2) and Reorder at (3) highlighted - 3
Link it to your services
Scroll to “Used by services” (1). Tick the services that use this item and enter how much each one uses — for example 0.1 bottle of top coat per gel manicure.
When a booking for one of these services is marked completed, that amount comes off automatically. The “Costs” tab then shows what supplies each service really costs you. Click “Save”.
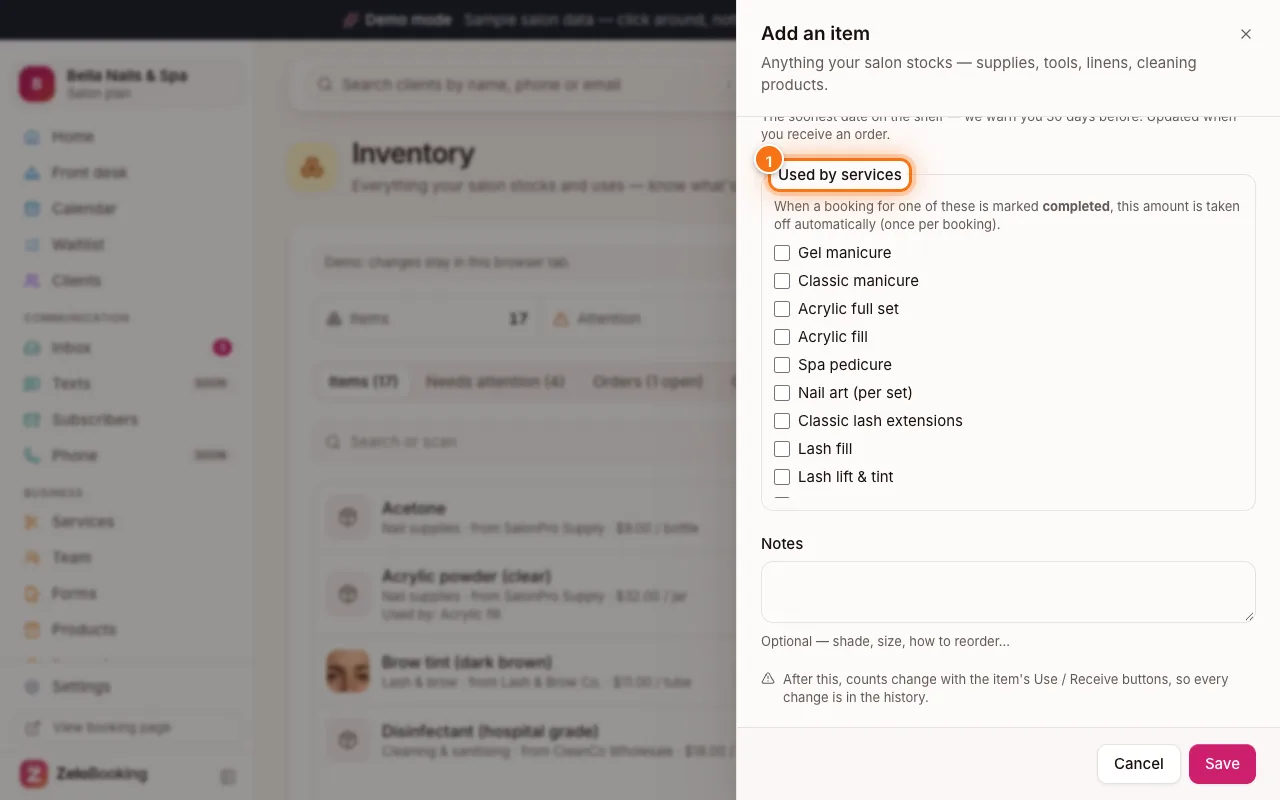
Add an item form with Used by services highlighted (1) - 4
Read the list and adjust by hand
Each item shows how many you have, a “low” warning, and how many days it will last (1) at your current pace. Expiry warnings appear too.
Used something outside a booking, or it got damaged? Click “Use” (2). A delivery arrived? Click “Receive” (3). The pencil edits the item.
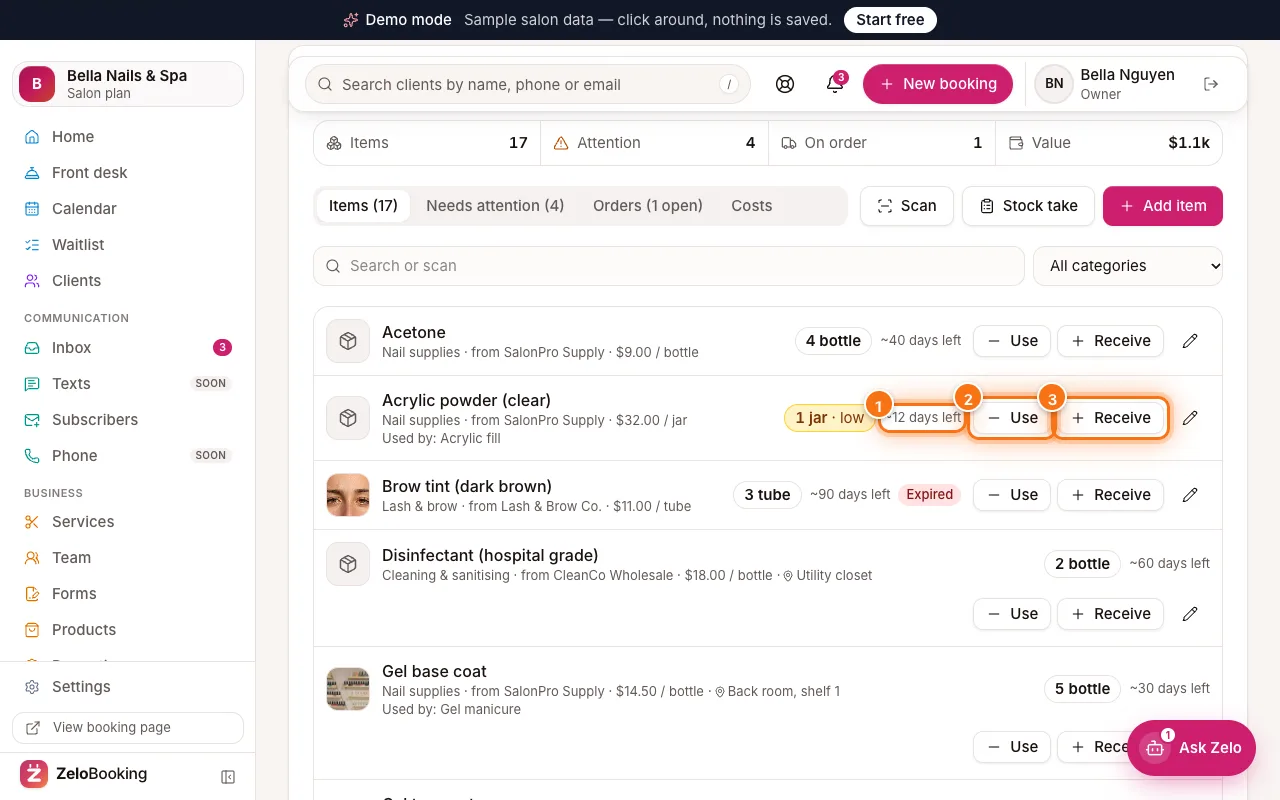
An inventory item’s days left (1), Use (2) and Receive (3) highlighted - 5
See what needs attention
Click “Needs attention” (1) for items that are low, expired or expiring soon. “Orders” (2) is where you order them.
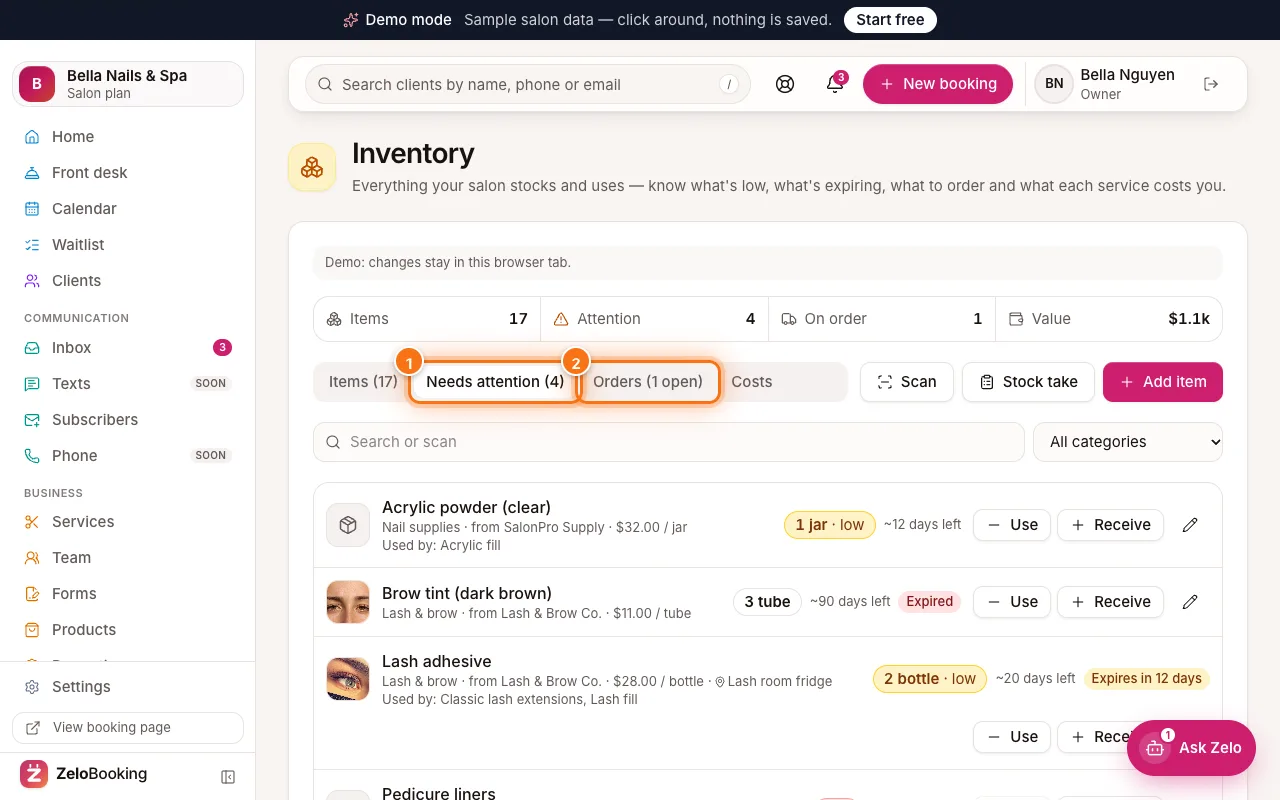
Inventory with the Needs attention (1) and Orders (2) tabs highlighted - 6
Order and receive deliveries
In “Orders”, suggestions are grouped by supplier. Click “Create order” (1) to order what’s low — then “Copy” or “Print” it for your supplier (or email it if the supplier contact is an email).
When it arrives, click “Receive delivery” (2), change any amount that didn’t come, and click “Add to stock”. Counts, costs and expiry dates update together.
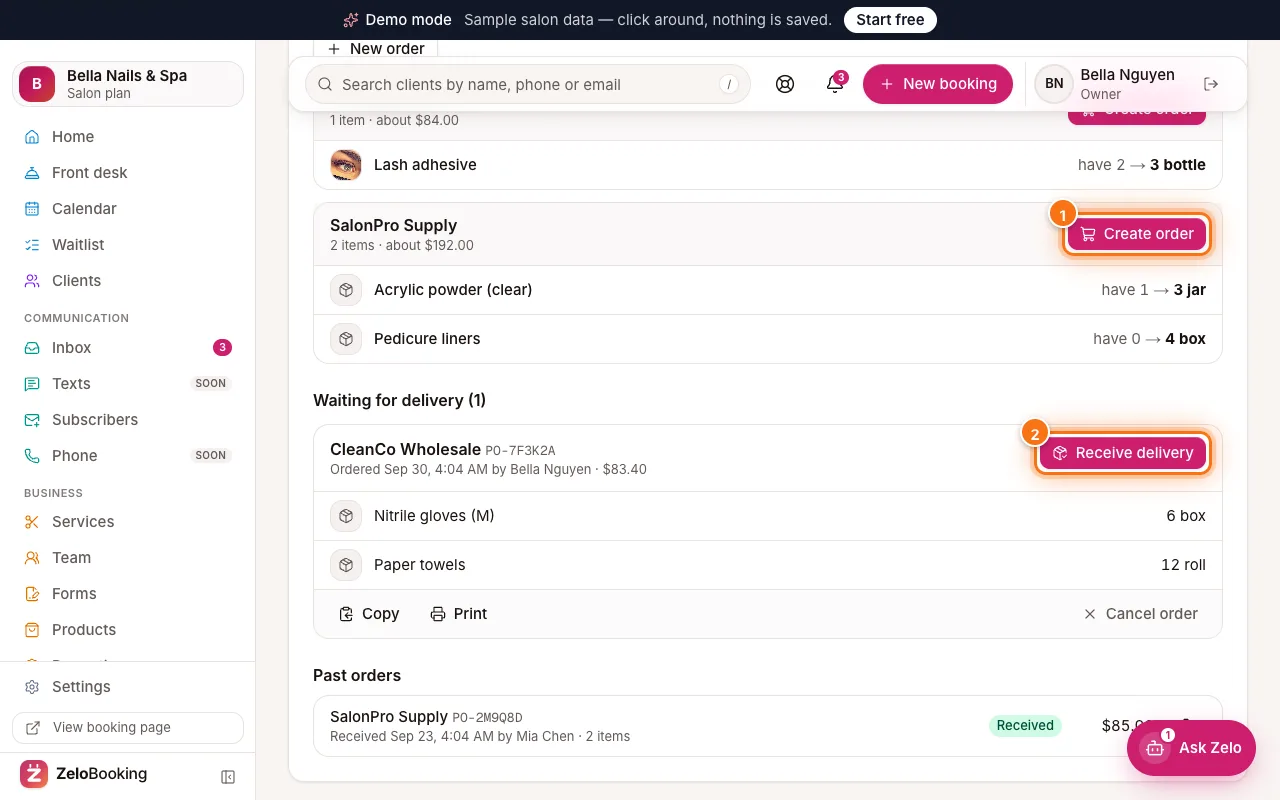
Inventory orders with Create order (1) and Receive delivery (2) highlighted - 7
Do a stock take
Once a month, click “Stock take”. Type what’s on each shelf (leave an item empty to skip it); “Count sheet” prints a paper list. Click “Review” (1) to see differences, then “Save count”.
Tip: Your progress is kept on this device, so you can count one room now and the rest later.
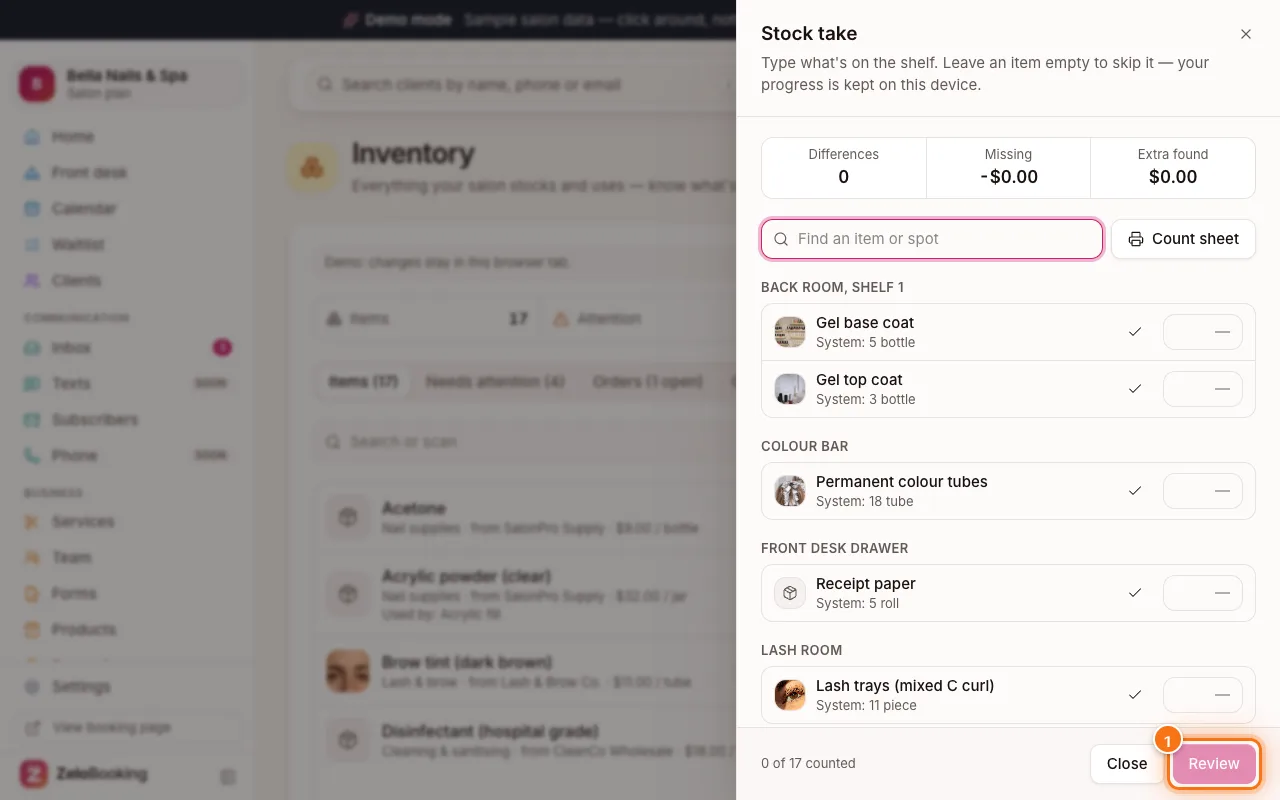
Stock take window with the Review button highlighted (1)