Video walkthrough coming soon
The written steps below cover everything in the meantime.
About 6 min to follow along
When you’re done
- Online booking only offers times you’re actually open
- Holidays and closed days blocked for everyone
- Clear notice, booking window and cancellation rules
- 1
Turn on opening hours and set each day
Open Settings (bottom of the left menu) → “Hours & booking rules”. In the “Opening hours” panel, make sure the “Use opening hours” switch (1) at the top right is on.
For each day, use the switch (2) to mark it open or closed, then pick the opening time (3) and the closing time next to “to”.
Online booking — your booking page, website widget and AI receptionist — only offers times inside these hours and inside each team member’s own hours. Your team can still book after hours from the calendar.
Tip: With “Use opening hours” off, online booking simply follows each person’s working hours (Team).
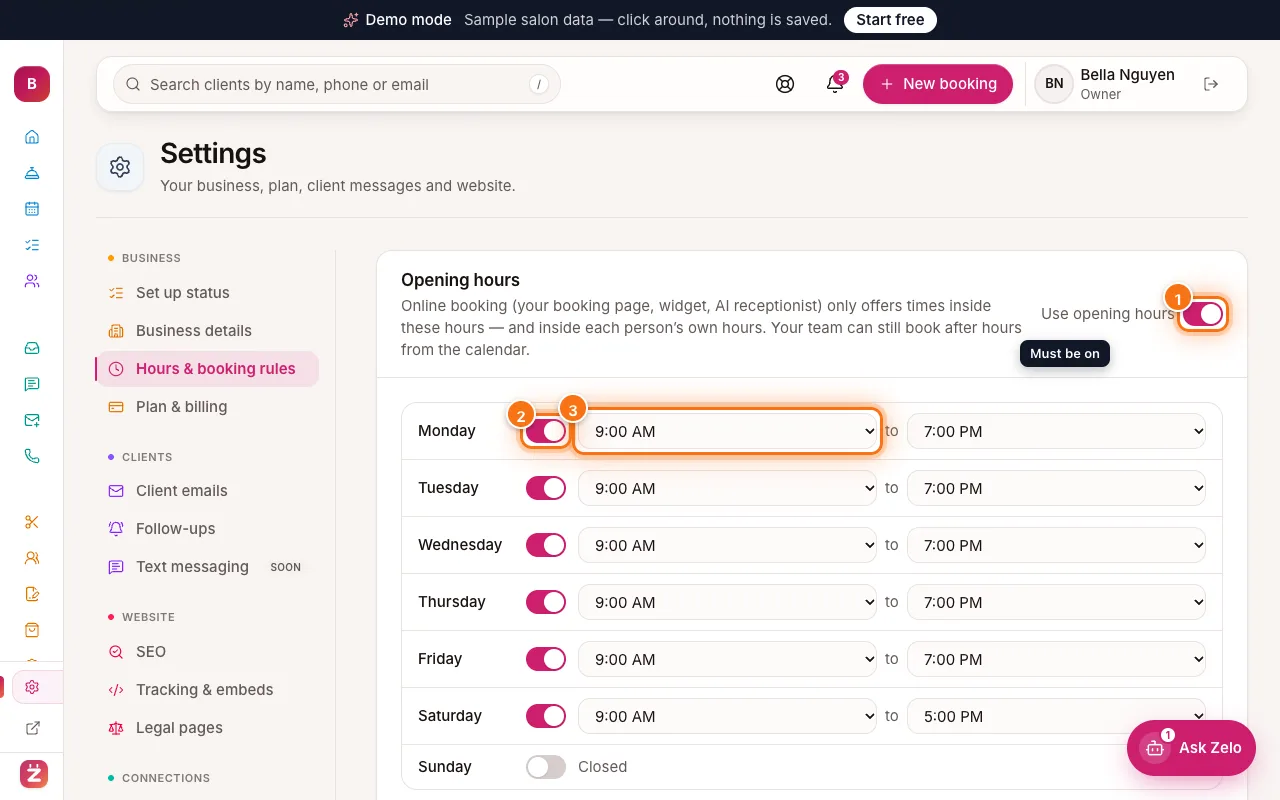
Opening hours with the Use opening hours switch (1), Monday’s switch (2) and opening time (3) highlighted - 2
Copy hours and save
Same hours every weekday? Set Monday, then click “Monday’s hours to all weekdays” (1) to copy them to Tuesday–Friday.
Click “Save opening hours” (2). You’ll see “Saved.” next to the button.
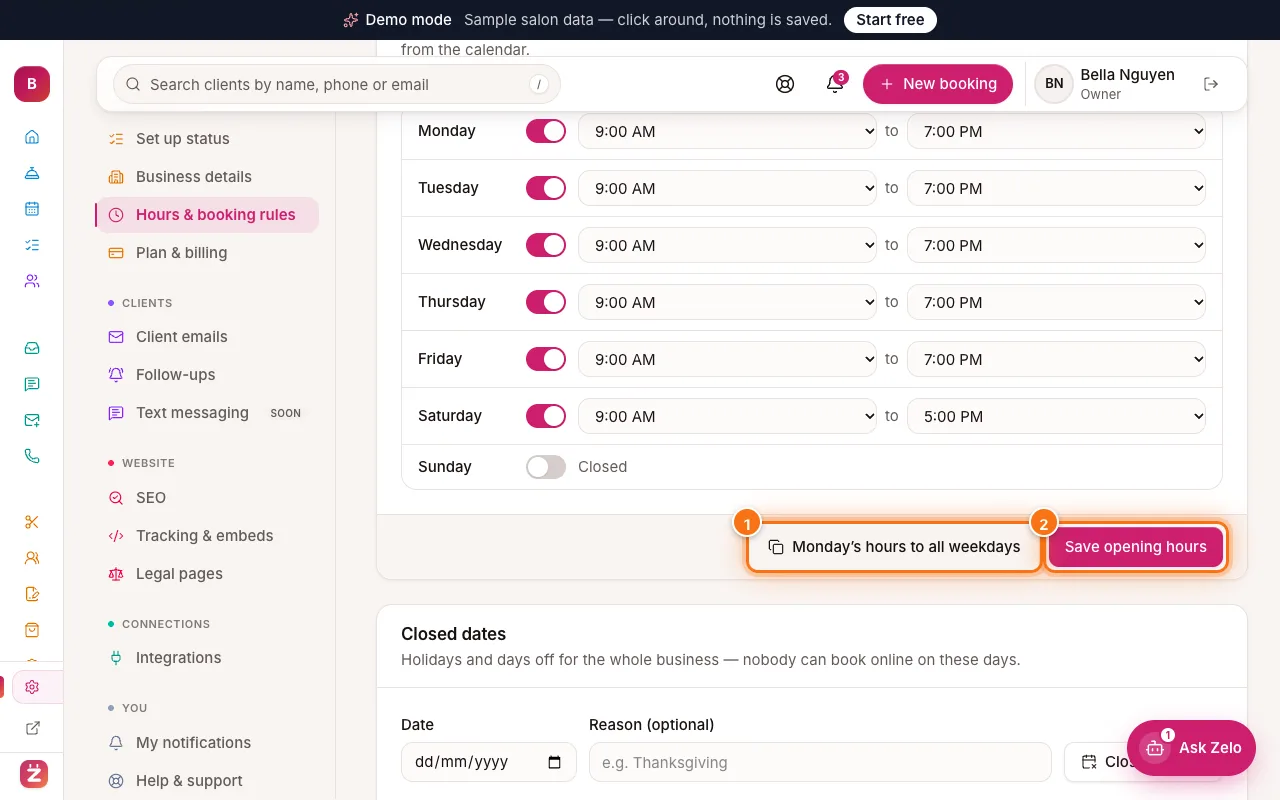
Opening hours footer with Monday’s hours to all weekdays (1) and Save opening hours (2) highlighted - 3
Add closed dates
Scroll to “Closed dates”. Pick the “Date” (1), type an optional “Reason (optional)” (2) such as “Thanksgiving” or “Staff training”, and click “Close this day” (3).
The date appears in the list below. Nobody can book online that day. To open it again, click the bin icon on its row.
Tip: Bookings you already have on that day stay — contact those clients to move them.
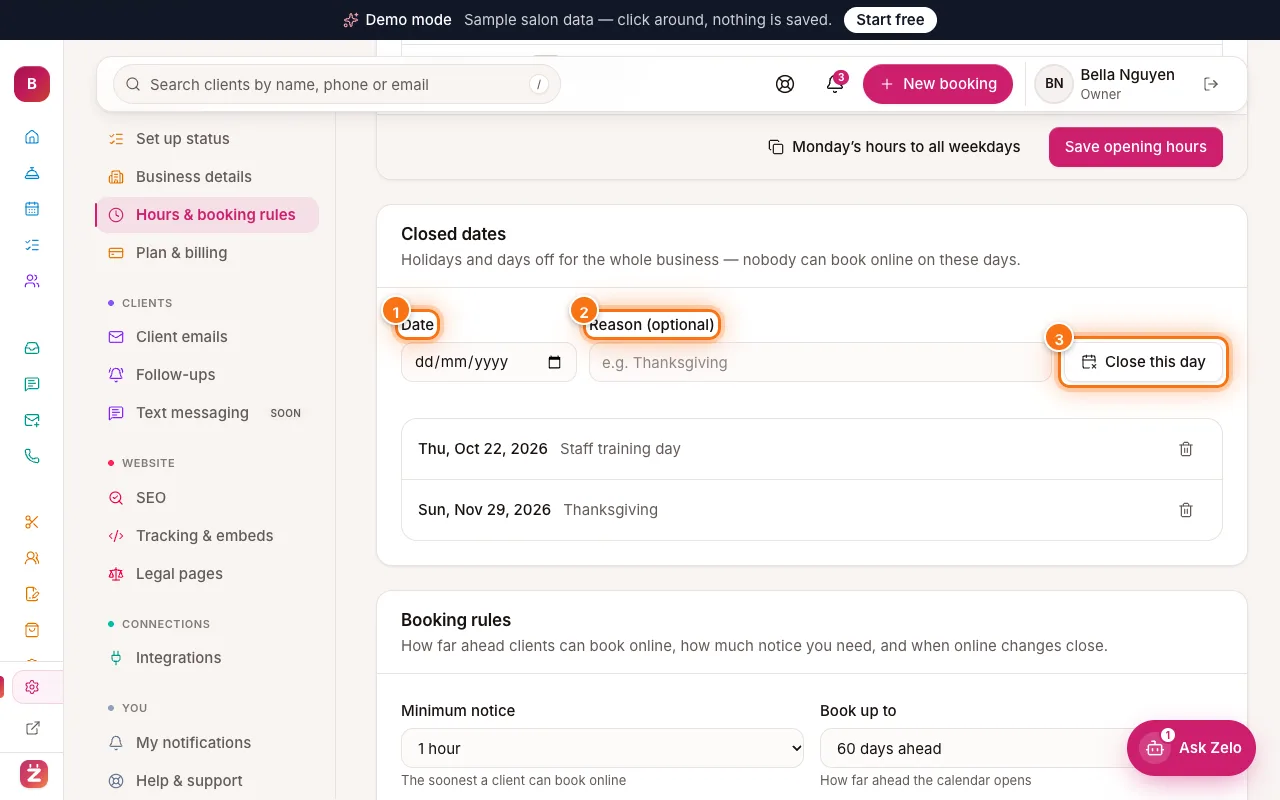
Closed dates with Date (1), Reason (2) and Close this day (3) highlighted - 4
Choose your booking rules
In “Booking rules”, set:
- “Minimum notice” (1) — the soonest a client can book online, from “No notice” to a few days
- “Book up to” (2) — how far ahead the calendar opens, from 7 days to 1 year
- “Start times every” (3) — the steps clients pick from: every 5, 10, 15, 20 or 30 minutes, or every hour
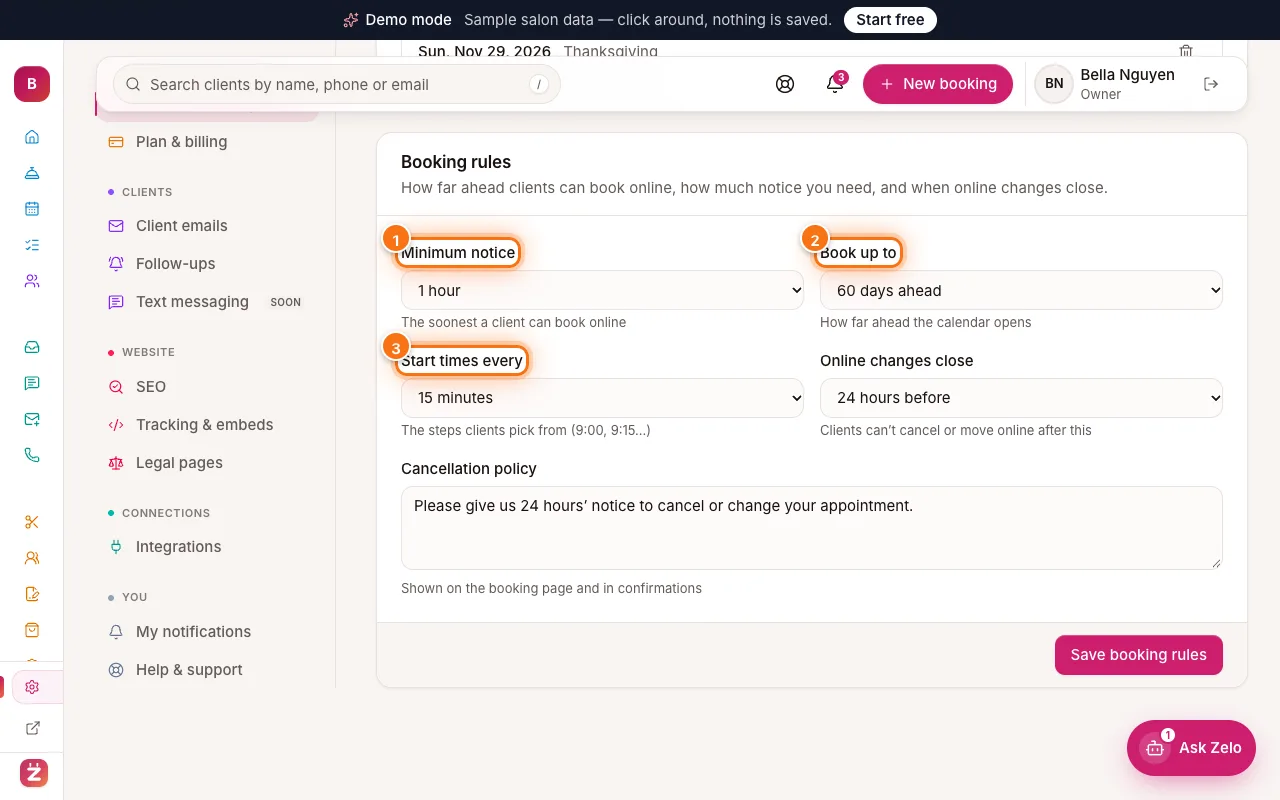
Booking rules with Minimum notice (1), Book up to (2) and Start times every (3) highlighted - 5
Set when online changes close and your policy
Pick “Online changes close” (1) — for example “24 hours before”. After that, clients can’t cancel or move online and are asked to call you.
Write your “Cancellation policy” (2) in plain words. It’s shown on the booking page, in the client app and in confirmation emails.
Click “Save booking rules” (3). Changes apply to your booking page straight away.
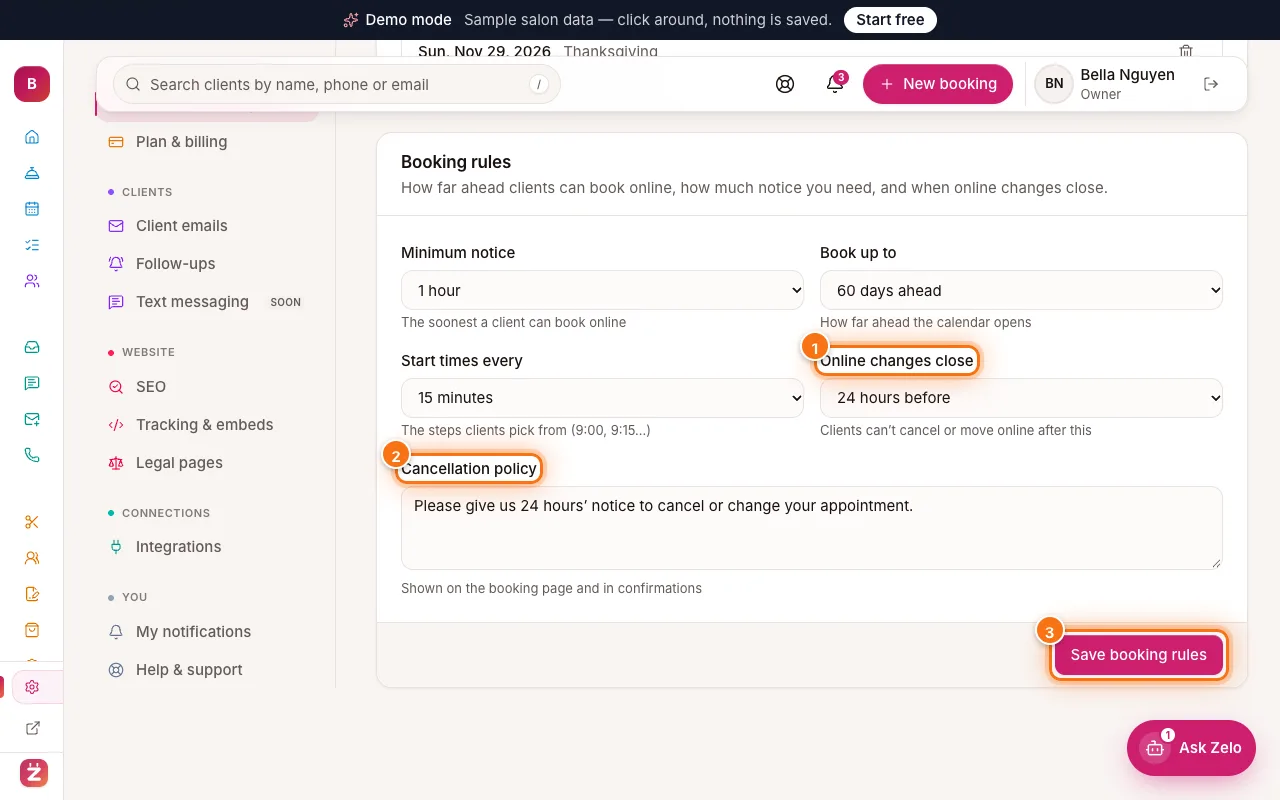
Booking rules with Online changes close (1), Cancellation policy (2) and Save booking rules (3) highlighted