Video walkthrough coming soon
The written steps below cover everything in the meantime.
About 8 min to follow along
When you’re done
- Pages built from the sections you want, in the right order
- Each section in the layout that suits it
- Your own words on every section
- 1
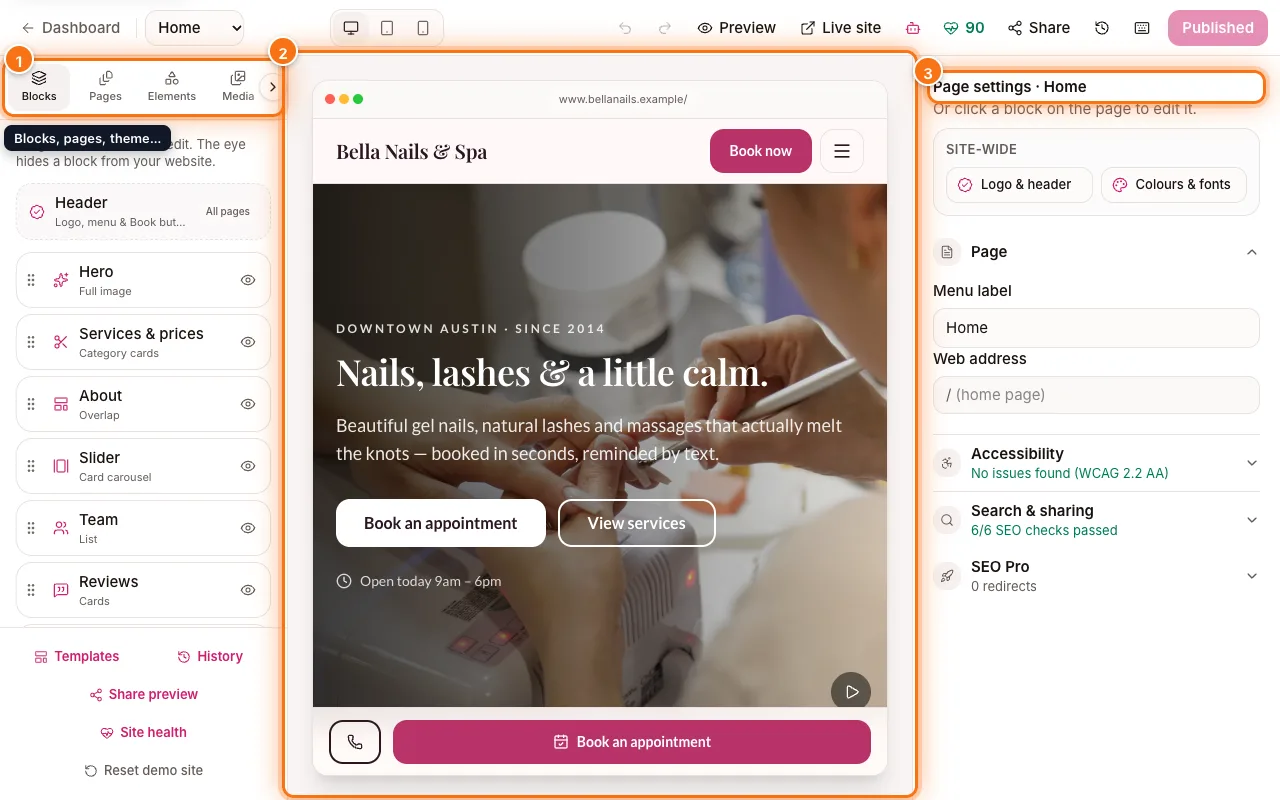
See the sections of your page
In the editor, click the “Blocks” tab in the left panel. It lists every section (block) on this page, from top to bottom, between the Header and Footer (those two are shared by all pages).
- Drag a section by its handle (1) to move it up or down.
- Click the eye (2) to hide a section from your website without deleting it. Click it again to show it.
- Click a section’s name to select it and open its settings.
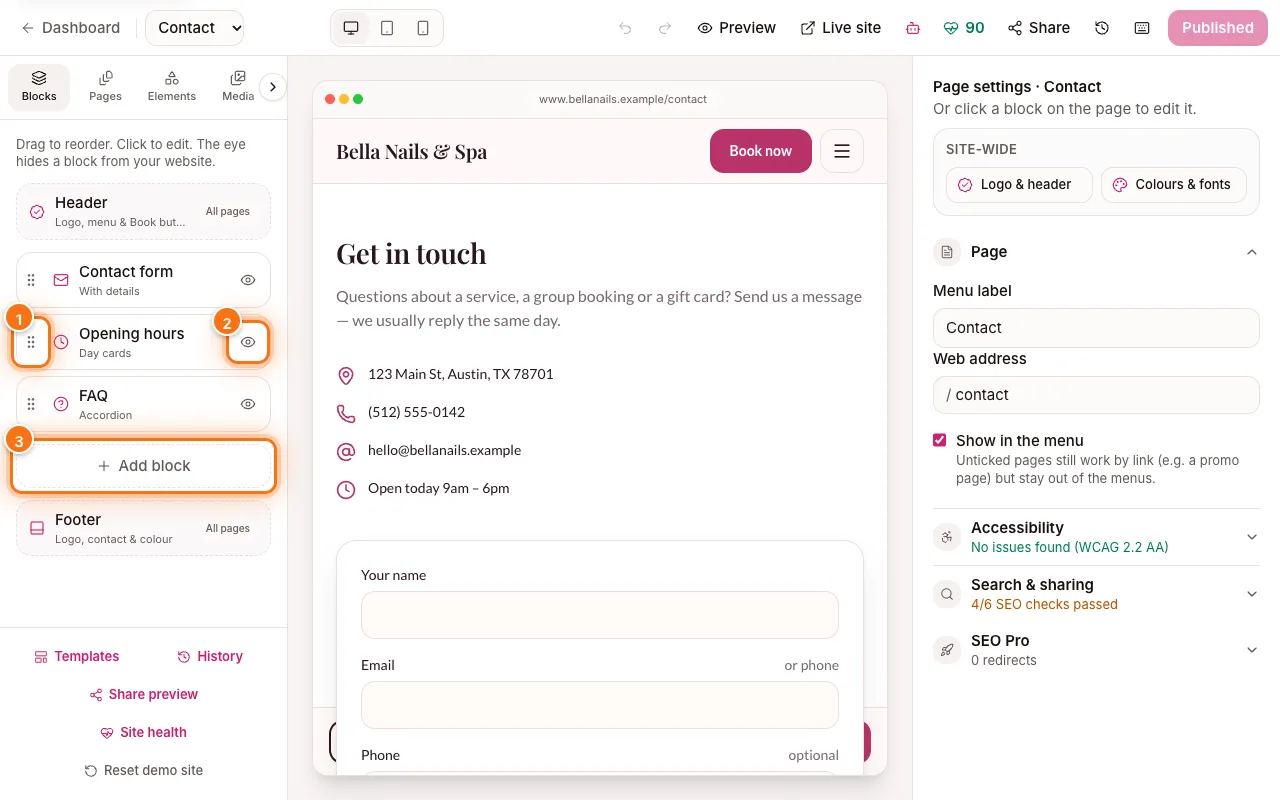
Blocks tab listing a page’s sections, with a drag handle (1), the eye (2) and Add block (3) highlighted - 2
Add a new section
Click “Add block” under the list (3 in the picture above). You can also point at a section on the page and click the round + button under it to add one right there.
In the “Add a block” window, type what you need in the search (1) — prices, photos, video, map — or scroll the list. Click a block (2) to add it. Each block has 10 layouts you can switch between later.
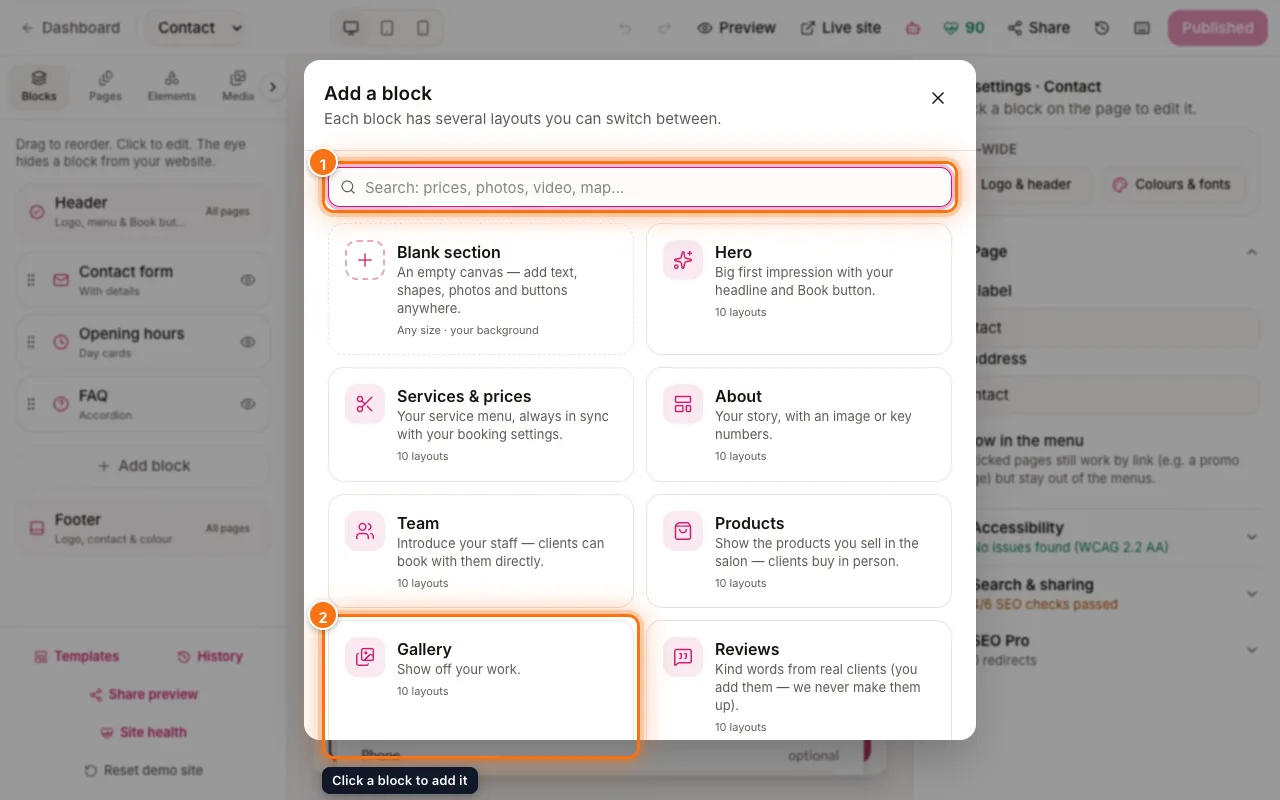
Add a block window with the search box (1) and the Gallery block (2) highlighted - 3
Move, copy or delete from the page
Click a section on the page. A small toolbar (1) appears at its top right: drag handle, move up, move down, hide, duplicate and delete (2).
Deleted something by mistake? Click “Undo” in the message at the bottom (or press ⌘Z / Ctrl+Z) to bring it back.
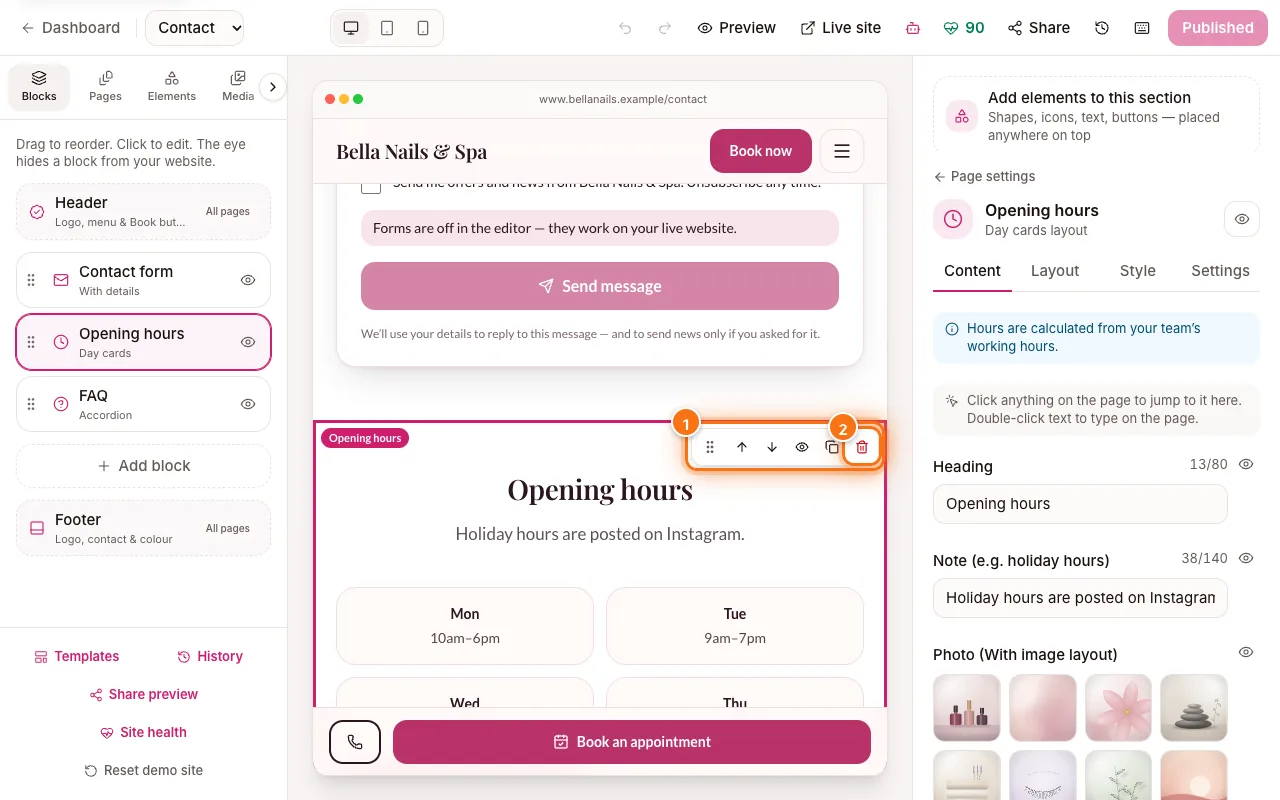
A selected section with its toolbar (1) and the Delete button (2) highlighted - 4
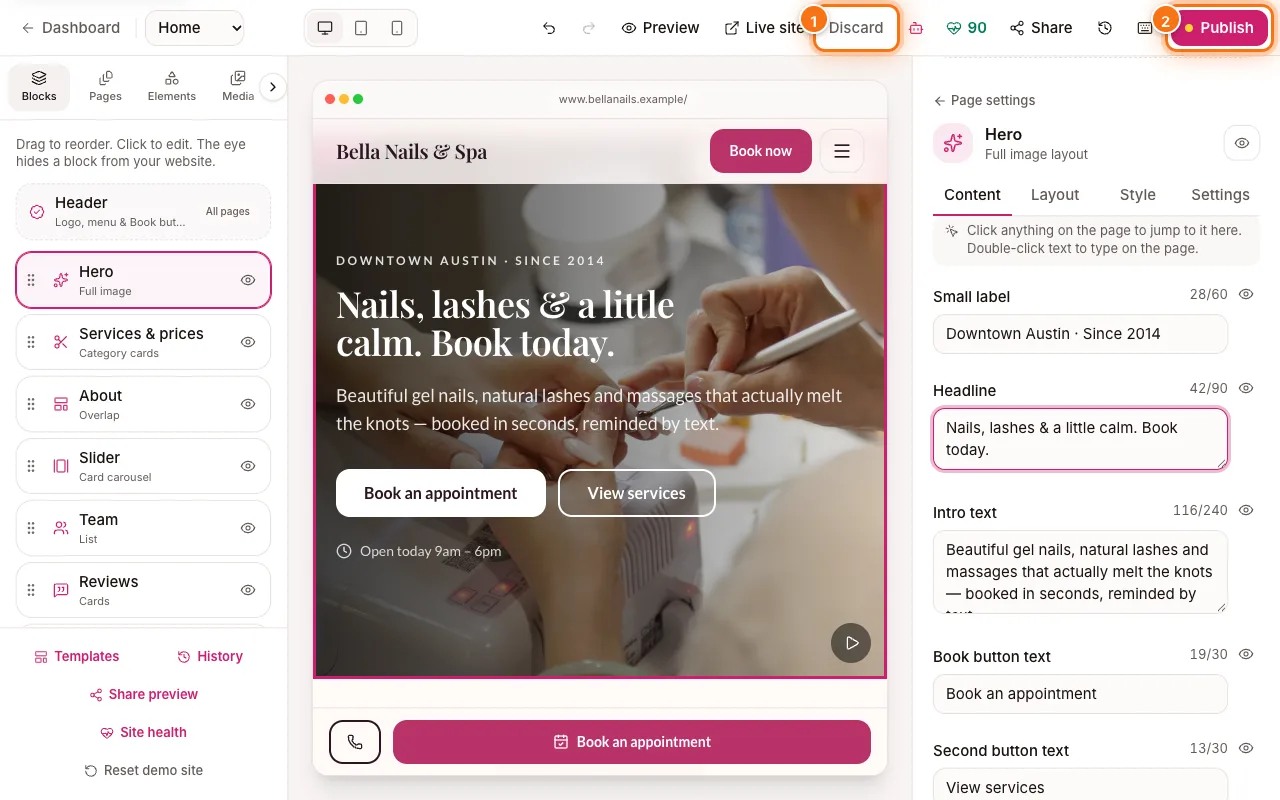
Change the words: Content tab
With a section selected, the right panel opens on “Content” (1). Type in the boxes — for example the “Headline” (2). The page updates as you type.
You can also double-click text right on the page and type there. The eye next to a field hides just that piece (for example a second button) on your site.
Tip: Services, Team and Opening hours sections read from your dashboard — a blue note at the top tells you where to change that information.
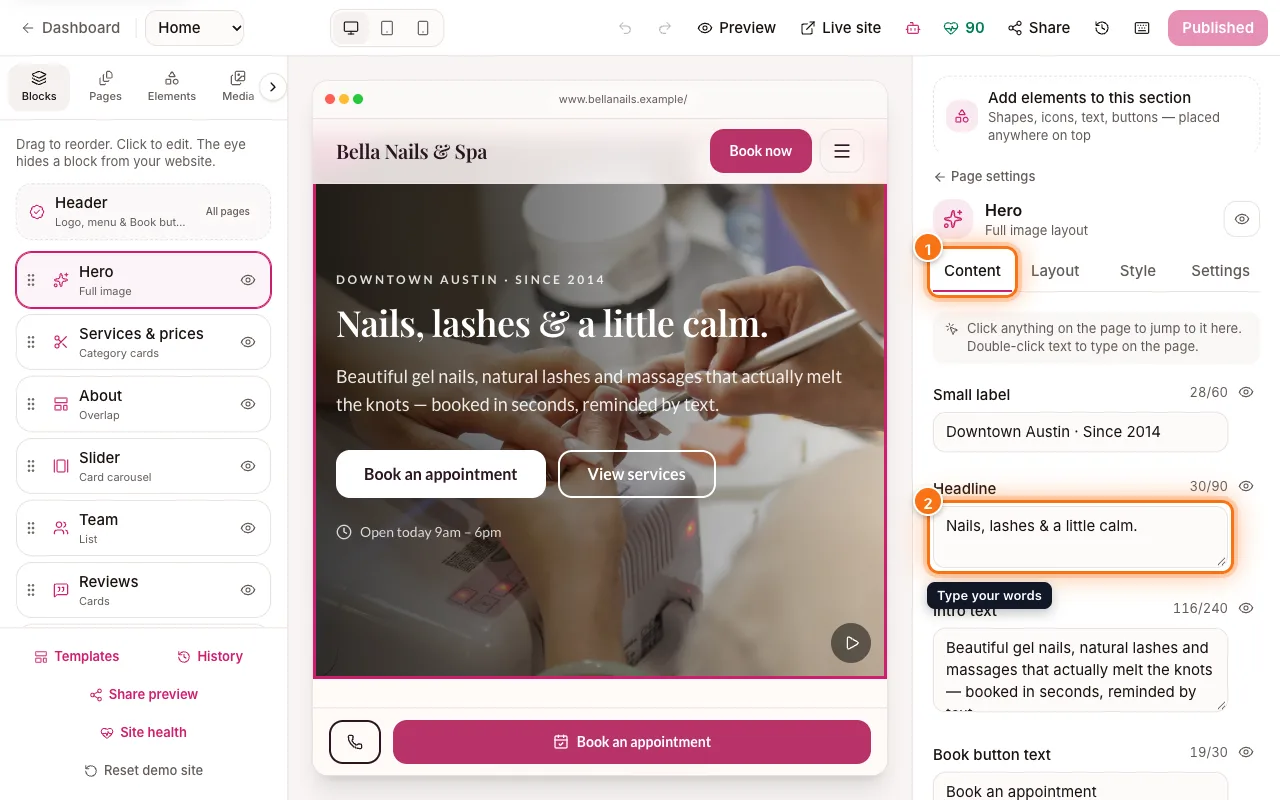
Hero section settings with the Content tab (1) and the Headline box (2) highlighted - 5
Pick a layout: Layout tab
Click “Layout” (1). Every layout is shown as a small live preview with your real content. Click one (2) to switch — your words and photos stay.
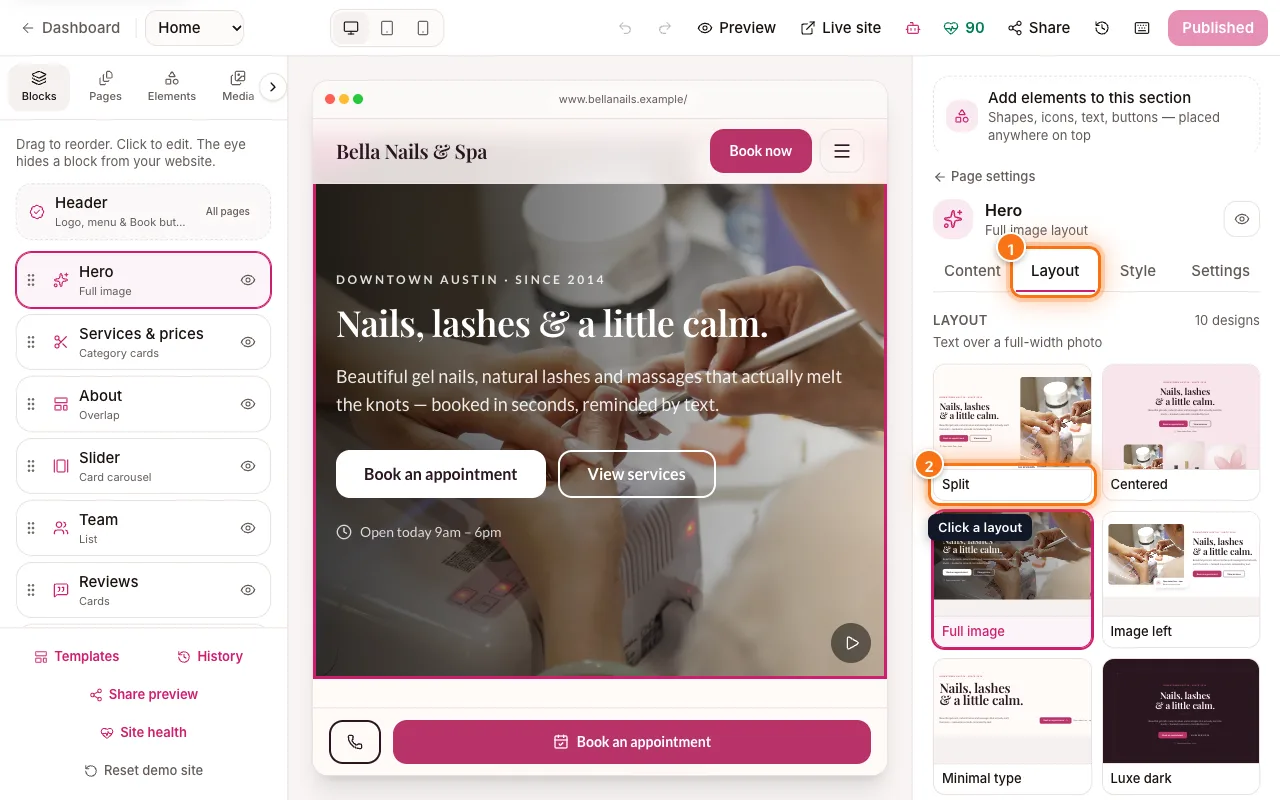
Layout tab (1) with live layout previews and one layout (2) highlighted - 6
Background and spacing: Style tab
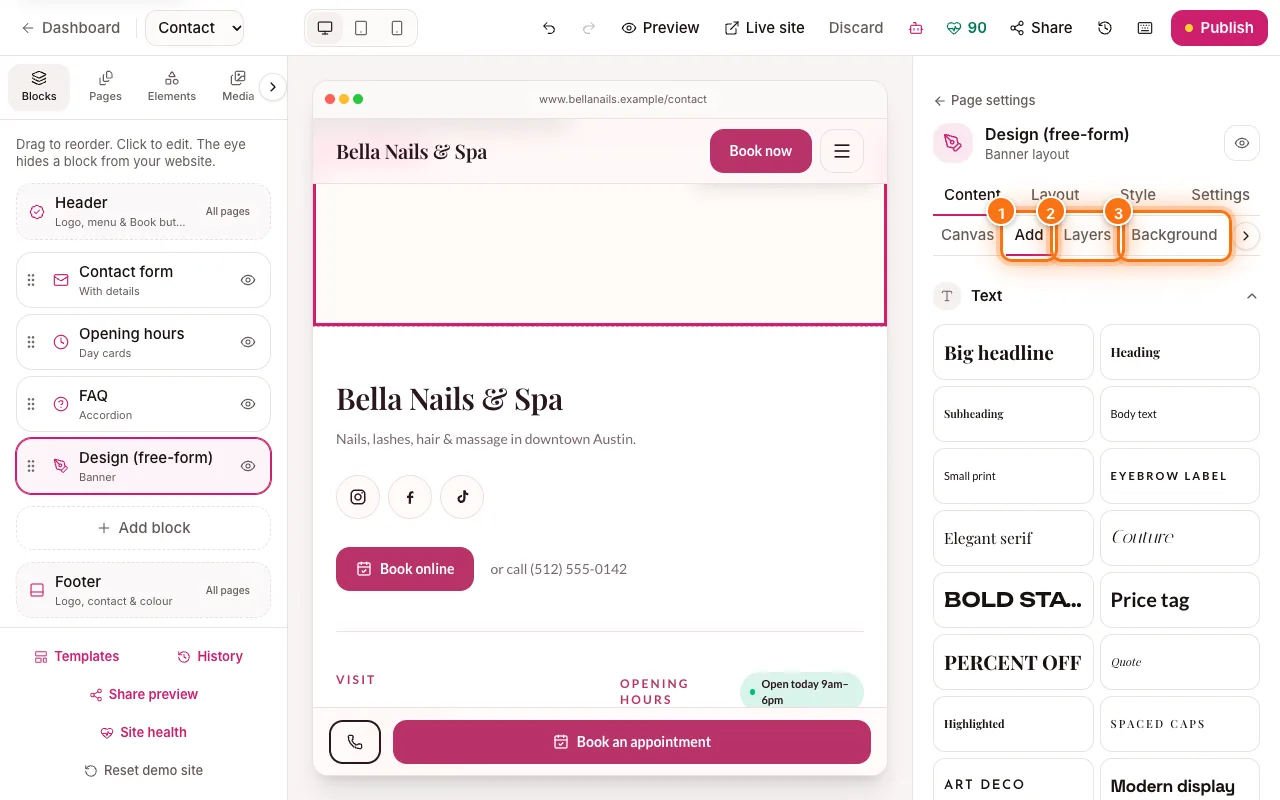
Click “Style” (1). Under “Background” (2) choose:
- Theme — the normal page colours.
- Colour — any colour, with a “Strength” slider.
- Image — a photo, with an overlay to keep text easy to read.
With Colour or Image you can also set “Text colour” to Auto, Light or Dark. “Spacing above & below” (3) makes the section tighter or roomier. Click “Reset” to go back to the theme look.
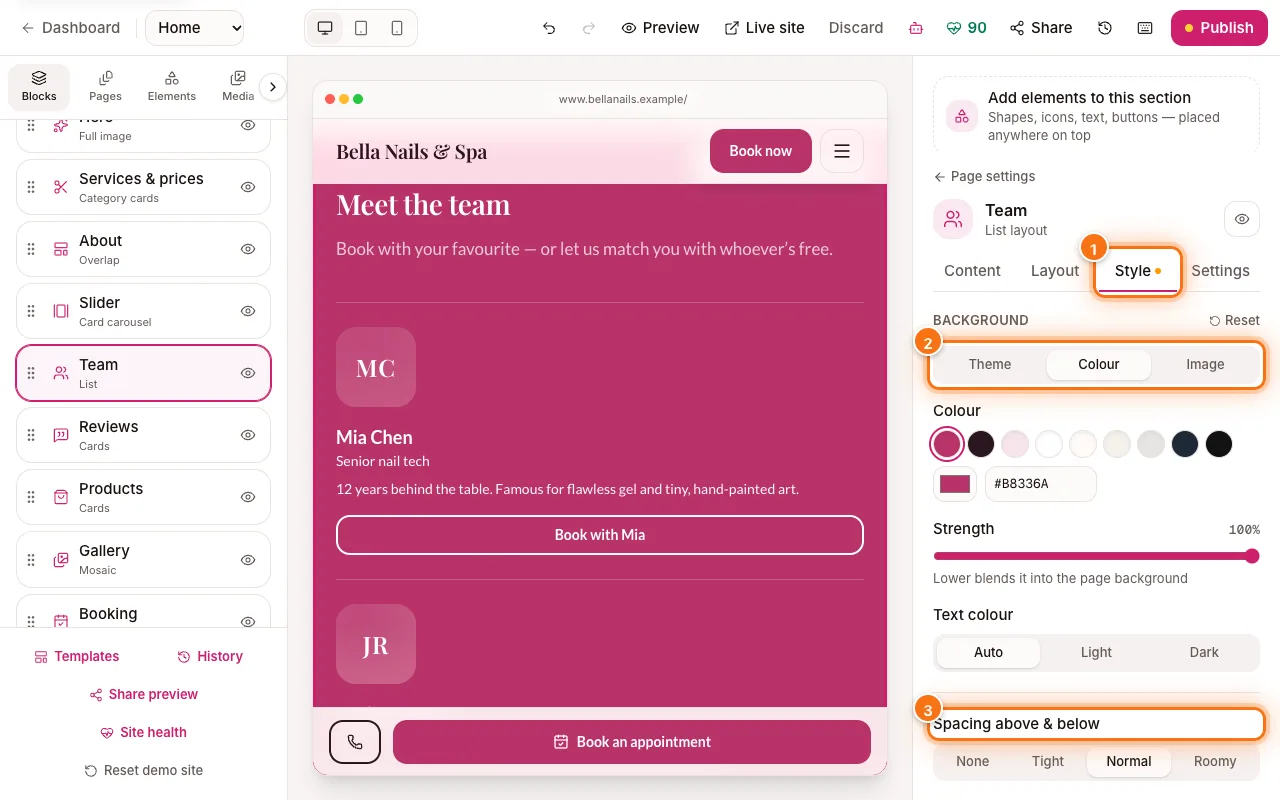
Style tab (1) with Background type (2) and Spacing above & below (3) highlighted - 7
More options: Settings tab
Click “Settings” (1):
- “Visible on your website” (2) — the same as the eye: turn it off to keep the section without showing it.
- “Section link” (3) — give the section a short name (like “offers”) so buttons and menus can scroll straight to it.
- “Copy or move to another page” — pick a page, then click “Copy” or “Move”.
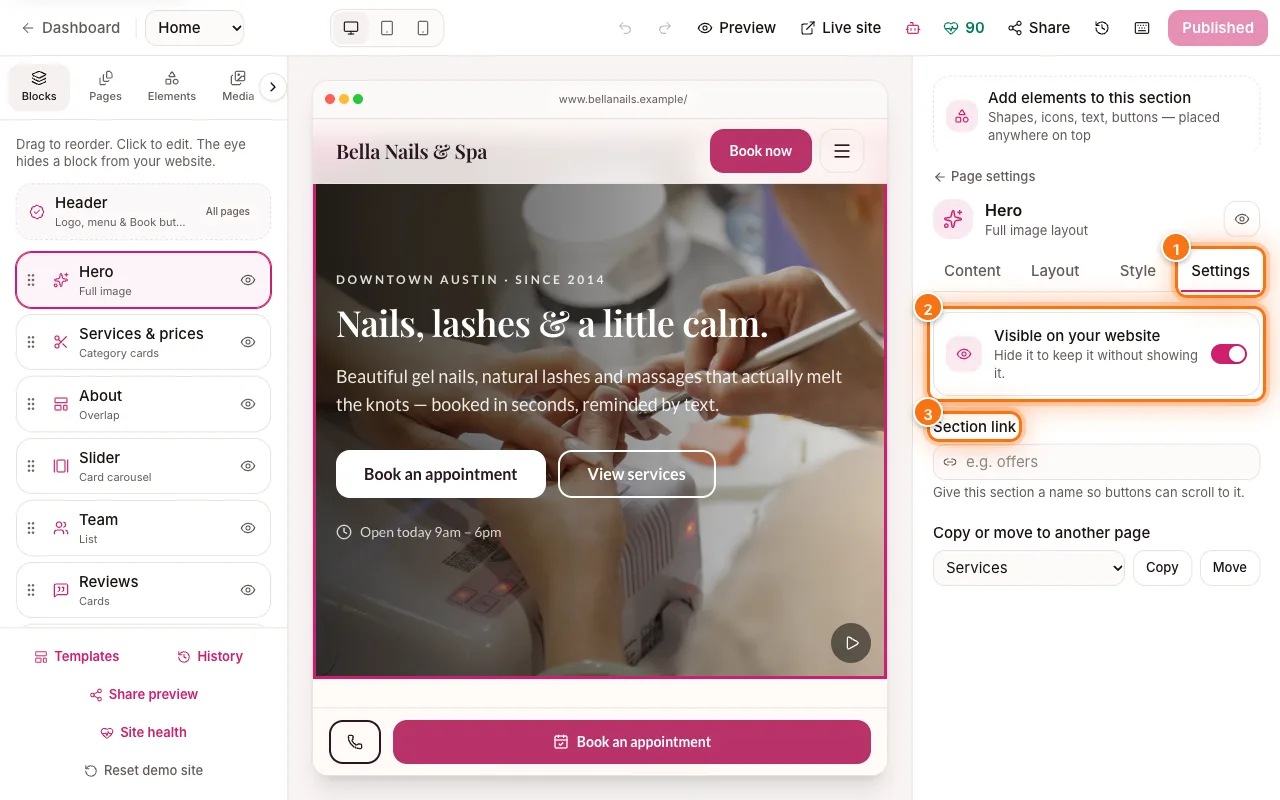
Settings tab (1) with Visible on your website (2) and Section link (3) highlighted