Video walkthrough coming soon
The written steps below cover everything in the meantime.
About 6 min to follow along
When you’re done
- Your brand colours and fonts on every page
- Your logo in the header and a favicon in the browser tab
- A header and Book button that fit your business
- 1
Start with a style preset
In the editor’s left panel, click “Theme” (1). (If you can’t see it, click the small arrow at the end of the tabs.)
“Style presets” (2) is open at the top. One click sets colours, fonts, corners and buttons together — for example “Soft glow”, “Luxe spa” or “Barber bold”. Start here, then fine-tune below.
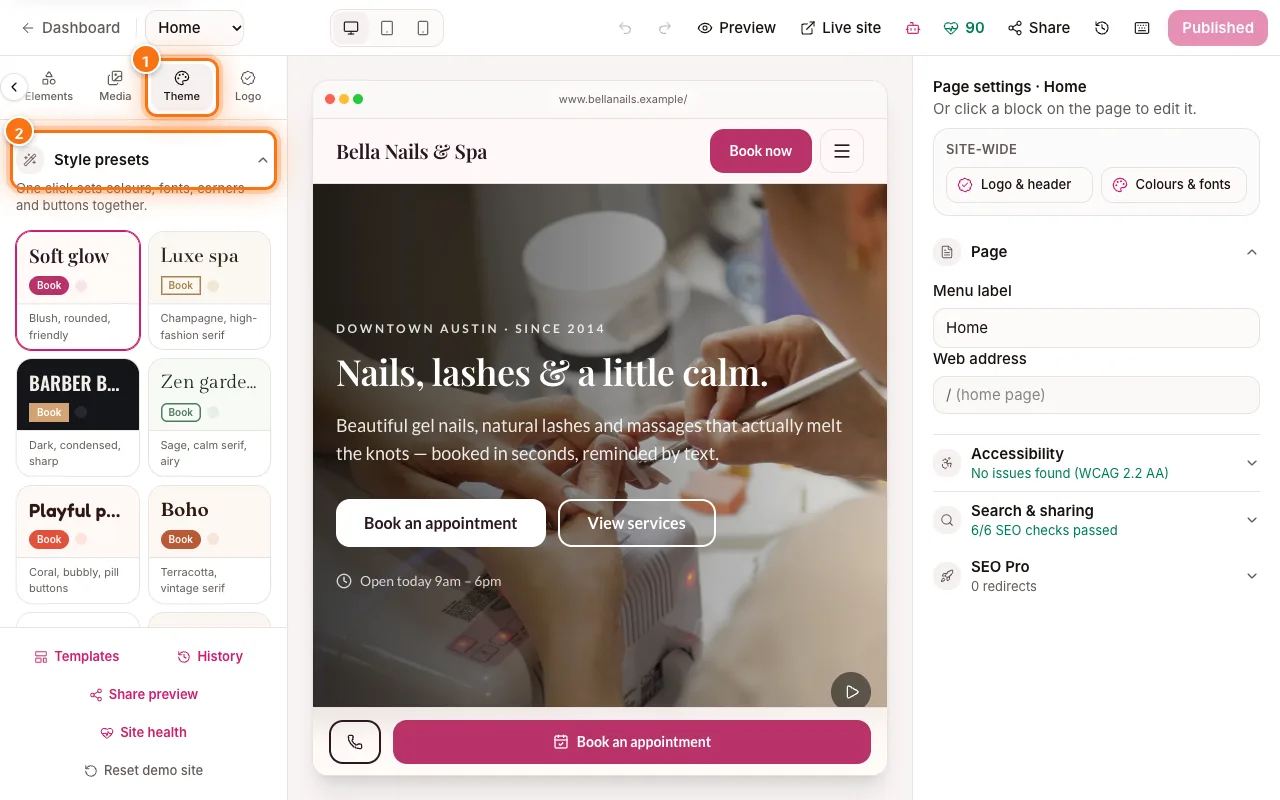
Theme tab (1) with Style presets (2) highlighted - 2
Choose your colours
Open “Colours”. Click a palette (1) — light ones first, dark ones under “Dark”.
To use your exact brand colour, click the colour square next to “Custom brand colour” (2) and pick it, or type its code (like #B8336A).
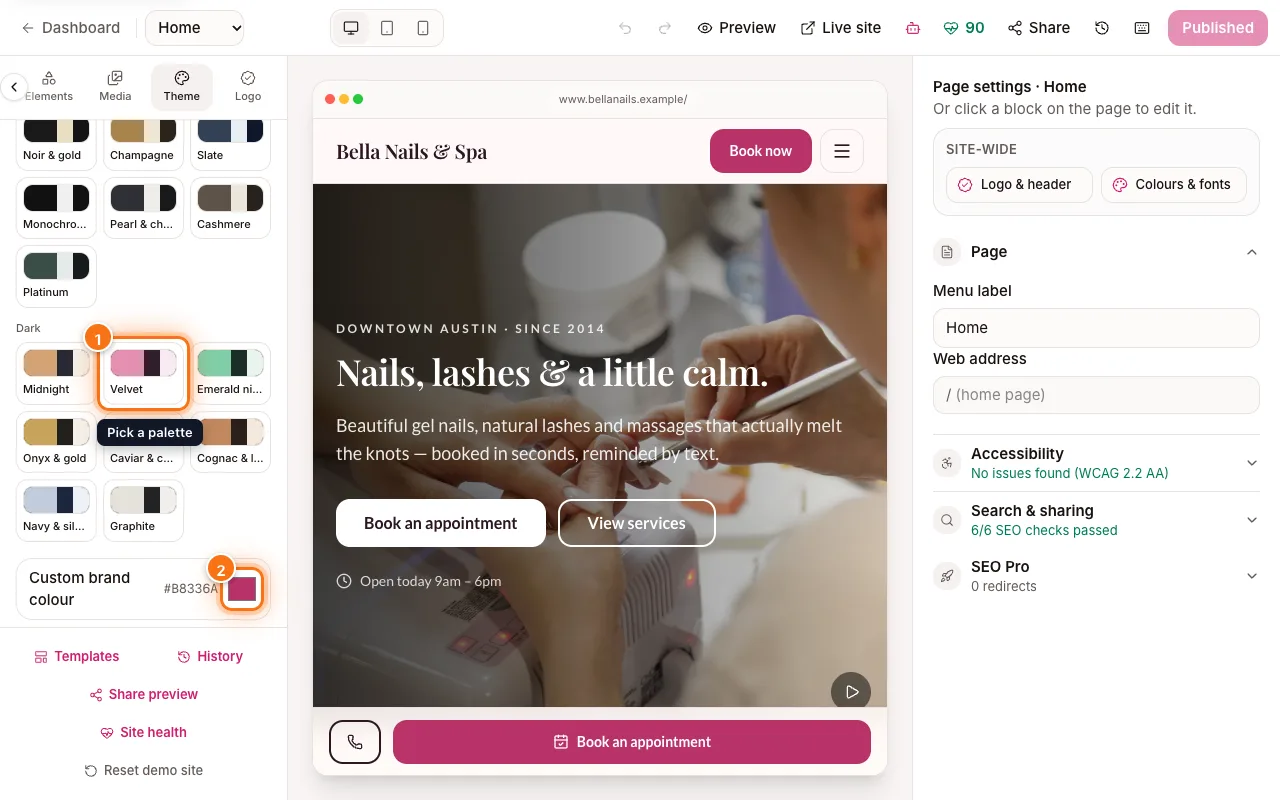
Colours section with the Velvet palette (1) and Custom brand colour (2) highlighted - 3
Pick your fonts
Open “Fonts” (1) and click a pair — each one sets a heading font and a body font, like “Modern”, “Elegant” or “Playful”. The page updates straight away.
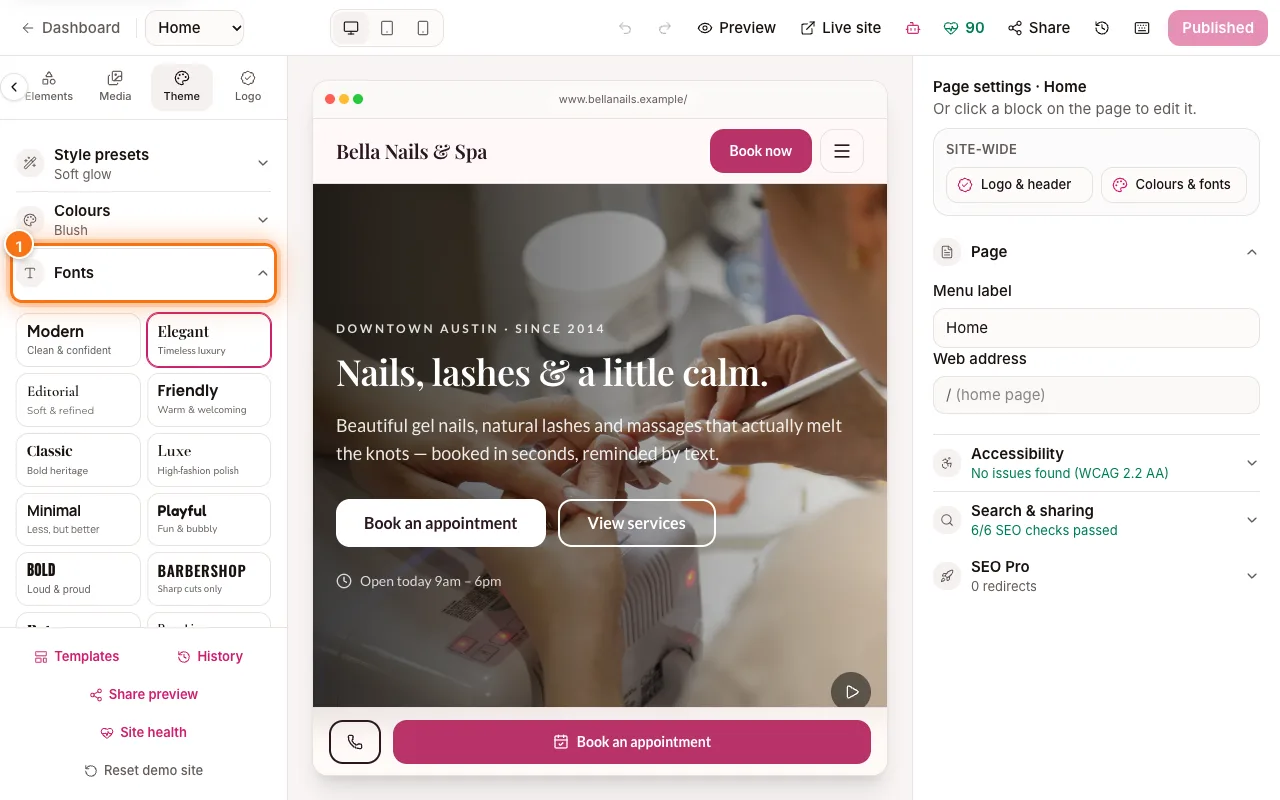
Fonts section (1) open with font pairs to choose from - 4
Buttons, corners and spacing
- “Buttons” (1) — Solid (filled) or Outline.
- “Corners” (2) — Sharp, Soft, Round or Pill.
- “Spacing” — how much room between sections (Compact, Cozy and more).
- “Footer” — Light, Dark or Brand colour.
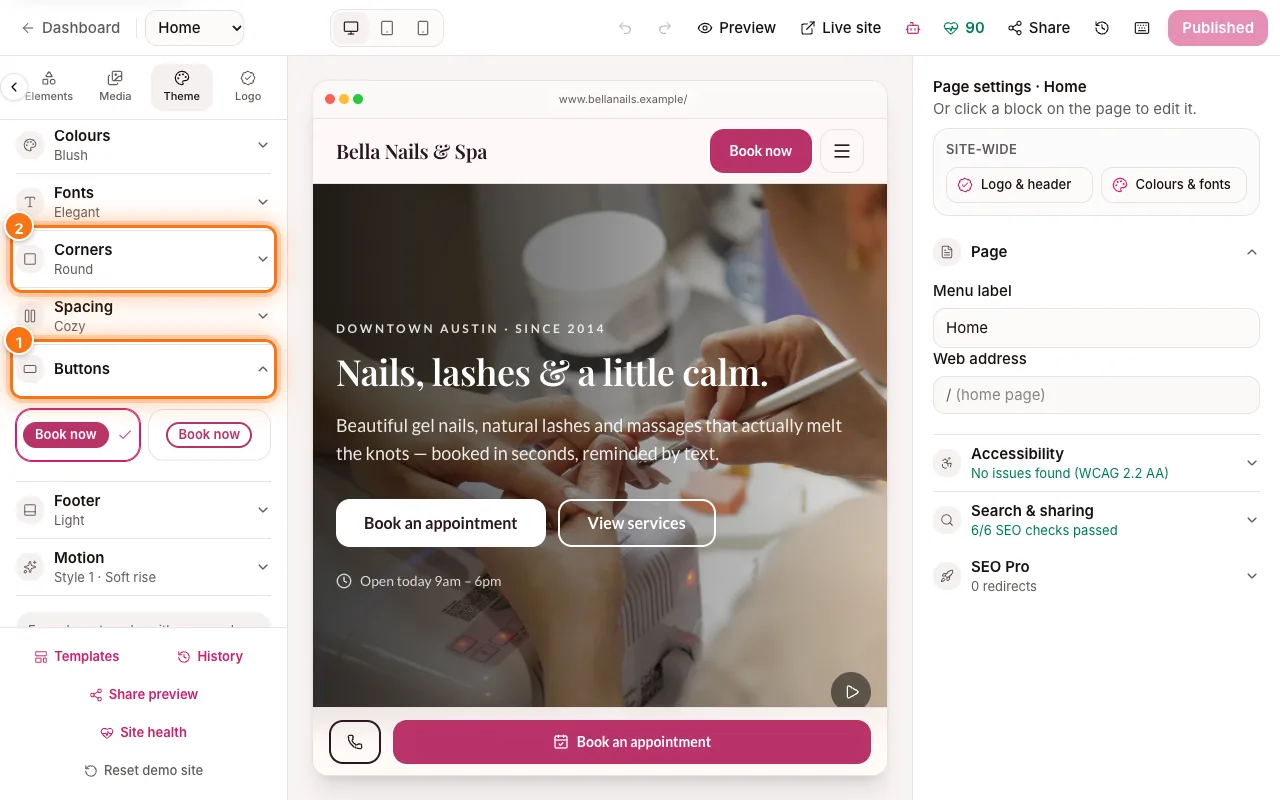
Theme tab with Buttons (1) and Corners (2) highlighted - 5
Add motion (optional)
Open “Motion” (1). Choose “None” for no animation, or a style such as “Style 1 · Soft rise” — sections fade in gently as visitors scroll. Point at a style to see it play.
Visitors who switch off motion on their device never see animations.
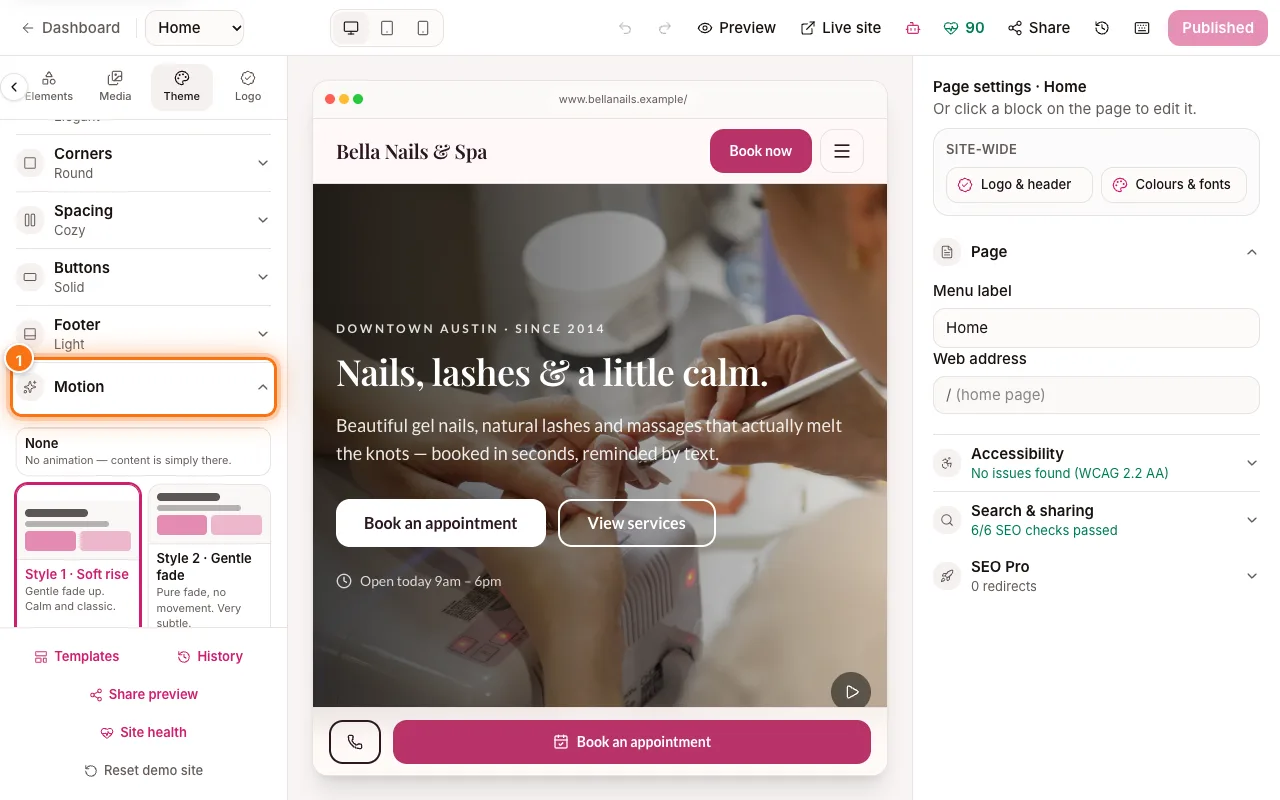
Motion section (1) open with None and the motion styles - 6
Set your logo and favicon
Click the “Logo” tab (1). Under “Logo”, choose “Name” (your business name in your heading font), “Monogram” or “Image” to upload your logo file.
“Favicon” (2) is the small icon in the browser tab and on phone home screens — use letters on a shape, or an image. “Header” (3) is below.
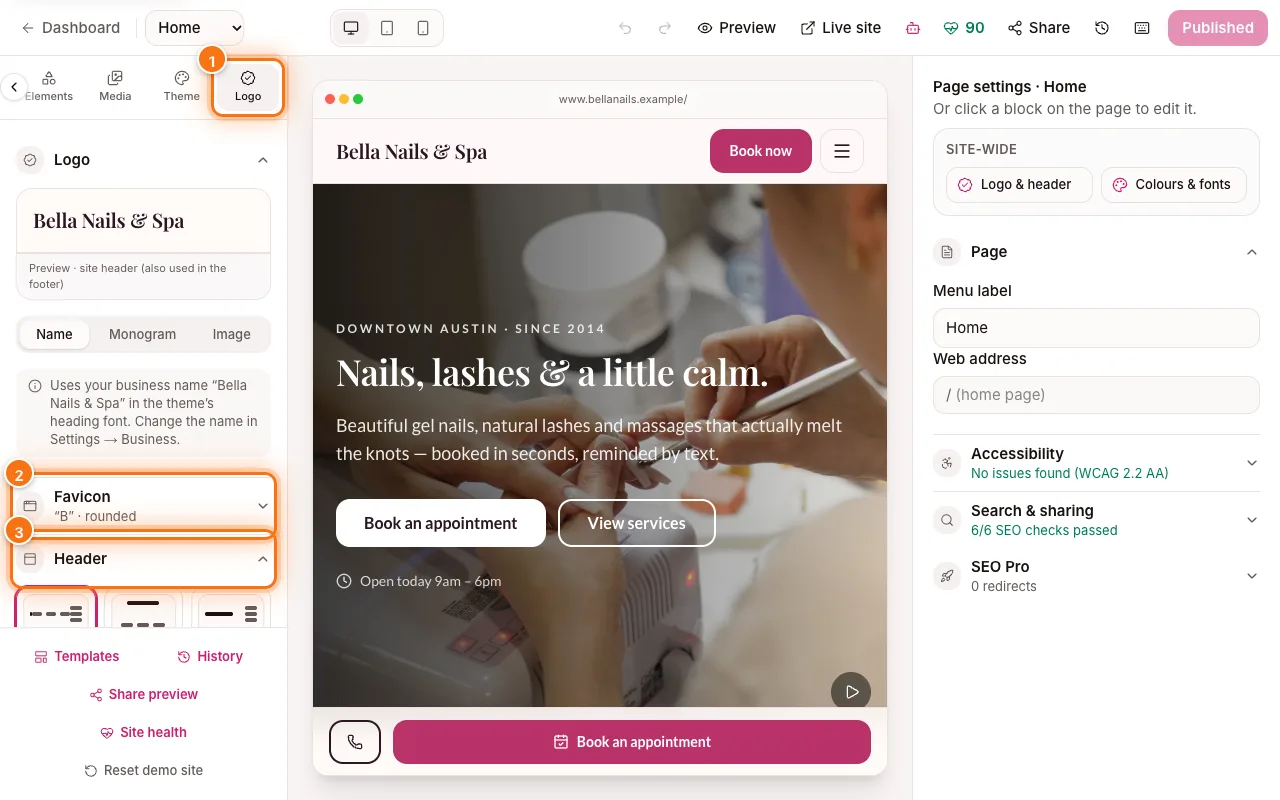
Logo tab (1) with Favicon (2) and Header (3) highlighted - 7
Set up your header
In “Header”, pick a layout (1): Classic, Centered or Minimal. Leave “Keep the header visible while scrolling” (2) ticked so the Book button is always in reach.
Type your own “Book button text” (3) — for example “Book now” or “Reserve”. Below it, “Announcement bar” adds a thin bar above the header for news like “Now open Sundays”.
Tip: On any page, “Page settings” on the right has shortcuts: “Logo & header” and “Colours & fonts”.
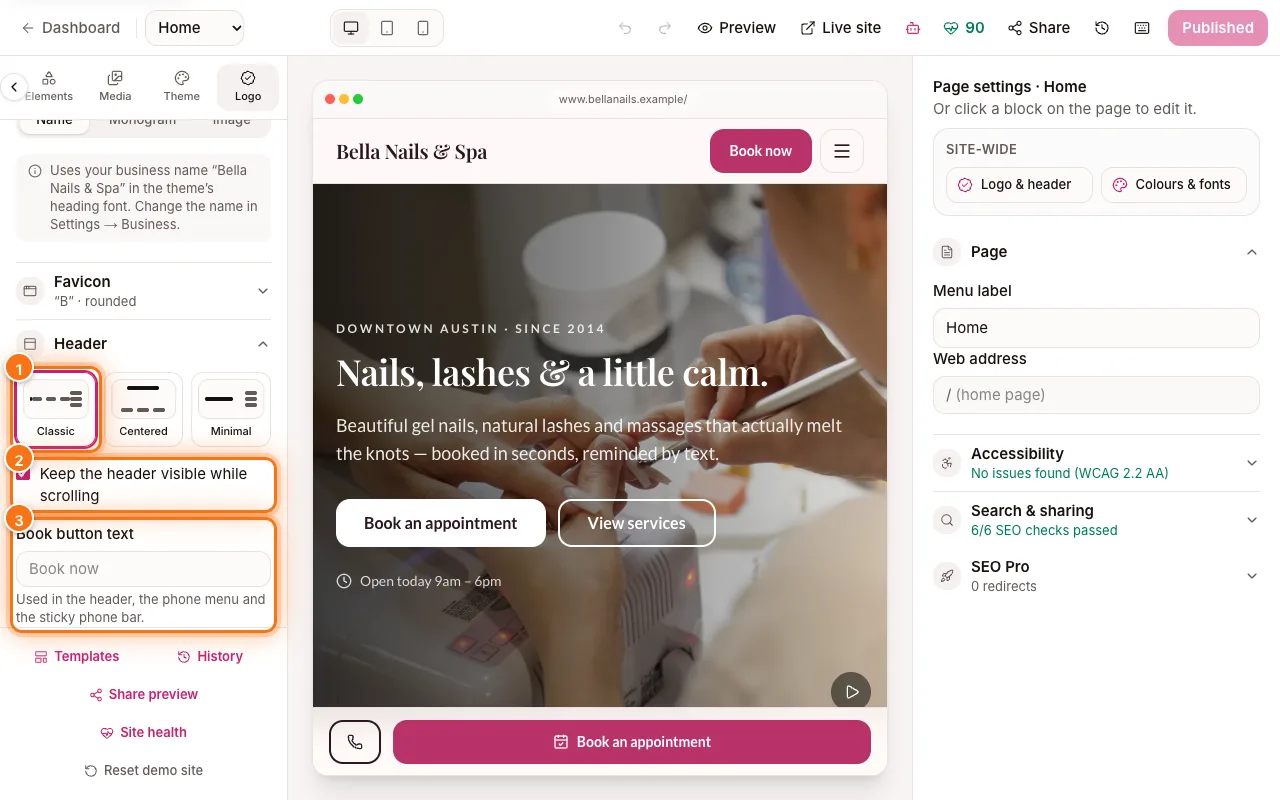
Header settings with the Classic layout (1), Keep the header visible (2) and Book button text (3) highlighted