Video walkthrough coming soon
The written steps below cover everything in the meantime.
About 7 min to follow along
When you’re done
- A live board of who’s upcoming, waiting, in the chair and done
- Walk-ins queued with a fair wait time and seated in two clicks
- Real arrival and wait times recorded for your reports
- 1
Read the board
In the left menu, click “Front desk”. The bar at the top shows the date and time and today’s numbers: Appointments, Checked in, In service, Walk-ins and Recorded (money recorded at checkout so far).
The board has four rows: “Upcoming”, “Checked in”, “In service” and “Done”. Each card shows the time, client, service and team member. A red “late” tag means the client should already be here. Use the arrows at the right of a row to scroll it sideways.
On the right, “Team right now” shows who is in service, booked or free, and until when. Click a person to show only their cards.
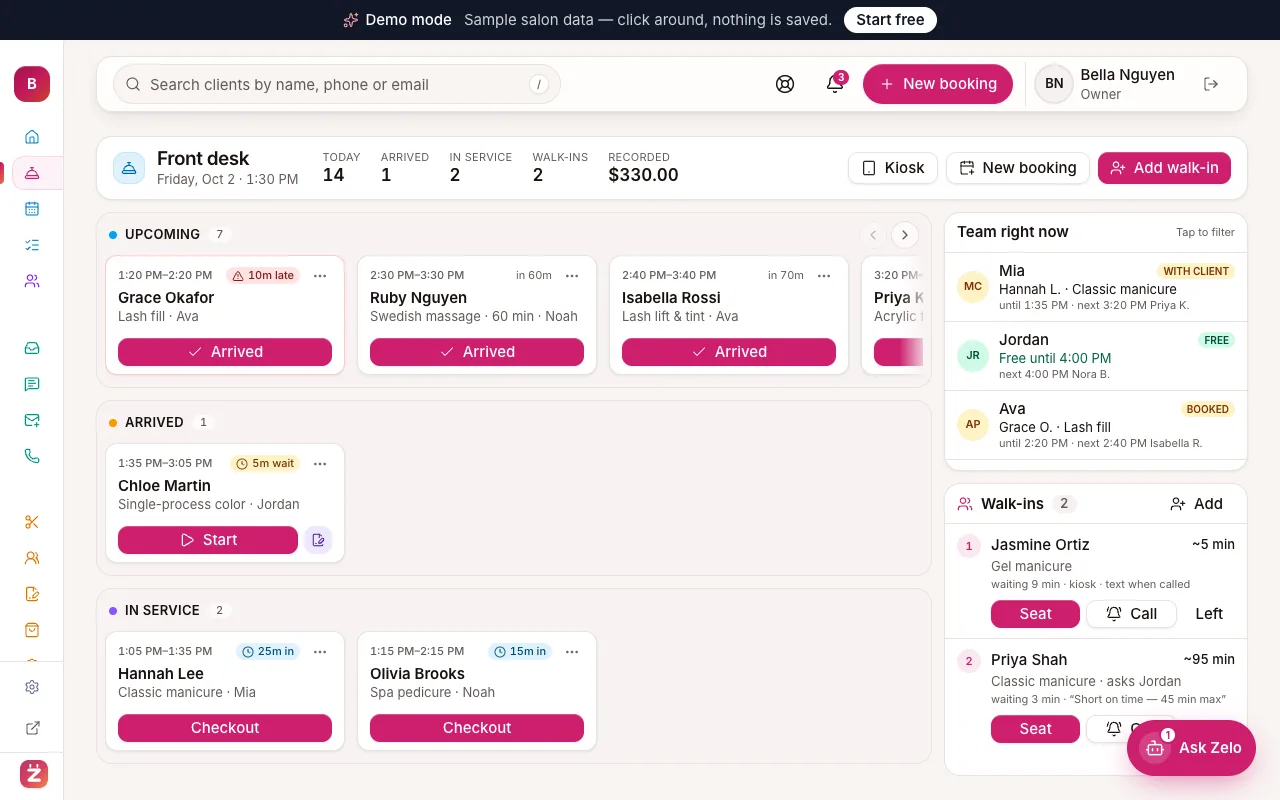
Front desk board: upcoming, arrived, in service and done, plus walk-ins and team status - 2
Check in → Start → Checkout
Move each client along as their visit goes:
- Client walks in: click “Check in” (1) on their card. It moves to Checked in and starts a wait timer.
- Service begins: click “Start” (2). It moves to In service.
- Service finished: click “Checkout” (3) to record what they paid (see “Record payment at checkout”). The card moves to Done and shows “Paid”.
The times are saved automatically, so your reports show real wait times.
Tip: Clicked the wrong one? Open the ⋯ menu at the top right of the card and choose “Undo check-in” or “Undo start”.
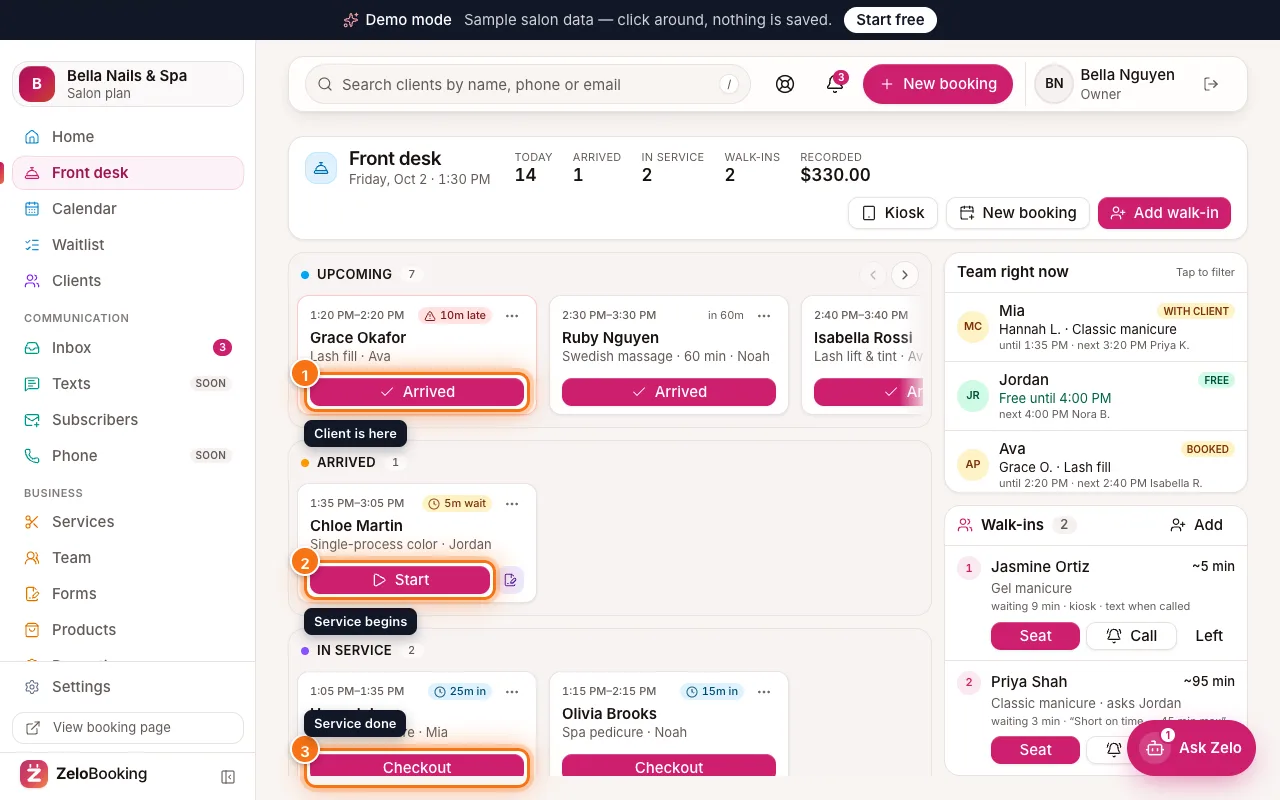
Front desk board with Check in (1) on an upcoming card, Start (2) on a checked-in card and Checkout (3) on a card in service - 3
Use the ⋯ menu on a card
Each card has a ⋯ menu at its top right with quick actions for that moment:
- Upcoming: “Send message: we’re running 10 min late” (also 15 or 20 min).
- Running late: “Send message: are you on your way?” and “Mark no-show”.
- Checked in: “Send message: we’re ready for you” and “Undo check-in”.
- In service: “Undo start”.
A small form icon on a card means the client still has a form to sign; a note icon shows the client’s note.
- 4
Add a walk-in
Click “Add walk-in” at the top right (or “Add” in the Walk-ins panel).
- “First name” (1) — the only thing you must fill in. “Last name” is optional.
- “Mobile” (optional) — finds them in your clients or adds them.
- “Service” (2) — or leave “Not sure yet”.
- “Asked for” — a team member, or “Anyone”.
- Once your business can text clients: tick “They asked for a text when it’s their turn” only if they said yes.
- “Note” — anything useful.
Click “Add to walk-in list” (3).
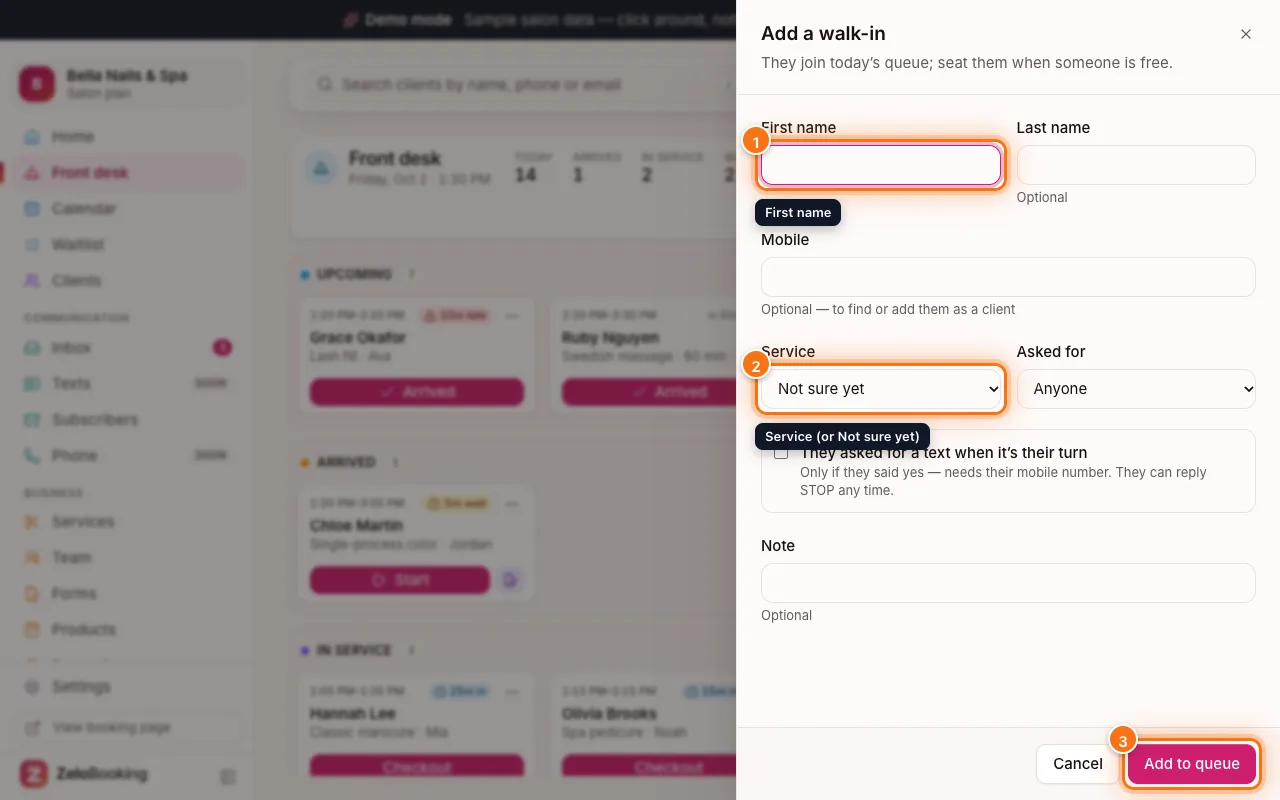
The Add a walk-in form with First name (1), Service (2) and Add to walk-in list (3) highlighted - 5
Work the walk-in queue
The Walk-ins panel lists everyone waiting, in order, with an estimate: “~5 min”, “Free now” or “No opening”.
- “Seat” (1): someone can take them now (next step).
- “Call” (2): tells them it’s their turn. It shows on the kiosk, and they’re texted if they asked for it and texting is switched on for your business. The button then reads “Again”.
- “Left” (3): they couldn’t wait — removes them from the queue.
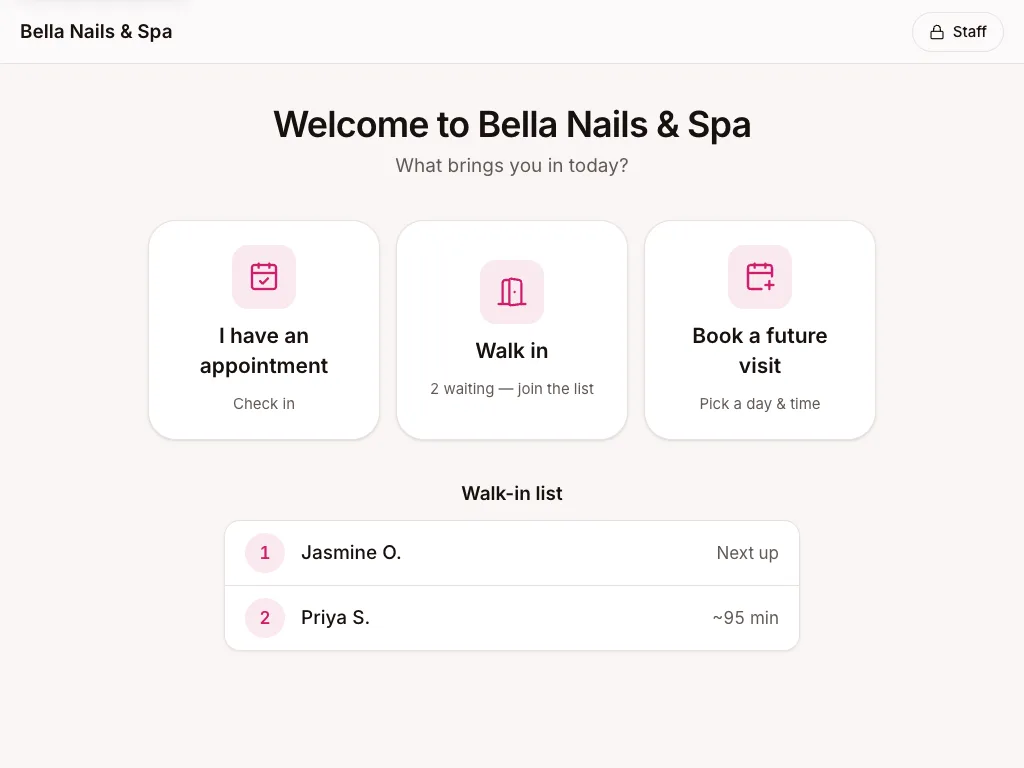
Tip: Clients can add themselves to this queue from the kiosk with “Walk in”.
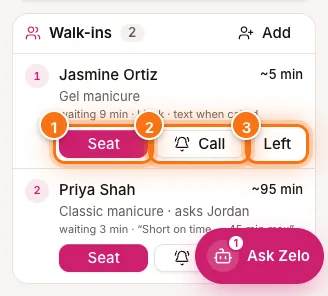
The Walk-ins list with the Seat (1), Call (2) and Left (3) buttons highlighted - 6
Seat a walk-in
After “Seat”, check the “Service”, then under “Who takes them” pick a team member (1). People marked “Free now” can start straight away; “Busy — would overlap” means they’re still with someone.
Click “Seat now” (2). The visit is booked from now and the client moves to In service.
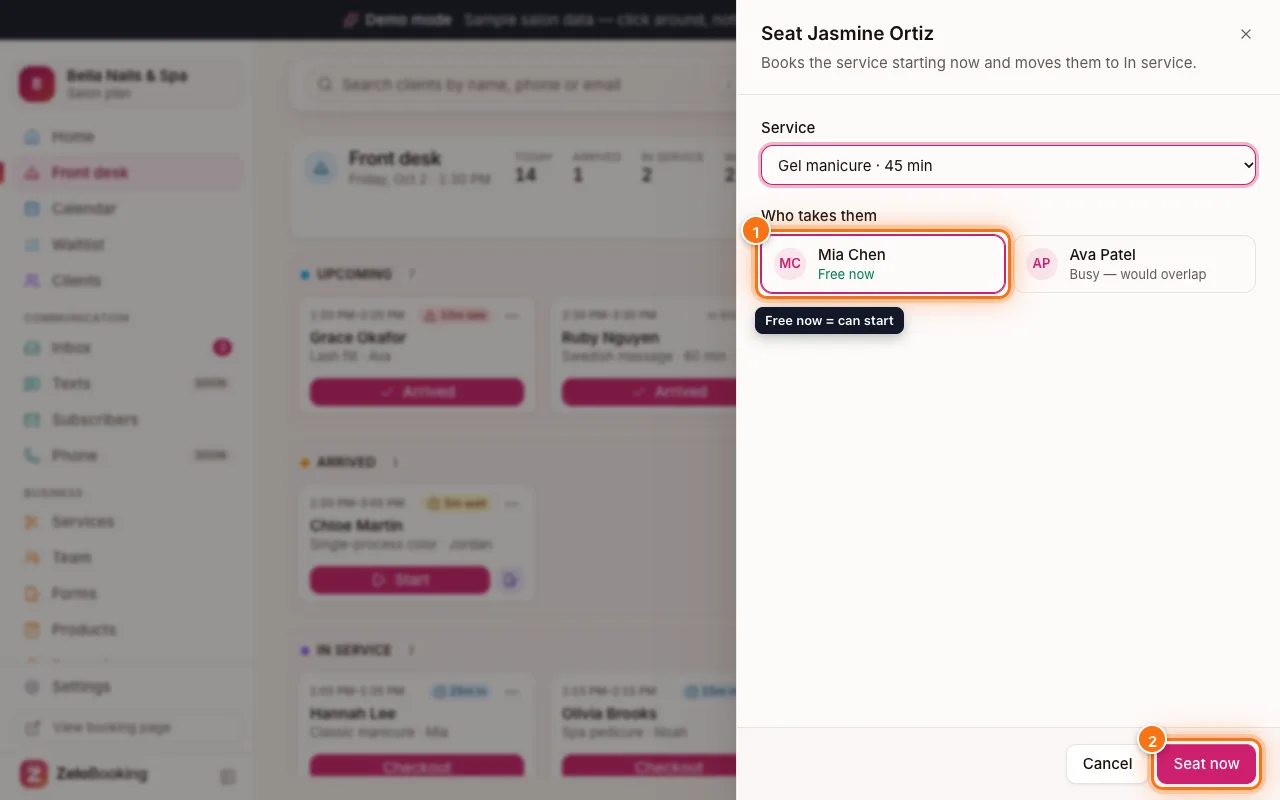
The Seat window with a team member who is free now (1) and the Seat now button (2) highlighted - 7
Book ahead or open the kiosk
Two more buttons at the top right:
- “New appointment” opens the calendar so you can book a future visit.
- “Kiosk” turns the screen into a self check-in screen for clients (see “Kiosk mode on your salon tablet”).
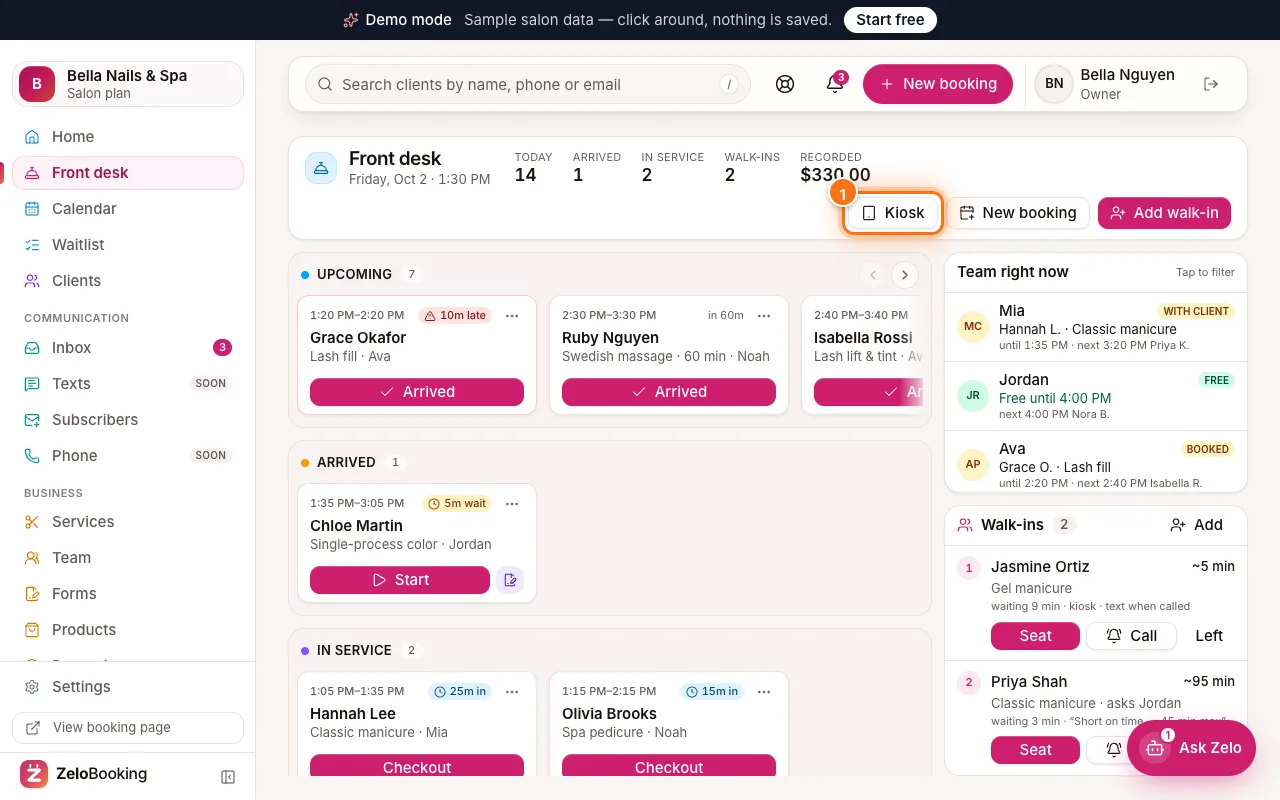
Front desk with the Kiosk button highlighted (1)