Video walkthrough coming soon
The written steps below cover everything in the meantime.
About 8 min to follow along
When you’re done
- Forms that go out automatically with the right bookings
- Questions, follow-ups and a legal e-signature in one place
- Less paperwork at the front desk
- 1
Open your forms
In the left menu, under Business, click “Forms”. Each card shows the form type, whether it’s Active or Paused, its version, how many questions it has, which services it’s sent for and how many were signed in the last 4 weeks.
Click “New form” (1) to add one, or “Edit” (2) on a card to change it. “Client view” opens the form the way clients see it.
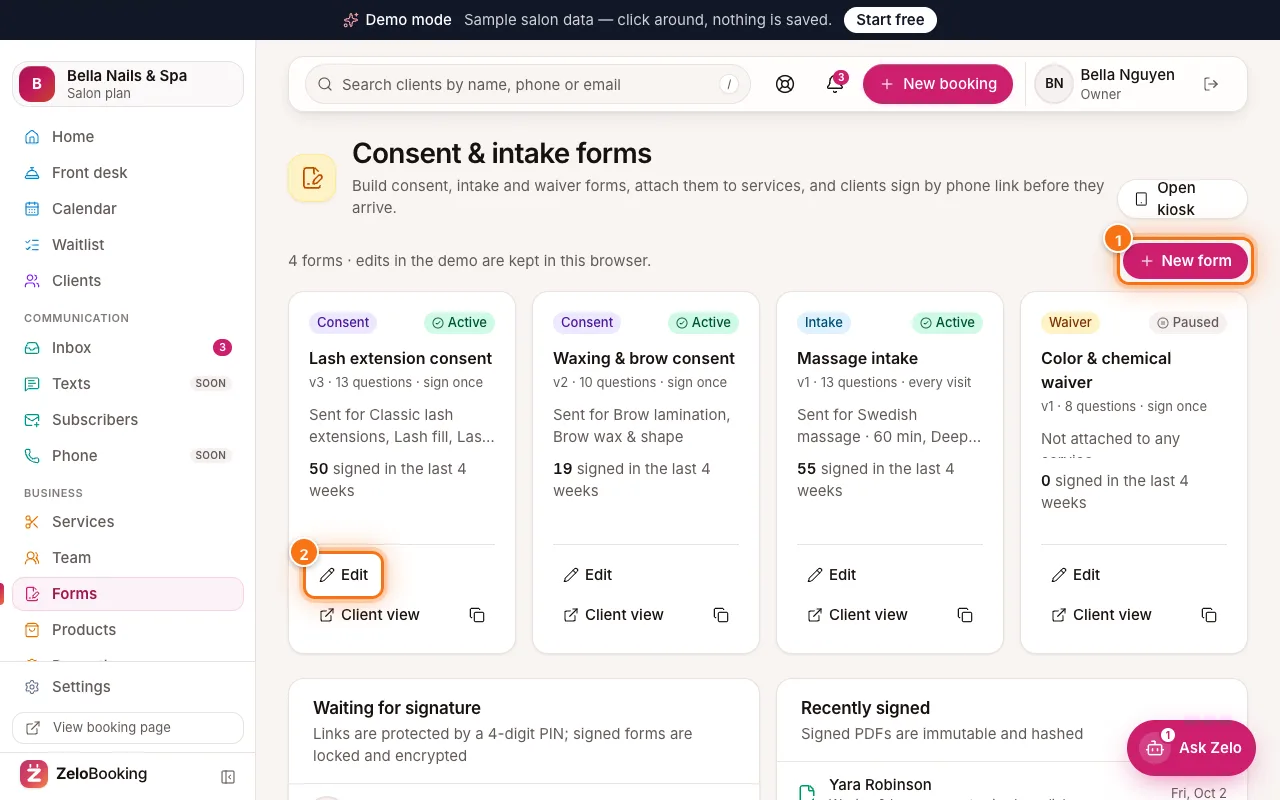
Consent & intake forms with the New form button (1) and a form’s Edit button (2) highlighted - 2
Start from a template
After “New form”, pick a ready-made template — the ones marked “For your business” suit your type of business — or click “Blank form” (1) to start from nothing.
Templates are plain-English starting points, not legal advice. Have your forms checked for your state and services.
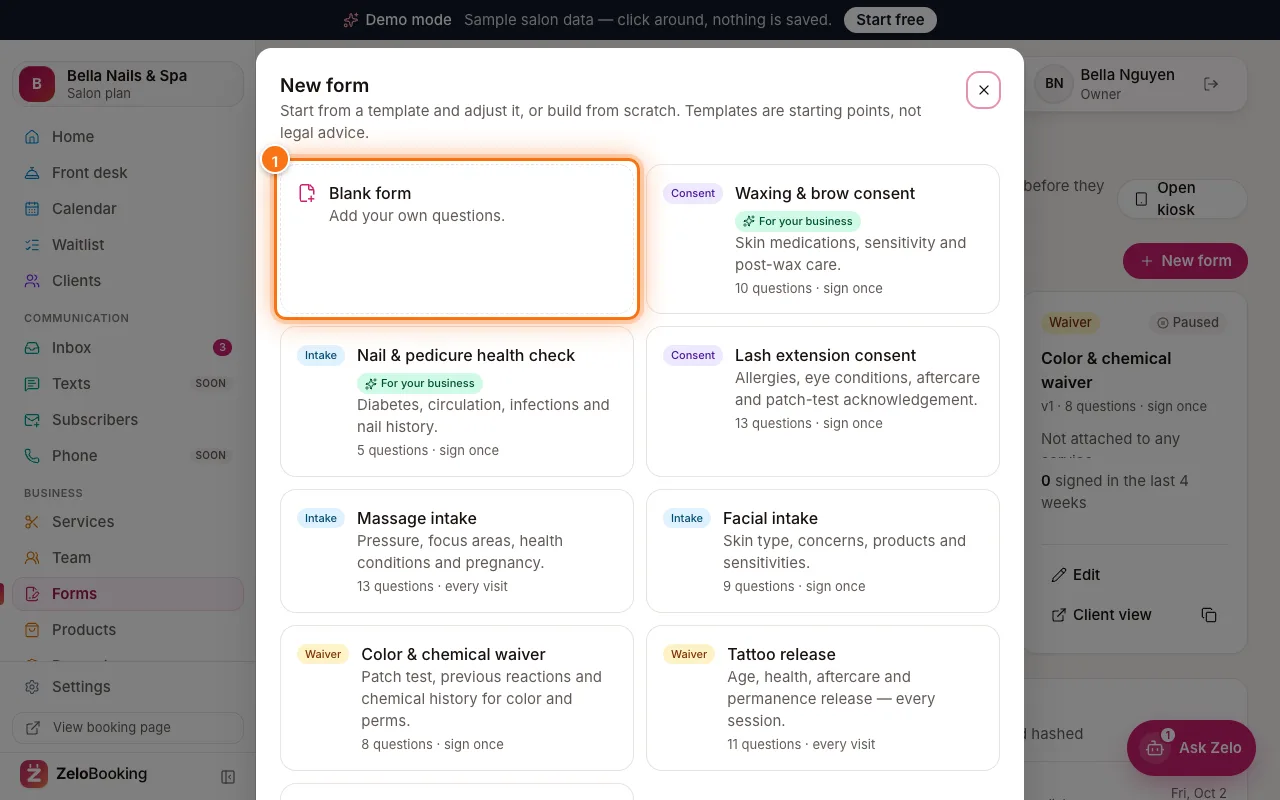
The New form window with ready-made templates and Blank form highlighted (1) - 3
Add and edit questions
The “Build” tab shows the form’s outline on the left. Questions are grouped in sections (like About you or Health & eyes).
Click “Add question” (2) under a section and choose a type: “Short answer”, “Long answer”, “Yes / no”, “Pick one”, “Tick all that apply”, “Date”, “Initials” or “Text block” (for terms, risks or aftercare). Click a question to change its text and switch “Required” on or off. A follow-up question can show only after a certain answer — for example only when a client answers Yes. Drag questions to reorder them, or click “Add section” at the bottom.
The client preview on the right updates as you go.
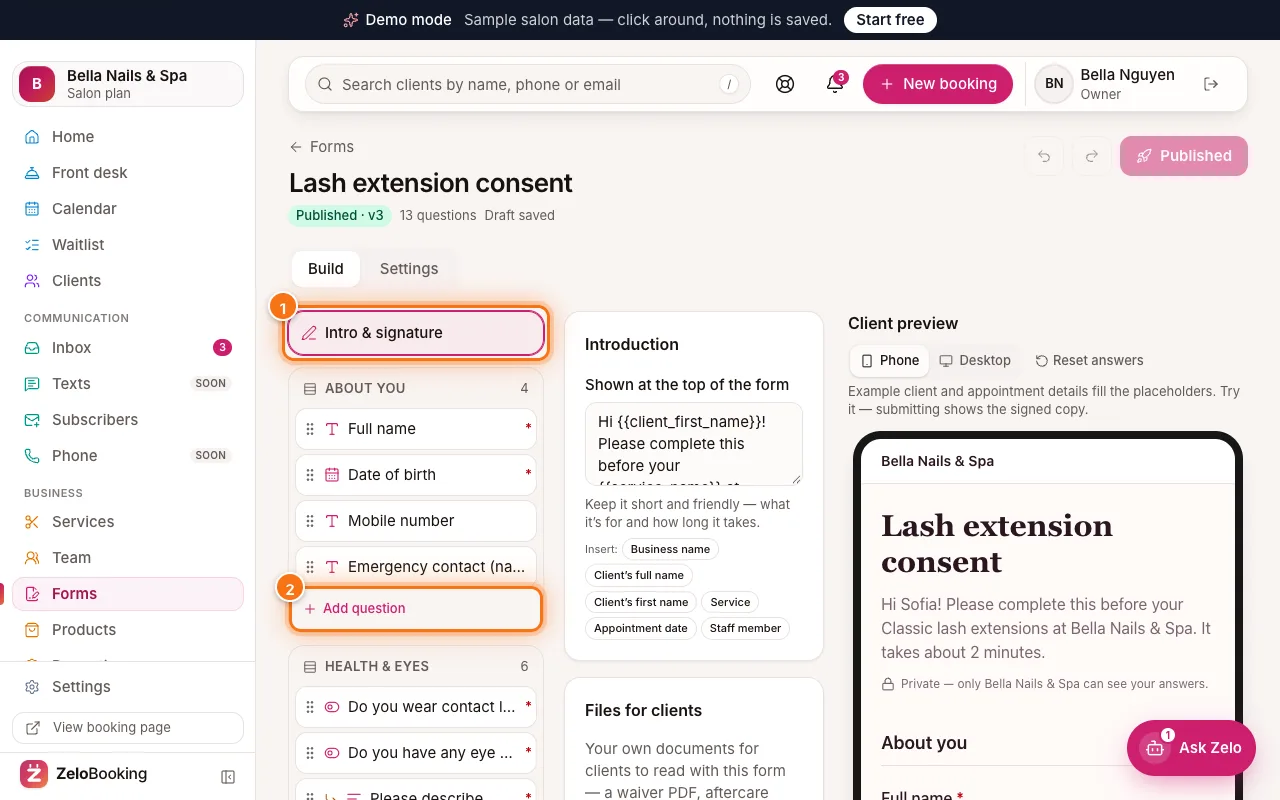
The form builder with Intro & signature (1) and Add question (2) highlighted - 4
Write the intro and signature
Click “Intro & signature” (1) at the top of the outline.
- Under “Introduction”, write the text “Shown at the top of the form”. Click an “Insert” button to add Business name, Client’s first name, Service, Appointment date and more — they’re filled in for each client.
- Under “Signature”, keep “Ask for a signature” on and write the “Statement above the signature”.
- Under “Files for clients”, click “Add a file” to attach an aftercare sheet or price list (PDF or image).
The legal e-signature wording is always added, and we record the time, device and form version with every signature.
The form builder with Intro & signature (1) and Add question (2) highlighted - 5
Choose the type and how often clients sign
Open the “Settings” tab.
- “Form type” (1): “Consent”, “Intake” or “Waiver”.
- “Ask clients to sign” (2): “Once, until the form changes” or “Every visit” (best when answers change — pregnancy, medications, tattoos).
- “Active” (3): when on, the form is sent automatically when an attached service is booked. Off = paused; signed copies are kept.
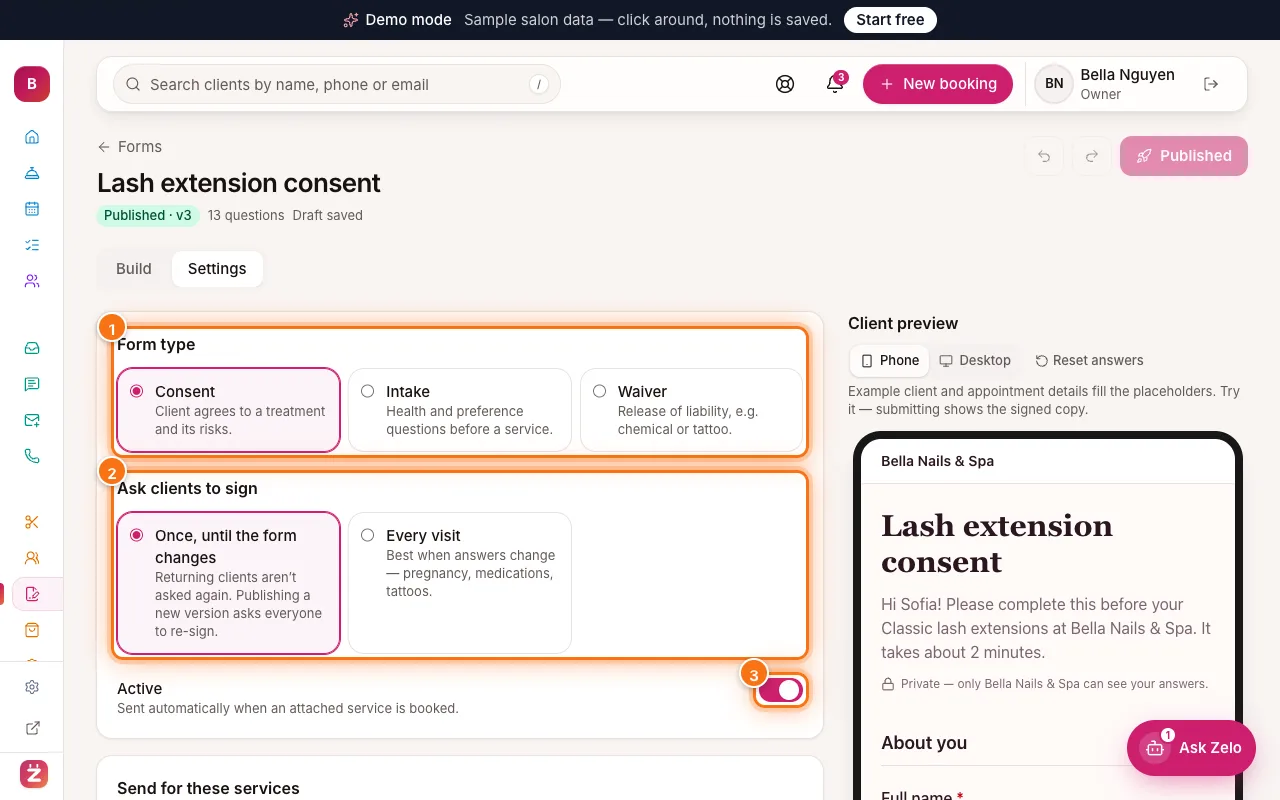
The form’s Settings tab with Form type (1), Ask clients to sign (2) and the Active switch (3) highlighted - 6
Attach it to services
Still on “Settings”, scroll to “Send for these services” and tick each service that needs this form (1). Clients who book one of them get the form link with their confirmation.
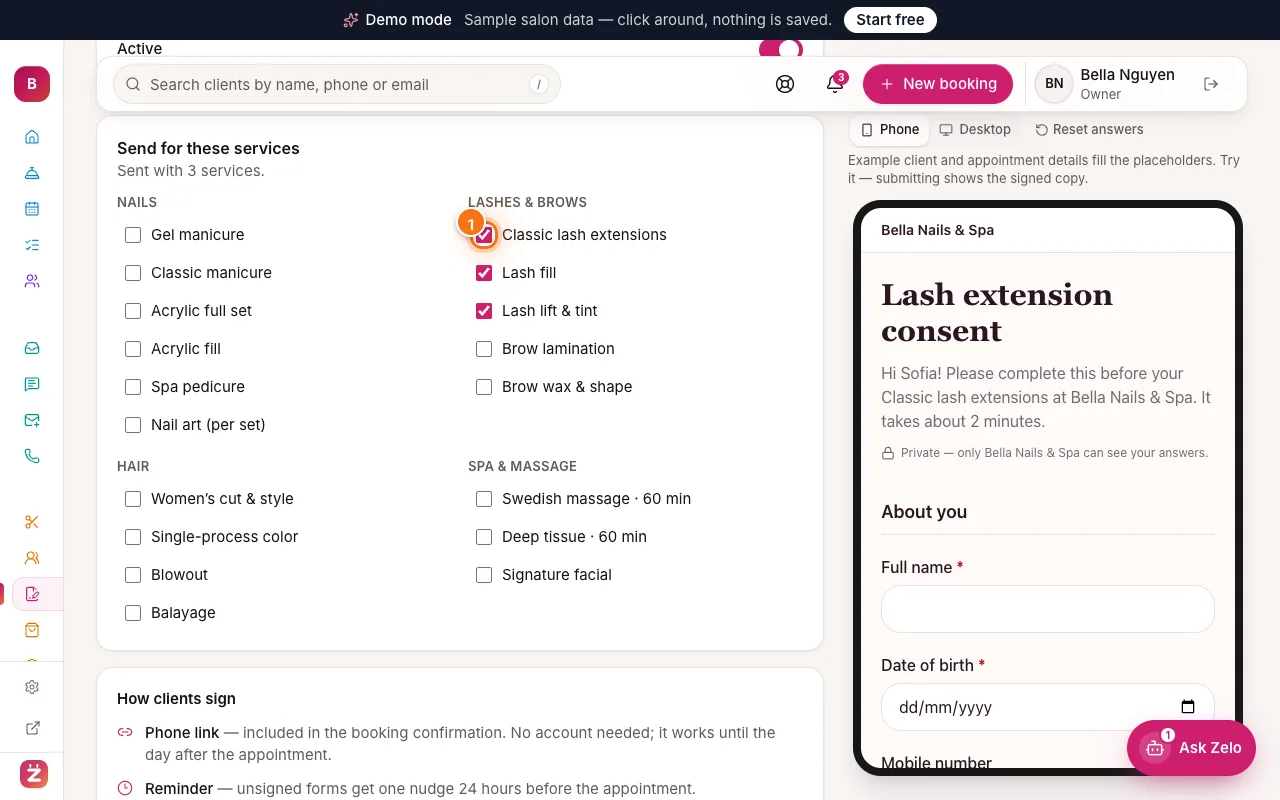
Send for these services: a ticked service highlighted (1) - 7
Publish your changes
Your edits save as a draft automatically. When you’re ready, click “Publish v…” at the top right and confirm. Only published versions go to clients. “Discard changes” throws the draft away.
Tip: For “Once, until the form changes” forms, publishing a new version asks everyone to sign again.