Video walkthrough coming soon
The written steps below cover everything in the meantime.
About 8 min to follow along
When you’re done
- Your website on your own domain
- Free SSL (the padlock) set up for you
- Your free address still working and sending visitors to the new one
- 1
Enter your domain
Go to the left menu → Website and scroll down to “Domains”. Your free address (yourname.zelobooking.com) is always on.
Under “Connect a domain you own”, type the domain you bought (1) — for example yoursalon.com, without “www” or “https” — and click “Continue” (2).
Tip: Don’t own a domain yet? Buy one at a provider such as GoDaddy, Namecheap or Squarespace, then come back here.
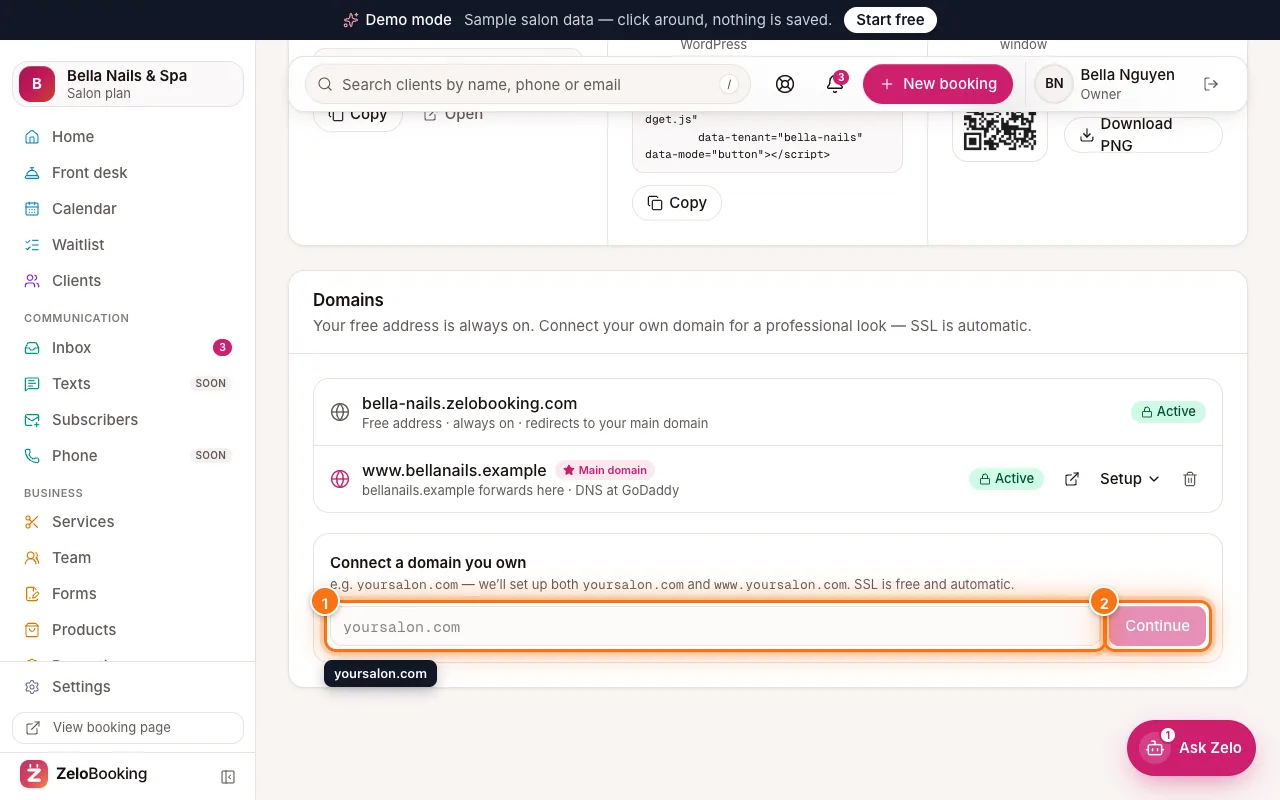
Domains section with the domain box (1) and Continue (2) highlighted - 2
Choose your main address
We look up who manages your domain. Under “Main address”, keep the recommended www.yoursalon.com (1) — it works with every provider. Both addresses will work; the other one simply forwards to it.
Then click the button (2):
- “Connect automatically with …” — shown when your provider supports one-click setup. You sign in at your provider, approve, and come straight back. No typing records.
- “Show the DNS records to add” (or “I’ll add the records myself”) — to set it up by hand.
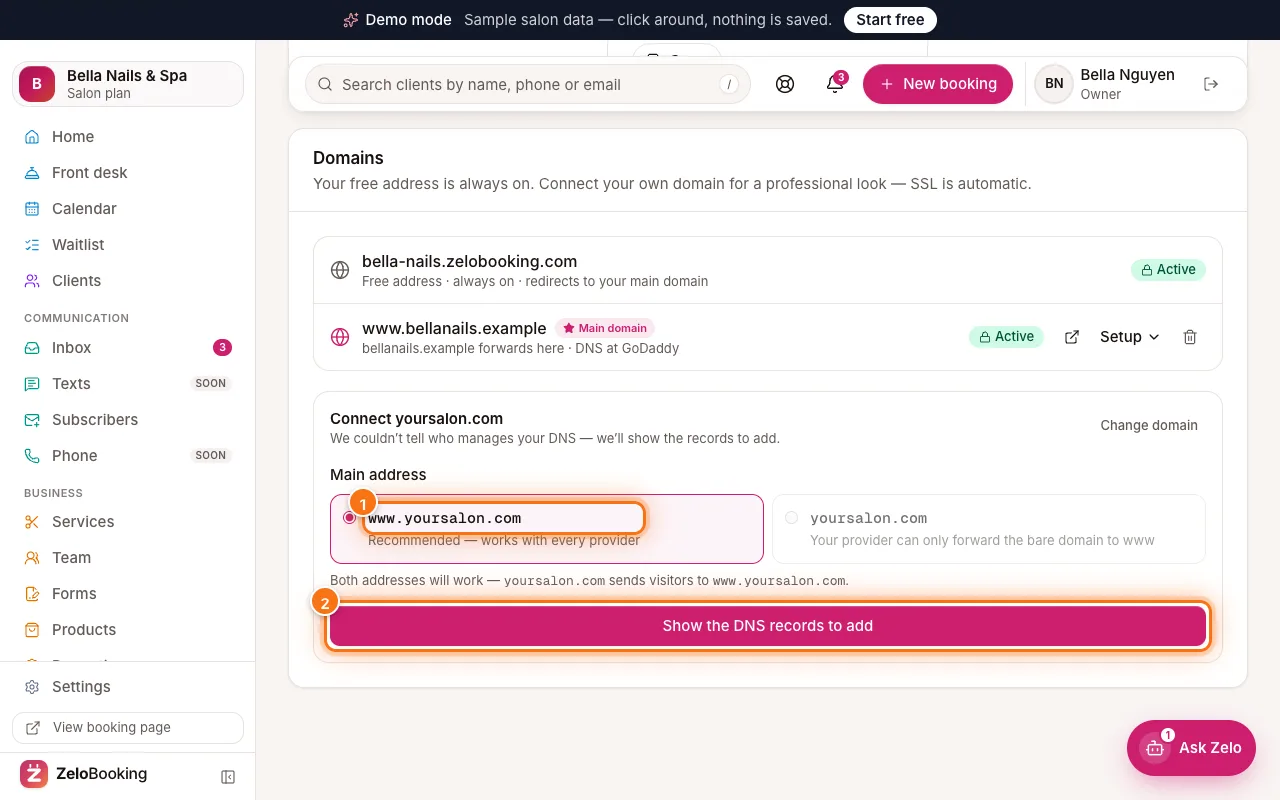
Connect a domain: the recommended www address (1) and Show the DNS records to add (2) highlighted - 3
Add the records at your provider
You’ll see three steps (1): DNS records, Verify & issue SSL, Live. Below is a table of records to add. For each one, copy the “Name / Host” and the “Value / Points to” (2) with the copy buttons, and add it in your provider’s DNS settings (look for “DNS”, “DNS records” or “Zone editor”).
One of them is a TXT record named “_zelobooking-verify” with a value starting “zb-verify=”. It’s unique to your business and proves the domain is yours, so no other ZeloBooking business can claim it. Once we find it, the card says “Ownership proven”.
Then click “Check DNS now”. Each record shows “In place” once we find it.
Tip: New records usually appear within minutes, but can take up to 24 hours. You can leave the page and click “Check DNS now” again later.
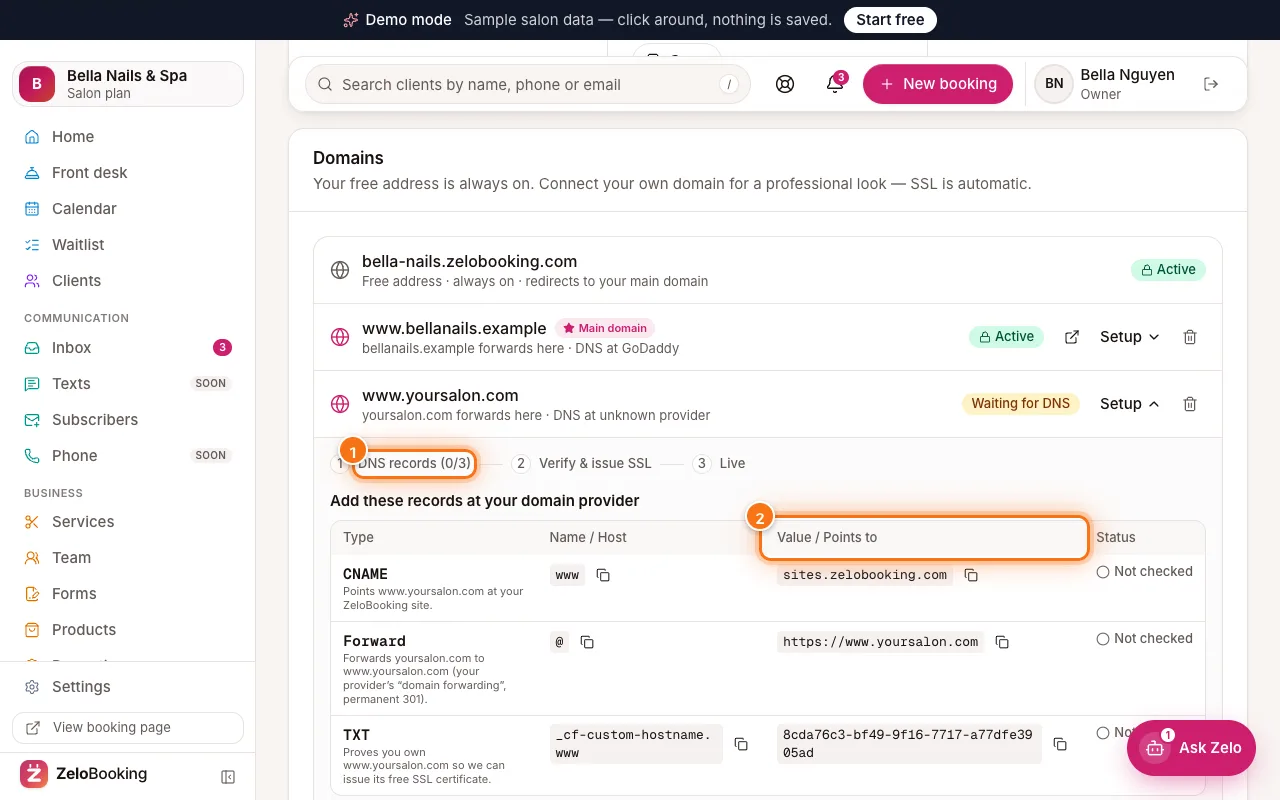
DNS records to add, with the setup steps (1) and the Value / Points to column (2) highlighted - 4
Wait for SSL, then you’re live
When all records are in place, we issue your free SSL certificate automatically. The domain’s badge changes from “Waiting for DNS” to “Active” (1). Your free address keeps working the whole time.
Use “Setup” (2) to see the records again; “Make main” chooses which domain is your main one if you connect more than one.
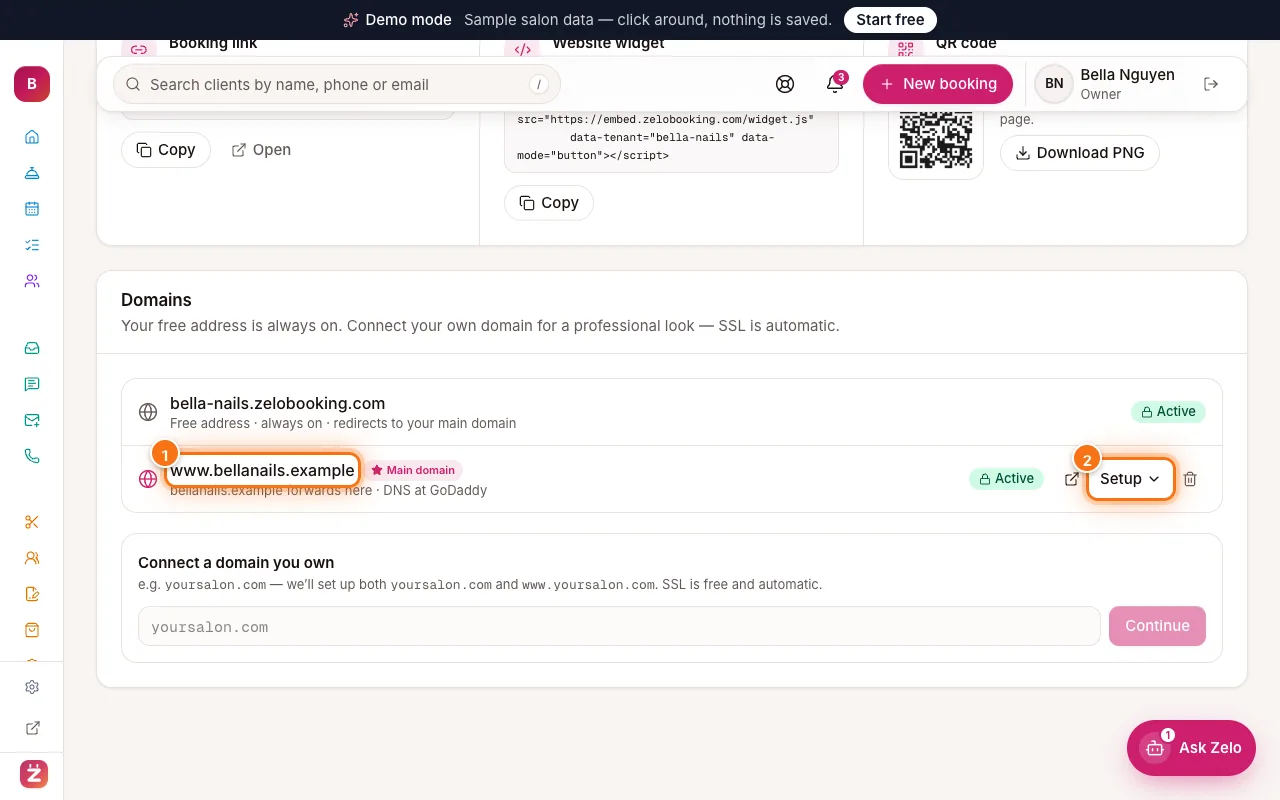
Domains list with a connected domain (1) and its Setup menu (2) highlighted