Video walkthrough coming soon
The written steps below cover everything in the meantime.
About 5 min to follow along
When you’re done
- Every visit’s price, tip and payment type recorded
- Promotions and points applied correctly (Pro)
- The next visit booked before the client leaves
- 1
Start checkout
In the left menu, click “Front desk”. When a service is finished, click “Checkout” (1) on the client’s card in the In service row.
Take the payment the way you always do — on your own card terminal, in cash and so on. ZeloBooking only records it: it never charges the client.
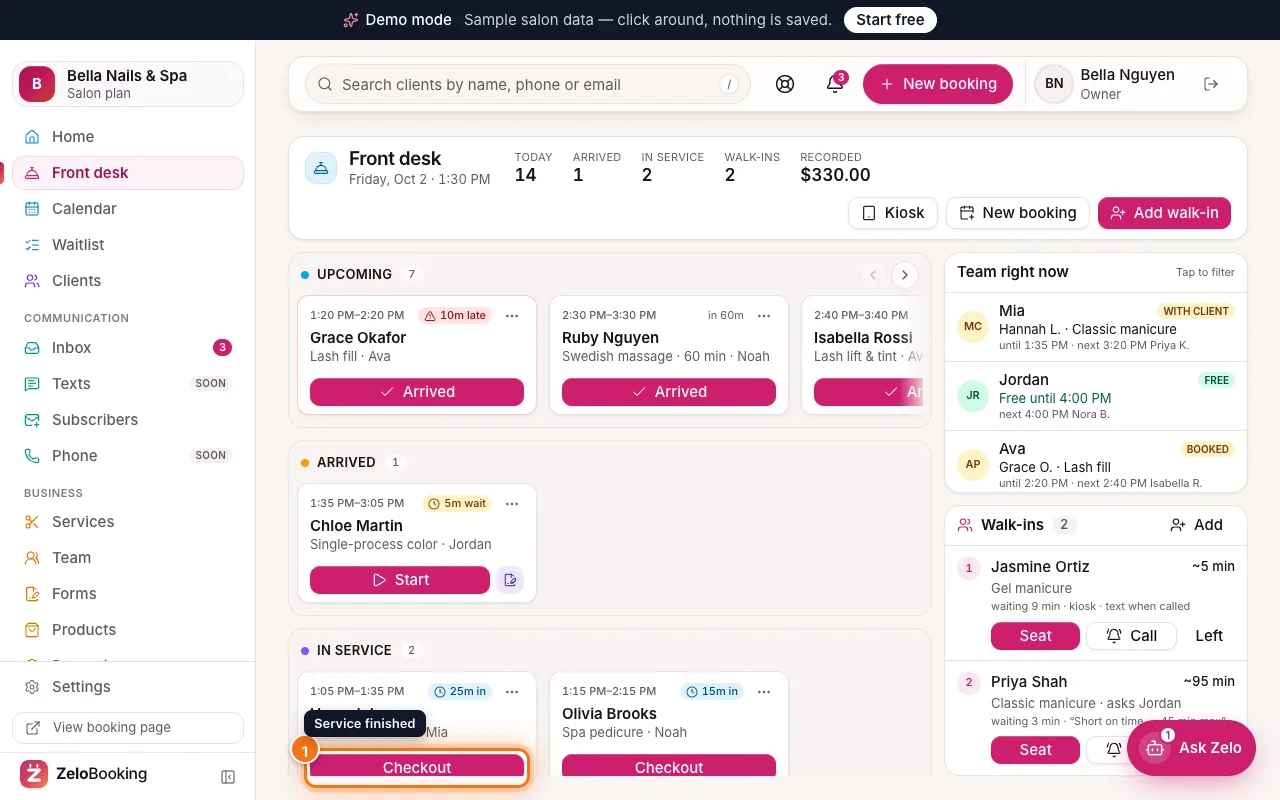
Front desk board with the Checkout button on a client in service highlighted (1) - 2
Check the price, tip and payment type
The Checkout panel opens on the right.
- Service price (1): filled in from the service. Change it if the price was different today.
- “Products”: choose from “Add a product…” and click “Add” to record retail items sold (set them up under Business → Products).
- “Tip” (2): type the amount, or click 15%, 18%, 20%, 25% or “No tip”.
- “Paid by” (3): “Card”, “Cash” or “Other”.
Tip: Use “Other” for anything that isn’t card or cash, such as a bank transfer.
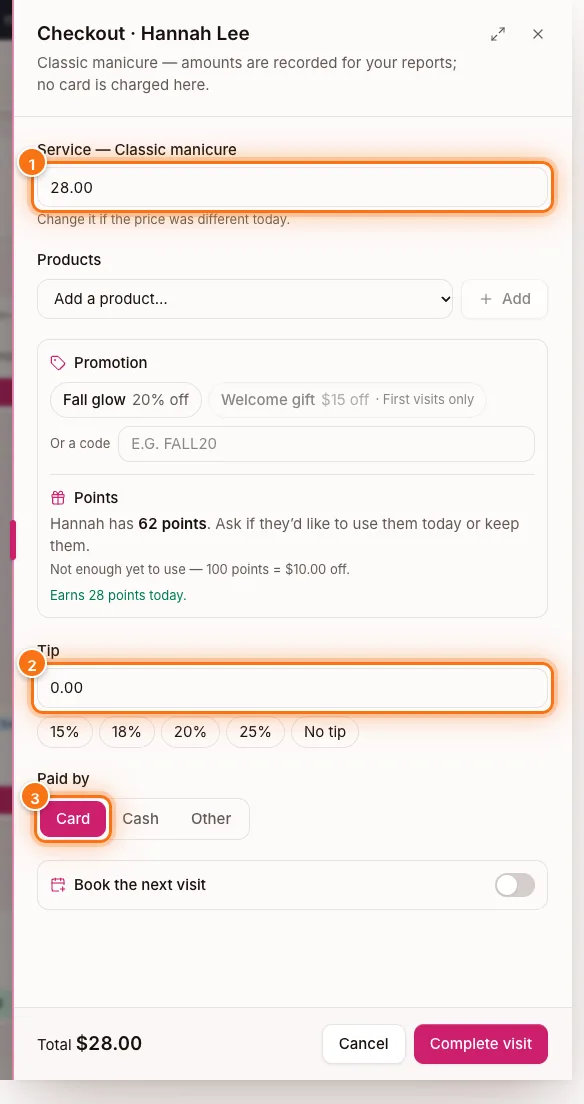
The Checkout panel with the service price (1), Tip (2) and the Card payment choice (3) highlighted - 3
Apply a promotion or points (Pro)
On the Pro plan you’ll also see a “Promotions and points” box.
- “Promotion” (1): click a running promotion. Greyed-out ones show why they can’t be used (for example “First visits only”). Or type a code in “Or a code”.
- “Points” (2): shows how many points the client has. Click “Keep for later” or “Use …” to take the value off today’s total. You’ll also see how many points they earn today.
Tip: Points are for registered clients — they need a phone number or email on their profile.
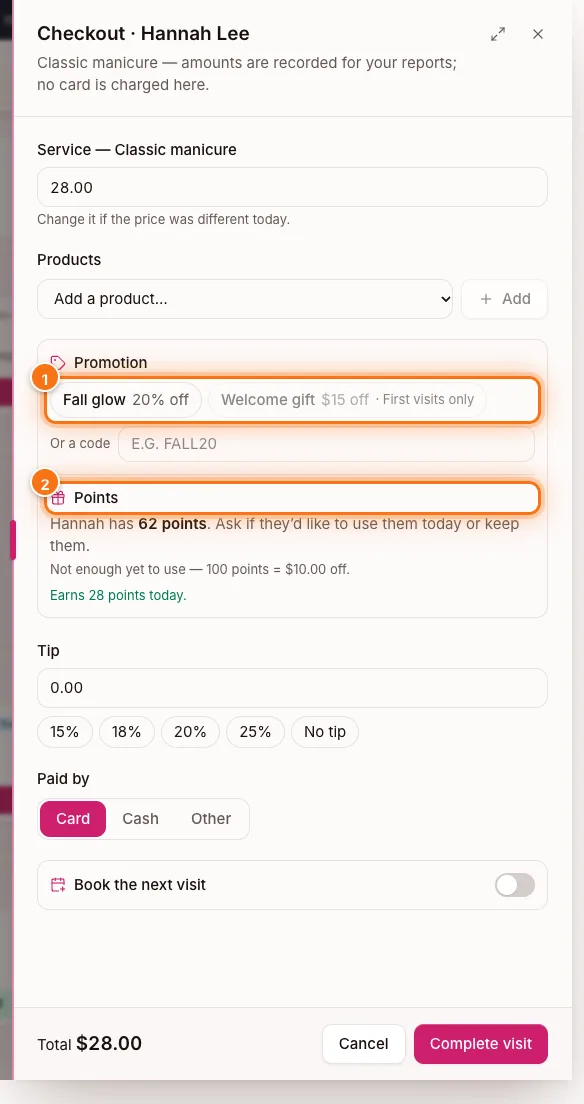
The Checkout panel with the Promotion choices (1) and the client’s Points (2) highlighted - 4
Book the next visit and complete
Want to rebook them now? Switch on “Book the next visit” (1). Pick a “Date”, “Time” and “With”, or click a shortcut like “In 4 weeks” (2).
Check the “Total” at the bottom, then click “Complete visit” (3). The card moves to Done and shows “Paid” with the amount.
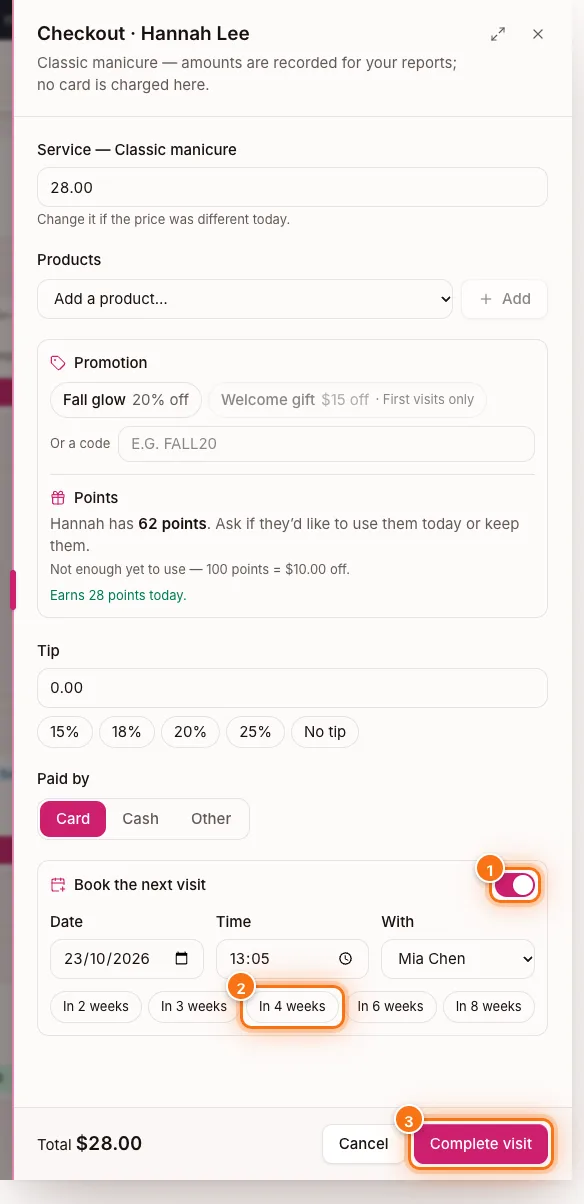
The Checkout panel with the Book the next visit switch (1), “In 4 weeks” (2) and Complete visit (3) highlighted - 5
Or record it from the calendar
You can also finish a visit from the calendar: click the appointment, then “Checkout” (on the appointment’s day or later).
In “Checkout”, check the “Amount” (1), add a “Tip”, pick “Card” (2), “Cash” or “Other”, and click “Save & complete” (3). “Back” closes it without saving.
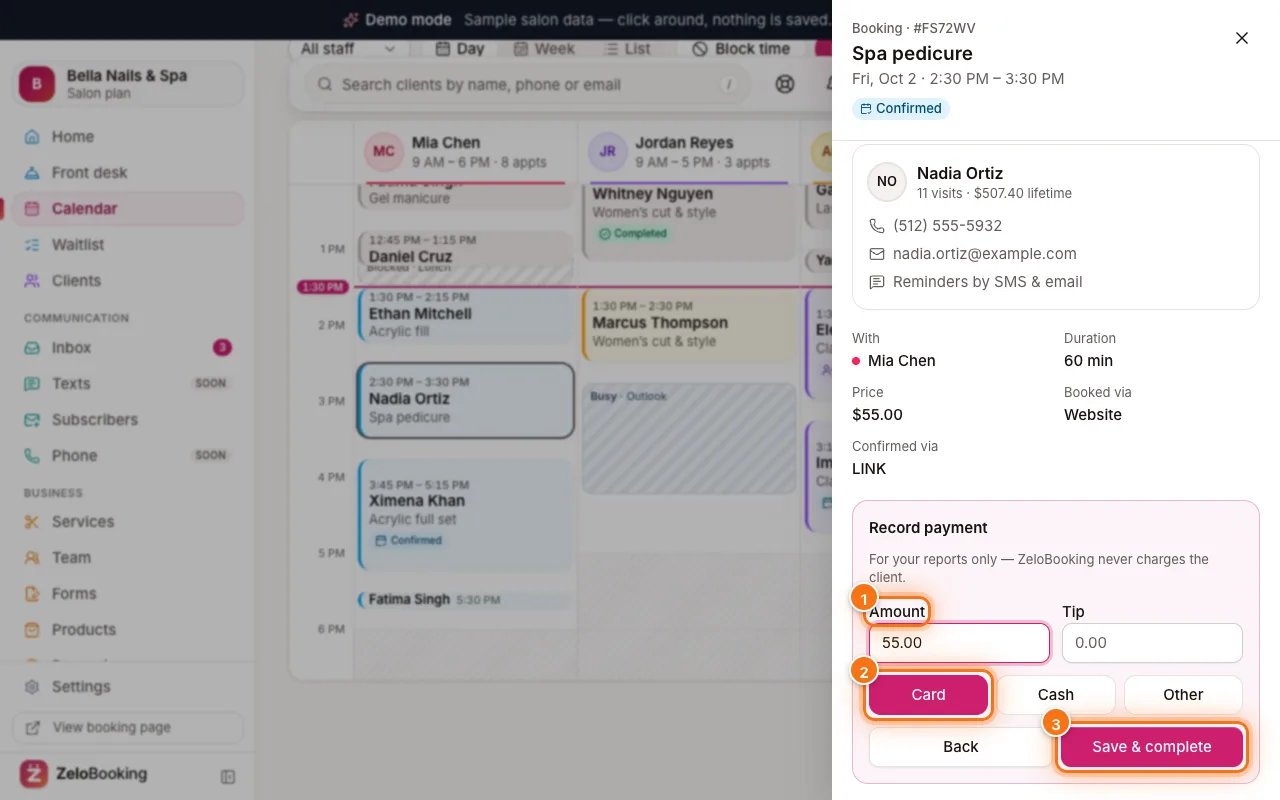
An appointment’s Checkout box in the calendar with Amount (1), Card (2) and Save & complete (3) highlighted