Video walkthrough coming soon
The written steps below cover everything in the meantime.
About 6 min to follow along
When you’re done
- Quick answers from Zelo, with links to the right screen
- A support case with a real person, including your screenshots
- Know exactly what live help can and can’t see — and how to stop it
- 1
Open the Help menu
Click the lifebuoy button in the top bar (next to the bell). The Help menu opens with:
- “Ask Zelo” (1) — quick answers about using ZeloBooking
- “Contact support” (2) — message a person on our team
- “Help & support” (3) — your cases, files and live help
- “Learning Center” — these step-by-step guides (opens in a new tab)
Owners, admins and front desk see all four. Staff see Ask Zelo and the Learning Center.
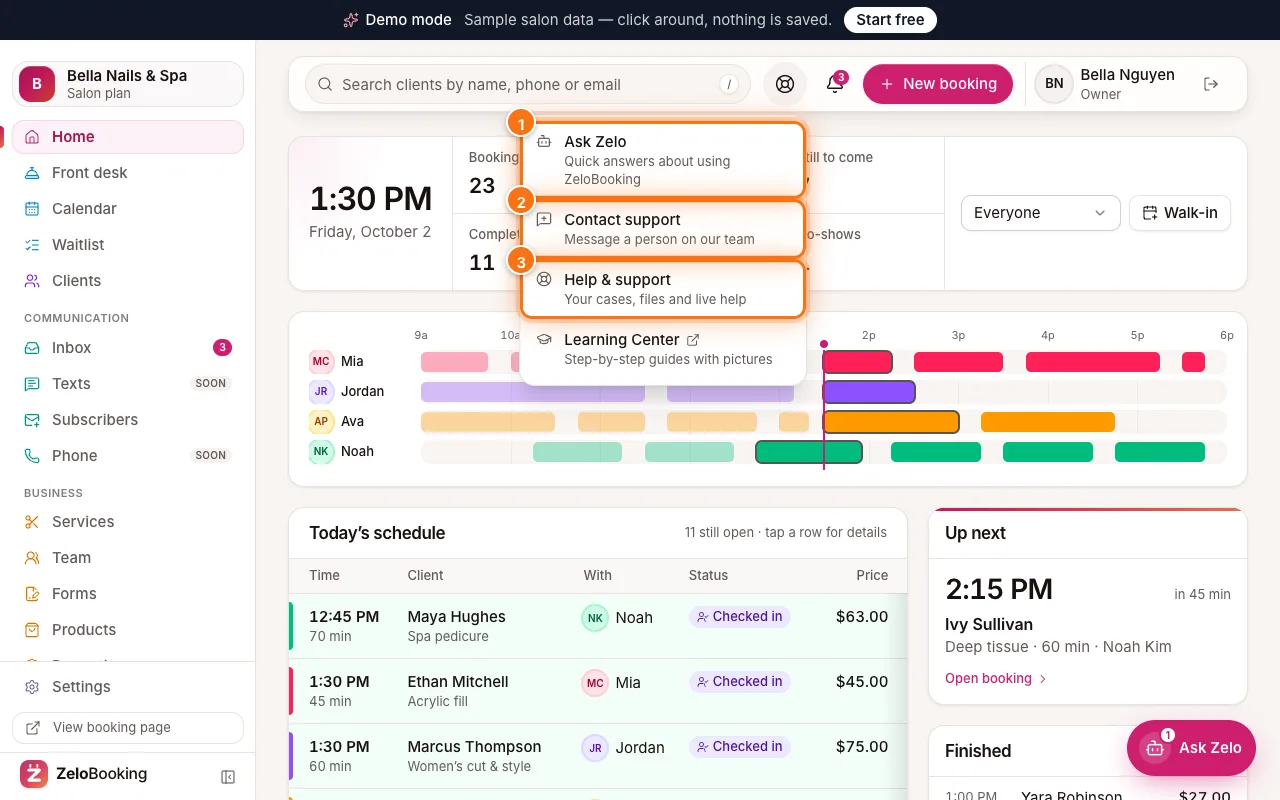
The Help menu open, with Ask Zelo (1), Contact support (2) and Help & support (3) highlighted - 2
Ask Zelo a question
Click “Ask Zelo” in the menu, or the “Ask Zelo” button at the bottom right of any page. Click a suggestion such as “How do I add a service?” (1), or type your own question in “Ask how to do anything…” (2) and press Enter.
Zelo answers with steps and a button that takes you to the right screen. To reach a person instead, click the “Support” tab (3) at the top of the panel.
Tip: AI answers can be wrong — check before relying on them, and never type clients’ personal details into the chat.
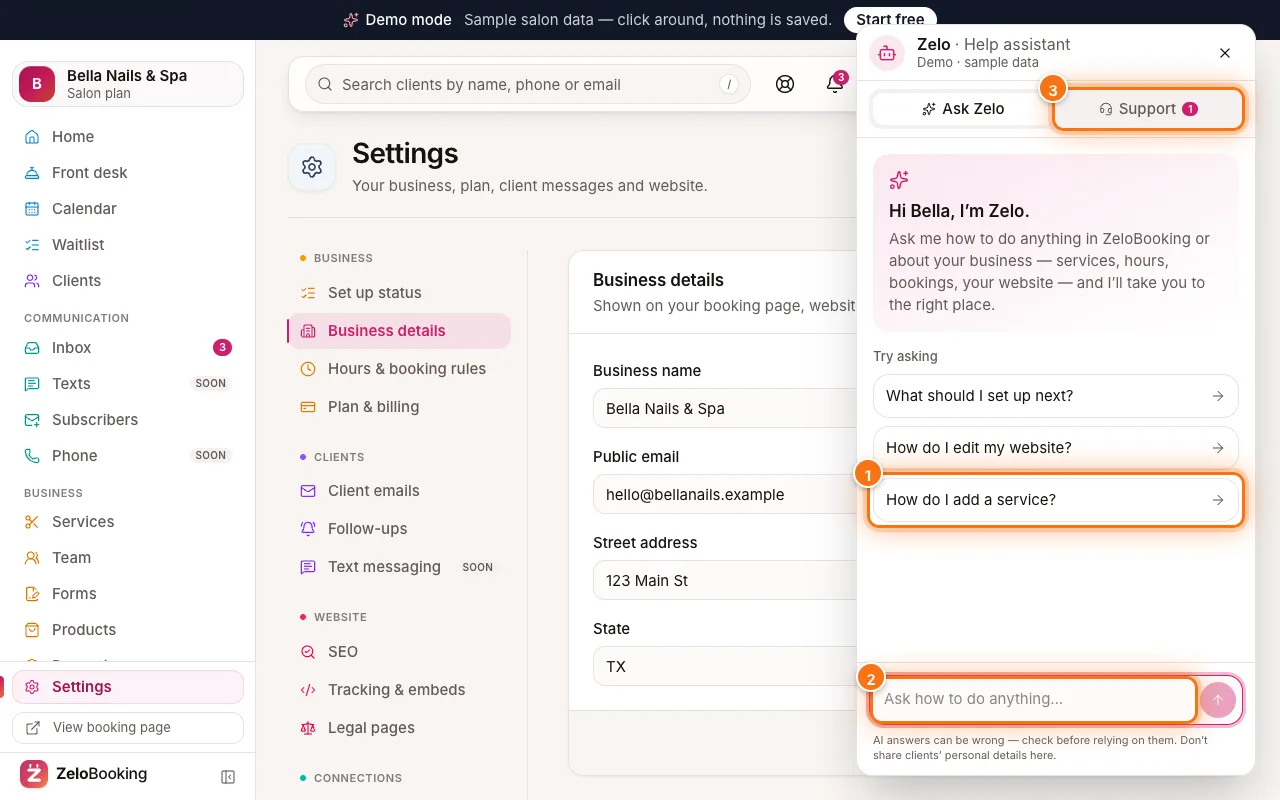
Ask Zelo panel with a suggested question (1), the question box (2) and the Support tab (3) highlighted - 3
Start a support case
Click Help → “Contact support”. Fill in:
- “Subject” (1) — a few words, like “Booking page shows the wrong hours”
- “What’s it about?” (2) — Booking, Billing, Website, Account, Bug or Other
- “Message” (3) — what happened, what you expected, and when
Tip: Never send passwords or card numbers in a message.
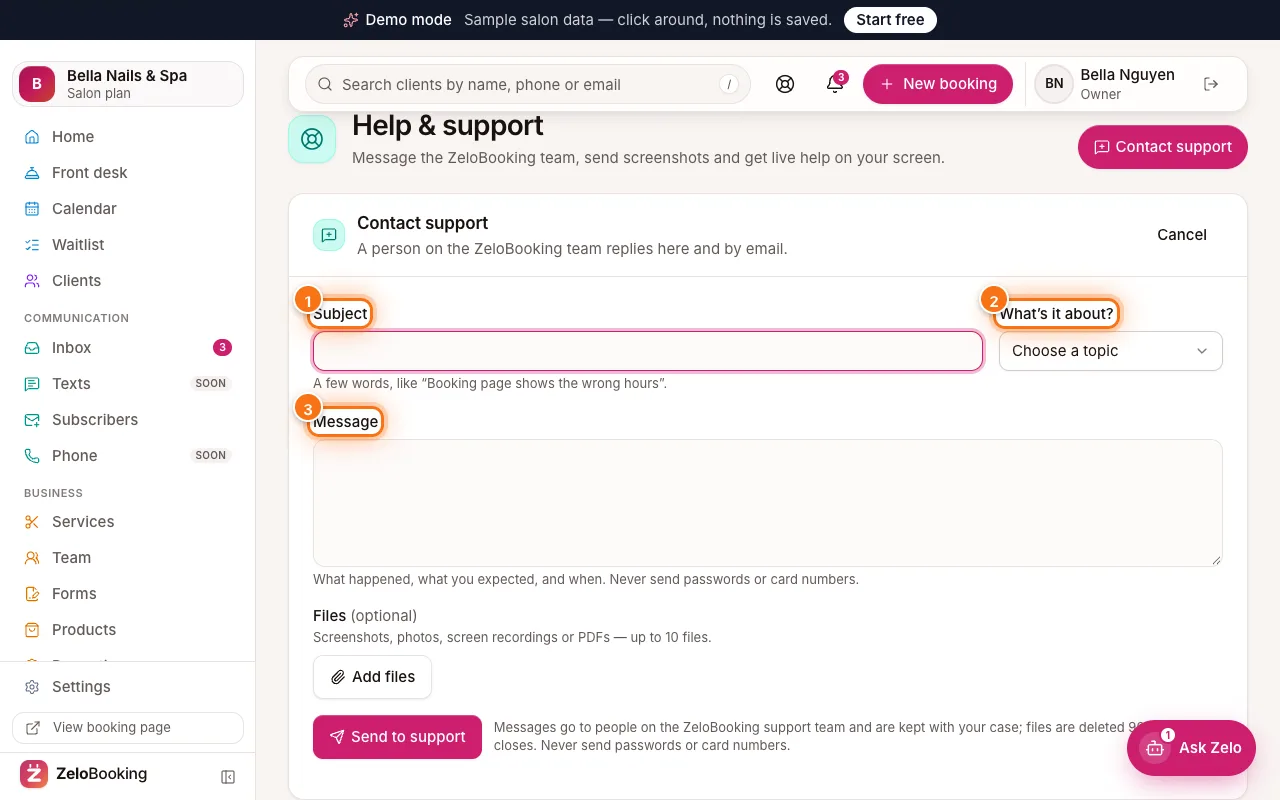
Contact support form with Subject (1), What’s it about? (2) and Message (3) highlighted - 4
Add screenshots and send
Click “Add files” (1) to attach screenshots, photos, screen recordings or PDFs — up to 10 files. Then click “Send to support” (2).
A person on the ZeloBooking team replies in your case and by email. A number on the “Ask Zelo” button means something new from support.
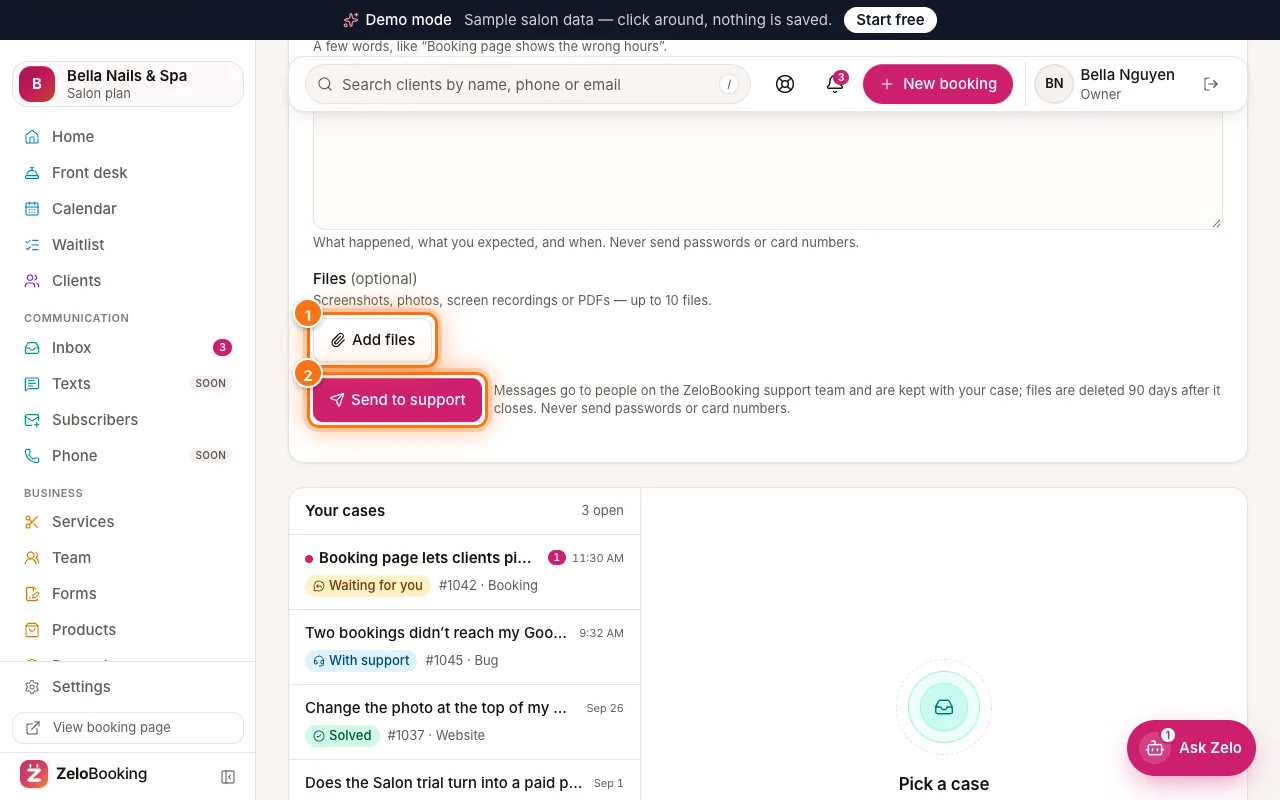
Contact support form with Add files (1) and Send to support (2) highlighted - 5
Find your cases on Help & support
Click Help → “Help & support”. “Your cases” lists every case with its status — “Waiting for you”, “With support”, “Solved” or “Closed”. Click a case (1) to read the conversation. “Contact support” (2) at the top right starts a new one.
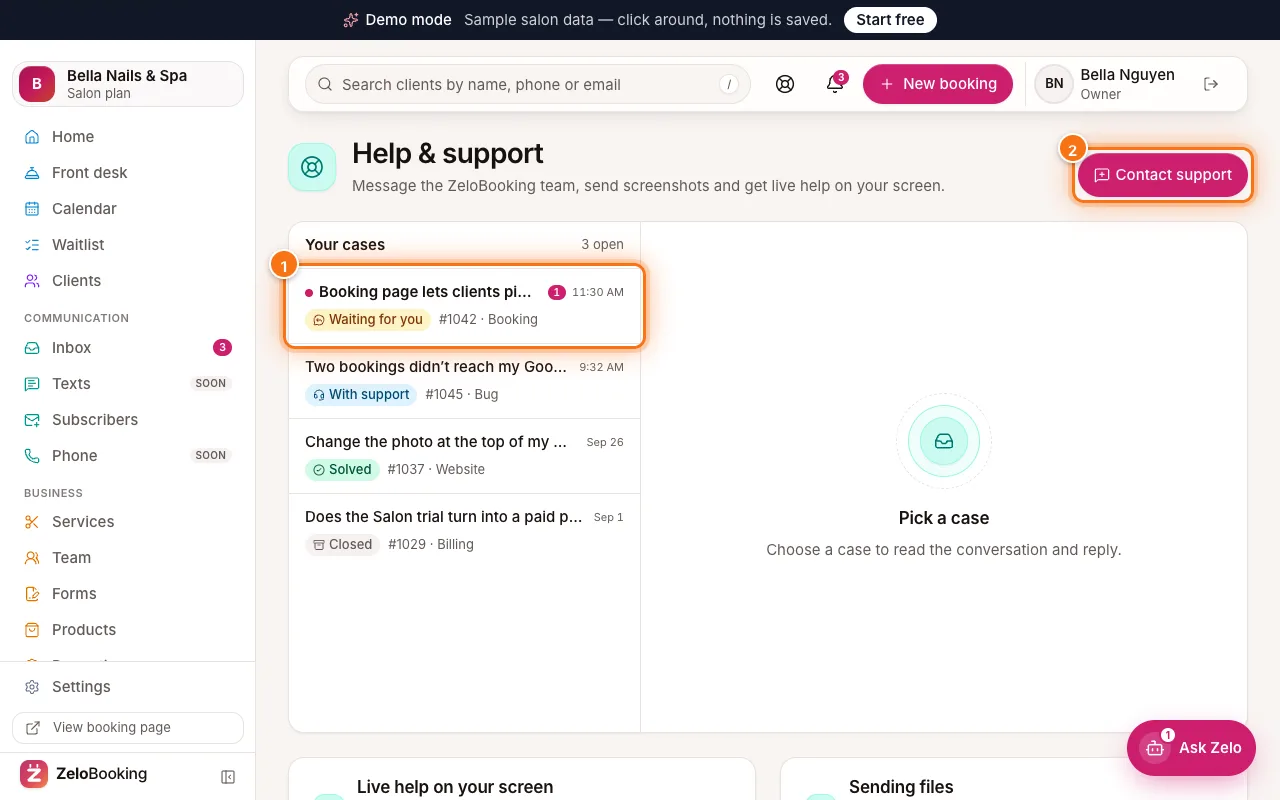
Help & support: Your cases with a case (1) and Contact support (2) highlighted - 6
Reply, send files and mark it solved
Type your reply in the box under the conversation. Click “Attach” (1) to add files — or paste a screenshot straight into the box — then click “Send” (2).
When it’s sorted, click “Mark as solved” (3). A new reply reopens it; solved cases close on their own after 14 quiet days.
Tip: Support may send an upload link instead. It opens on your phone without signing in — handy for photos — and works for 7 days.
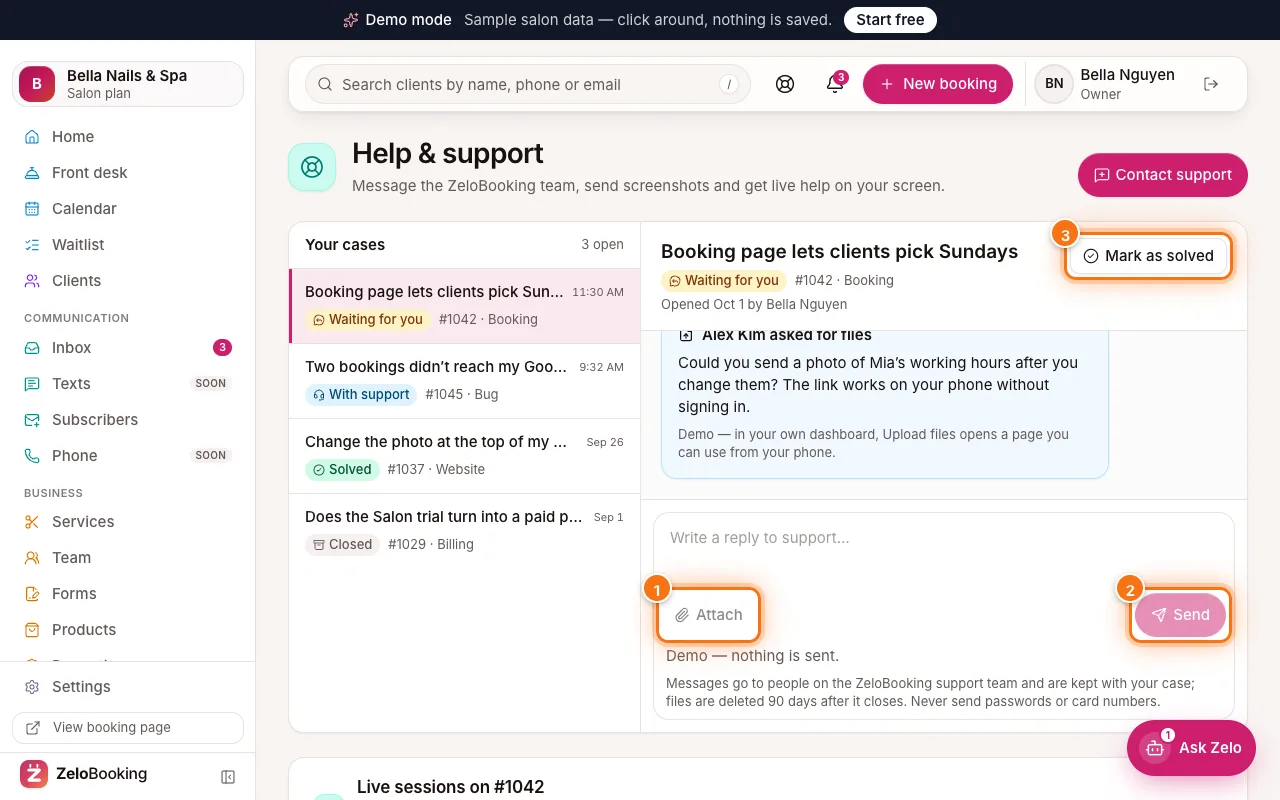
An open support case with Attach (1), Send (2) and Mark as solved (3) highlighted - 7
Live help: you’re always in charge
While you chat, support can ask to see your ZeloBooking tab. Nothing is shared until you say yes — every time:
- A window asks first. Click “Allow viewing” or “Decline” (Esc declines). It says whether the session is recorded; most aren’t.
- Support sees only this ZeloBooking tab — not your other tabs, apps or desktop. Passwords, card numbers, PINs, private fields and signatures are always hidden.
- If they need to click for you, a second window asks. Click “Allow control” or “Decline”. Owner-only steps (billing, passwords, publishing, client data exports and more) stay with you.
- A bar at the top shows who is viewing. Click “Take back control” to stop their clicks, or “Stop” (or press Esc twice) to end the session.
Past sessions are listed under “Live sessions on #…” (1) in the case. “Live help on your screen” (2) explains all of this on the page.
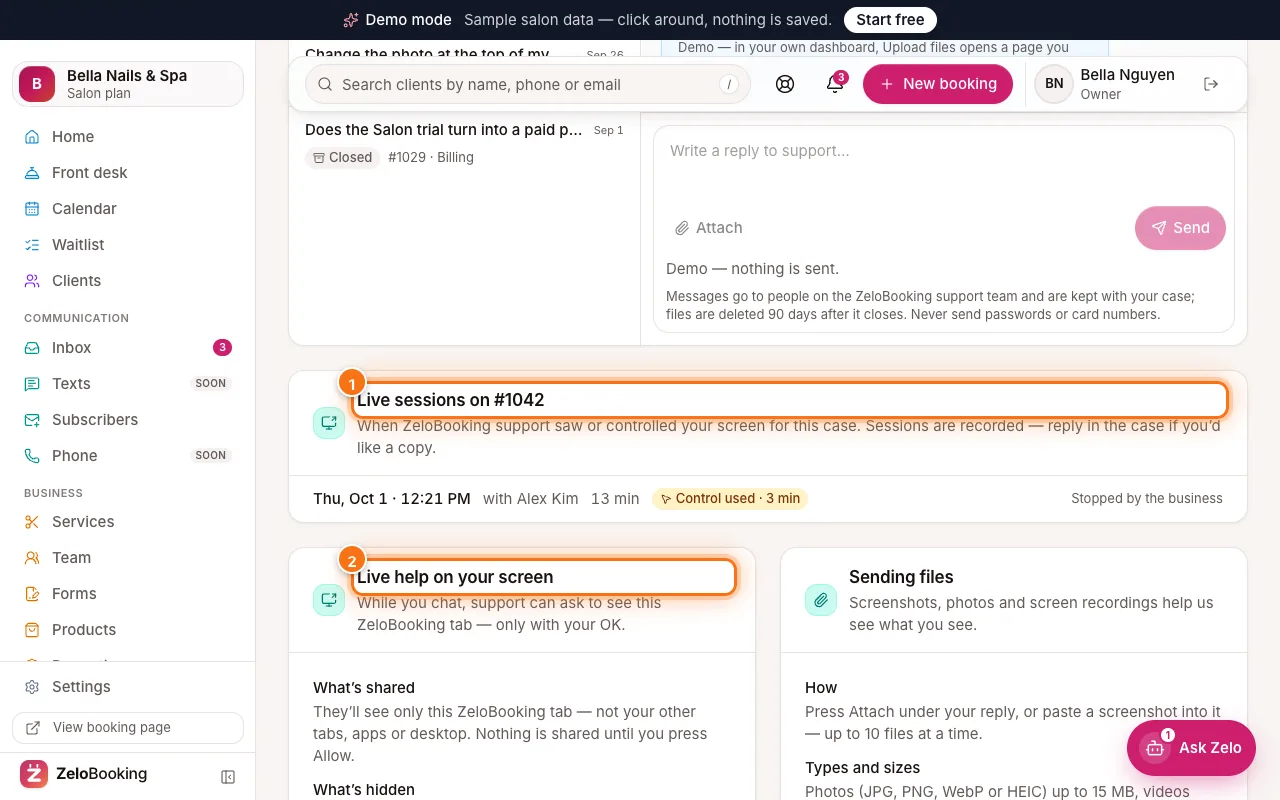
A case’s Live sessions list (1) and the Live help on your screen explainer (2) highlighted